Custom security attributes in Entra ID is a feature that allows you to add attribute sets and attributes to your tenant, which you can use on all your user and application objects. A fairly common ask in Entra ID is the ability to store “secret data”, such as social security numbers, and making sure only certain principals can read these values. Here is where custom security attributes come into play. You can add an attribute set “PersonalInformation” to your tenant, and add “SSN” as an attribute to this attribute set. You can then tag each user with values, which only will be readable by those assigned the “Attribute assignment reader” role on tenant level or attribute set level.
However, currently Entra ID does not allow for these to be a part of issued tokens, not part of outbound synchronization rules and not as criteria for criteria based groups. So yeah, not really a first class citizen currently. For issued tokens, we can do something about it though!
The way we can address this, is to utilize the Custom authentication extensions. We can essentially do this:

Let’s get it going!
Creating our attribute set and attributes
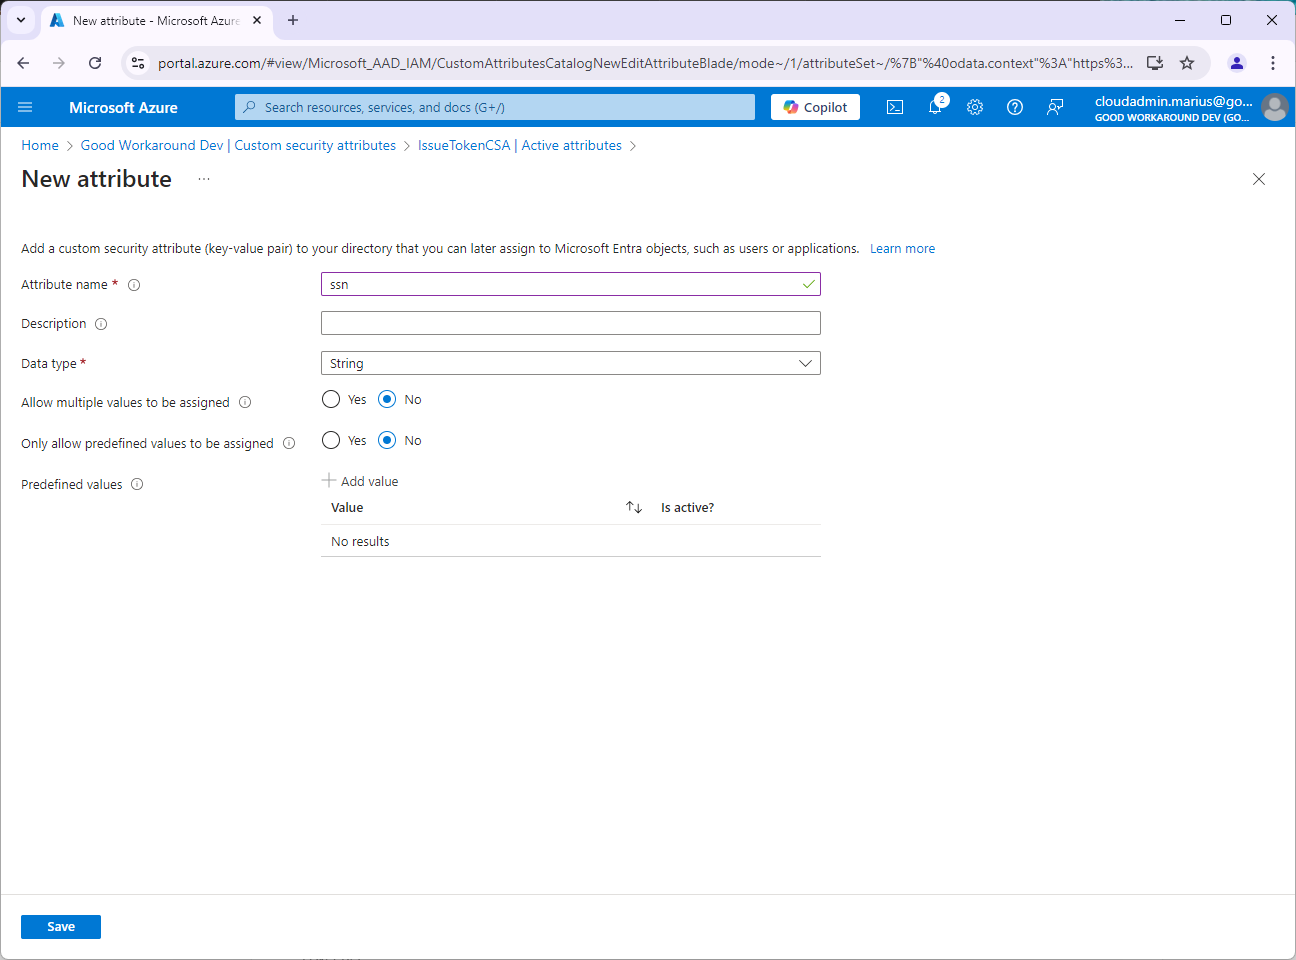
Start by creating an attribute set named IssueTokenCSA, or whatever you’d like.

After the attribute set IssueTokenCSA has been created, we add an attribute named ssn:

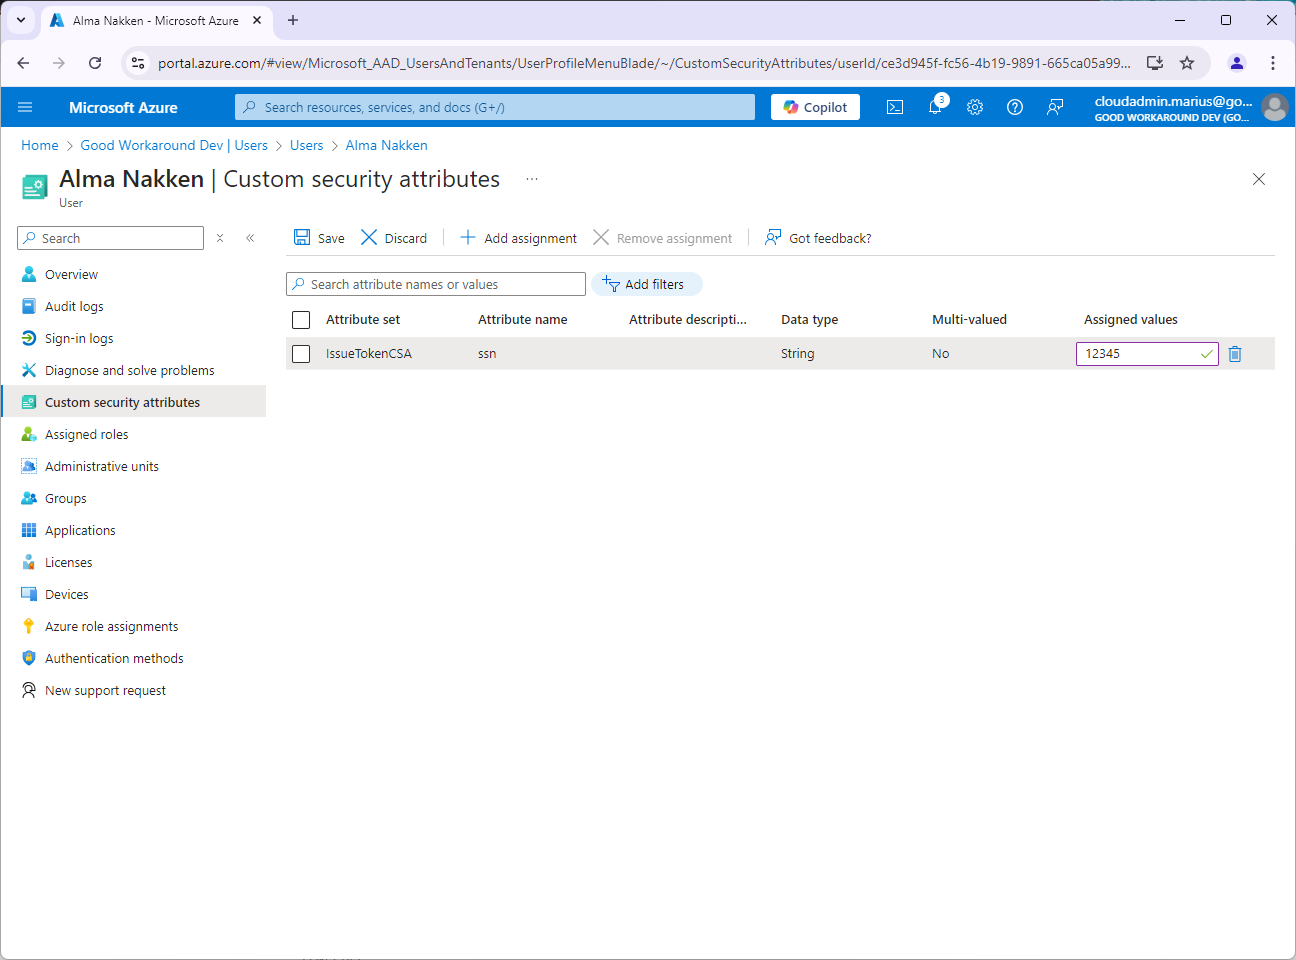
And last we go to a user, find Custom security attributes and add a value of 12345.
We can now read this attributes from the Graph by selecting the customSecurityAttributes attribute in $select.
GET https://graph.microsoft.com/beta/users/ce3d945f-fc56-4b19-9891-665ca05a998d?$select=id,customSecurityAttributes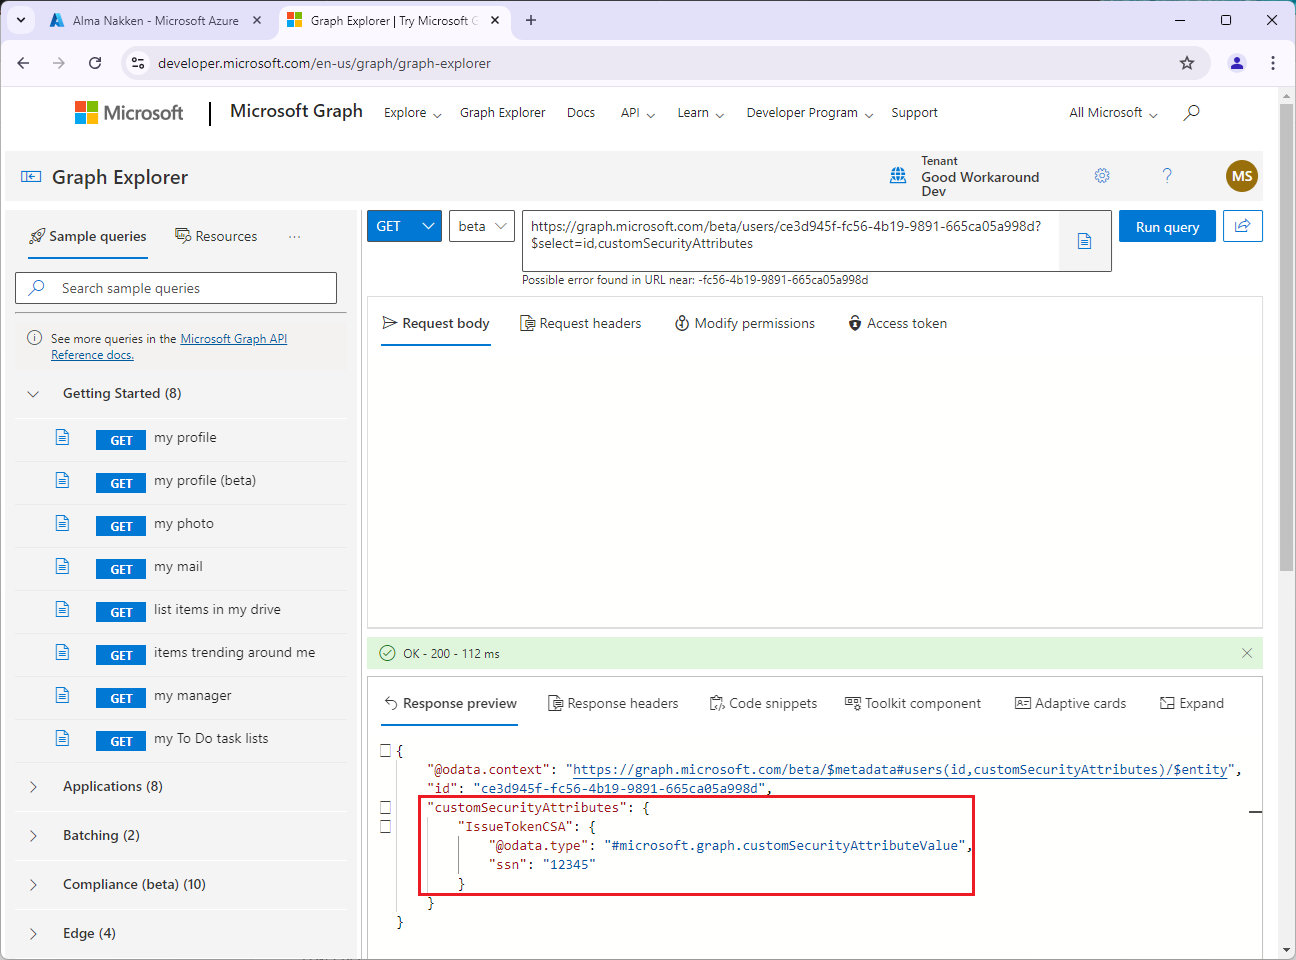
Remember, this is not visible if you do not have the attribute assignment reader role, not even for global admin.
Creating our app registration
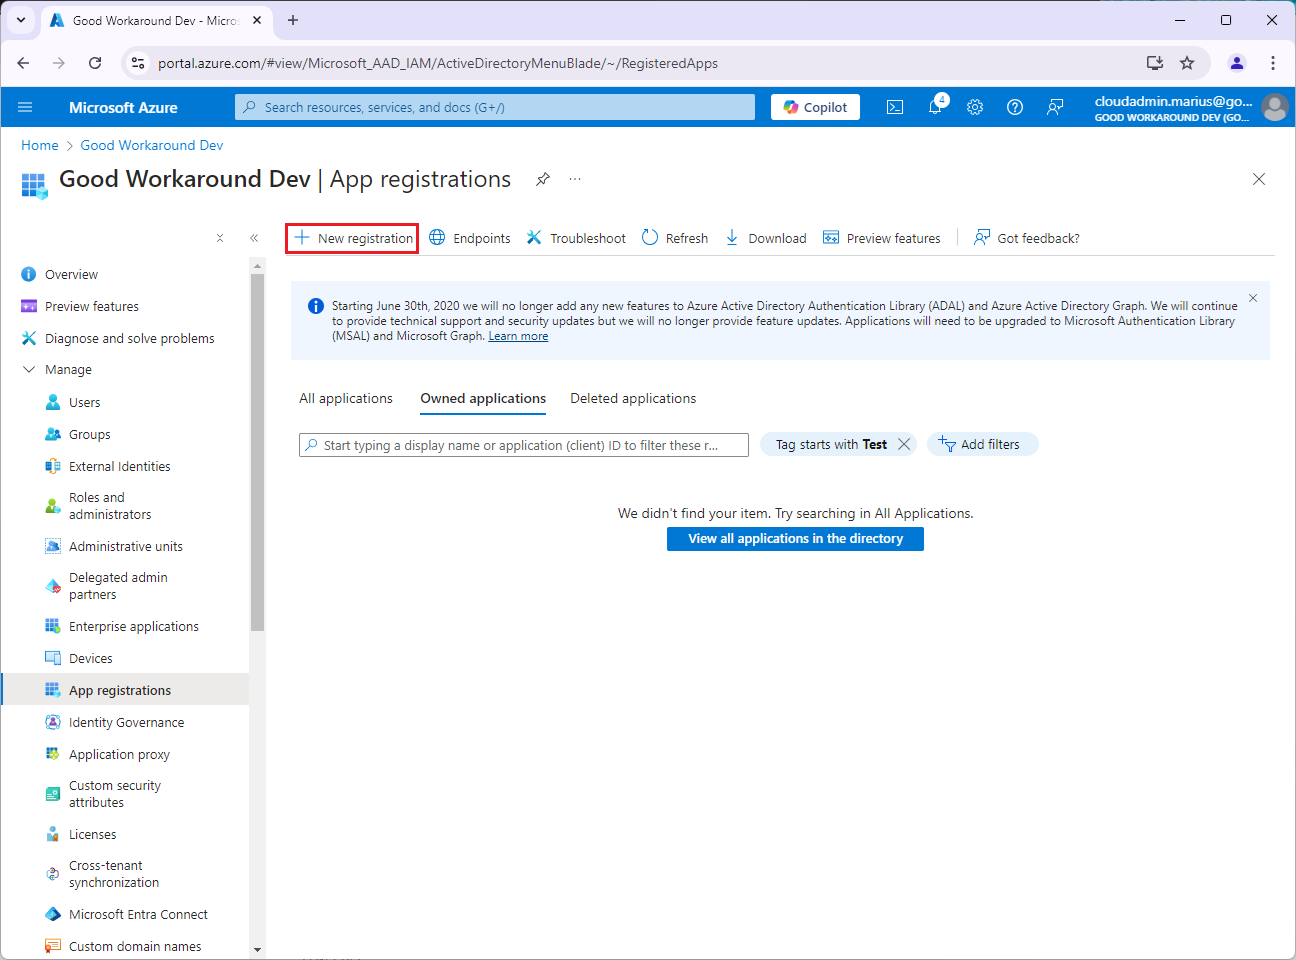
Now that we have the user ready, we can create an application. Let’s start normal, and then we’ll add custom security attributes:
Start by creating a new app registration:
In this example I’ll name the application Jwt.ms with CSA, and use a direct of https://jwt.ms, which is great for this type of testing:
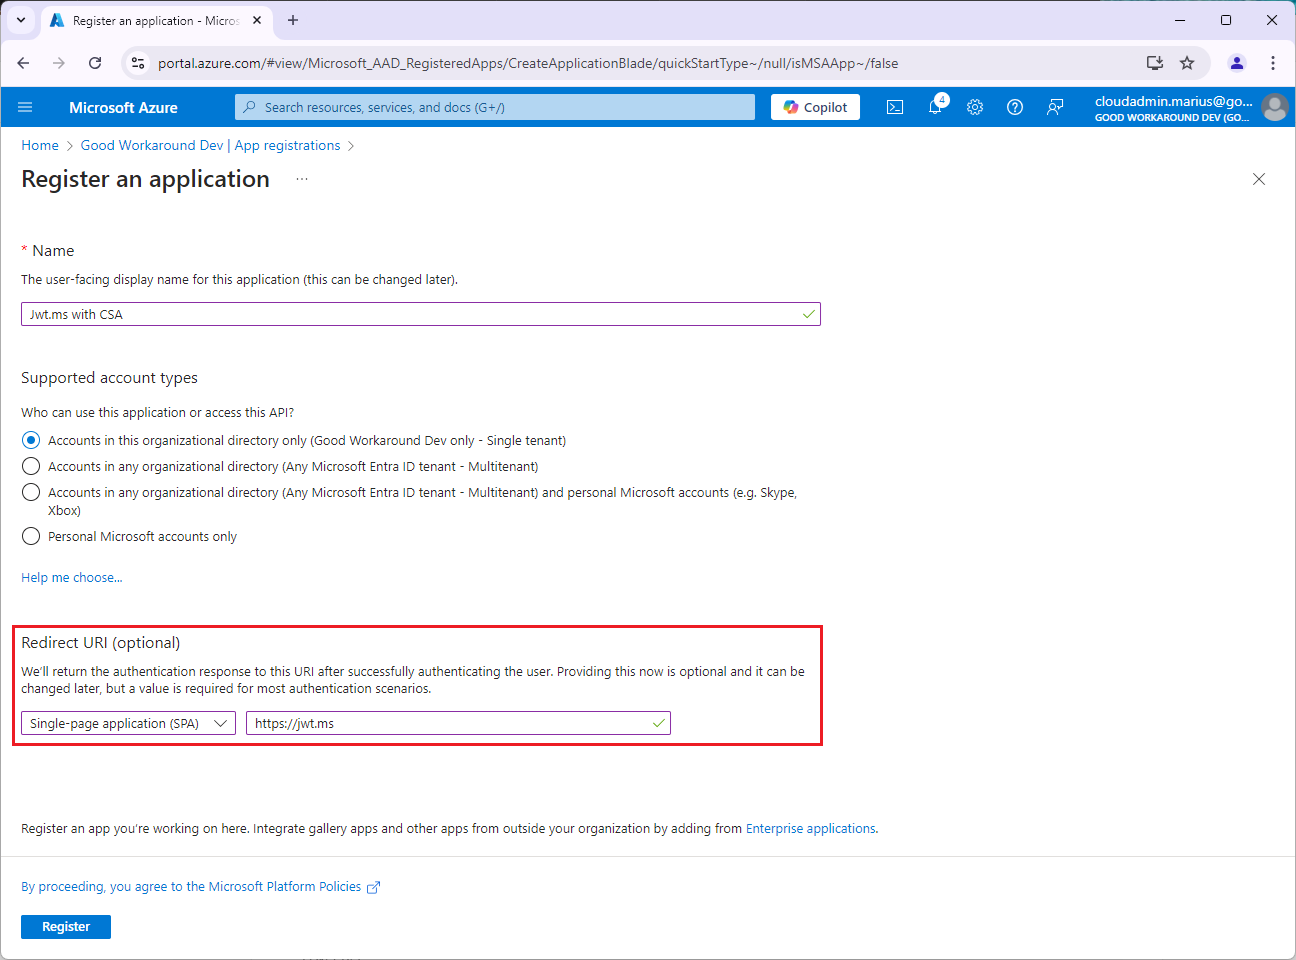
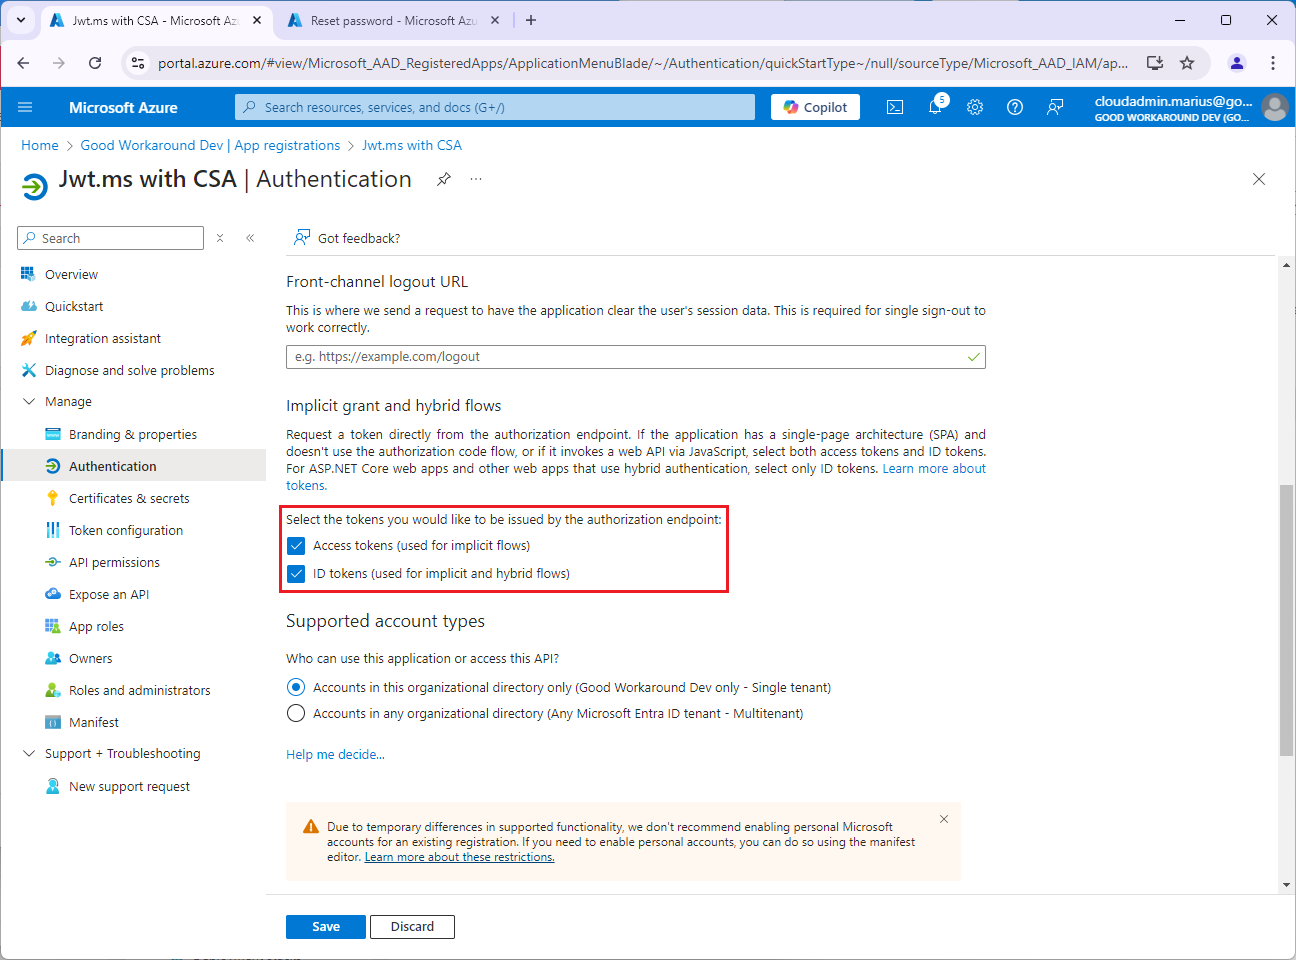
My app was created with clientid of 4059732c-c89b-43ab-8516-40c77cf33996, and I will now enable implicit grant (as it is required by jwt.ms). This will vary with your application, and does not matter for the token custom security attribute issuance later:
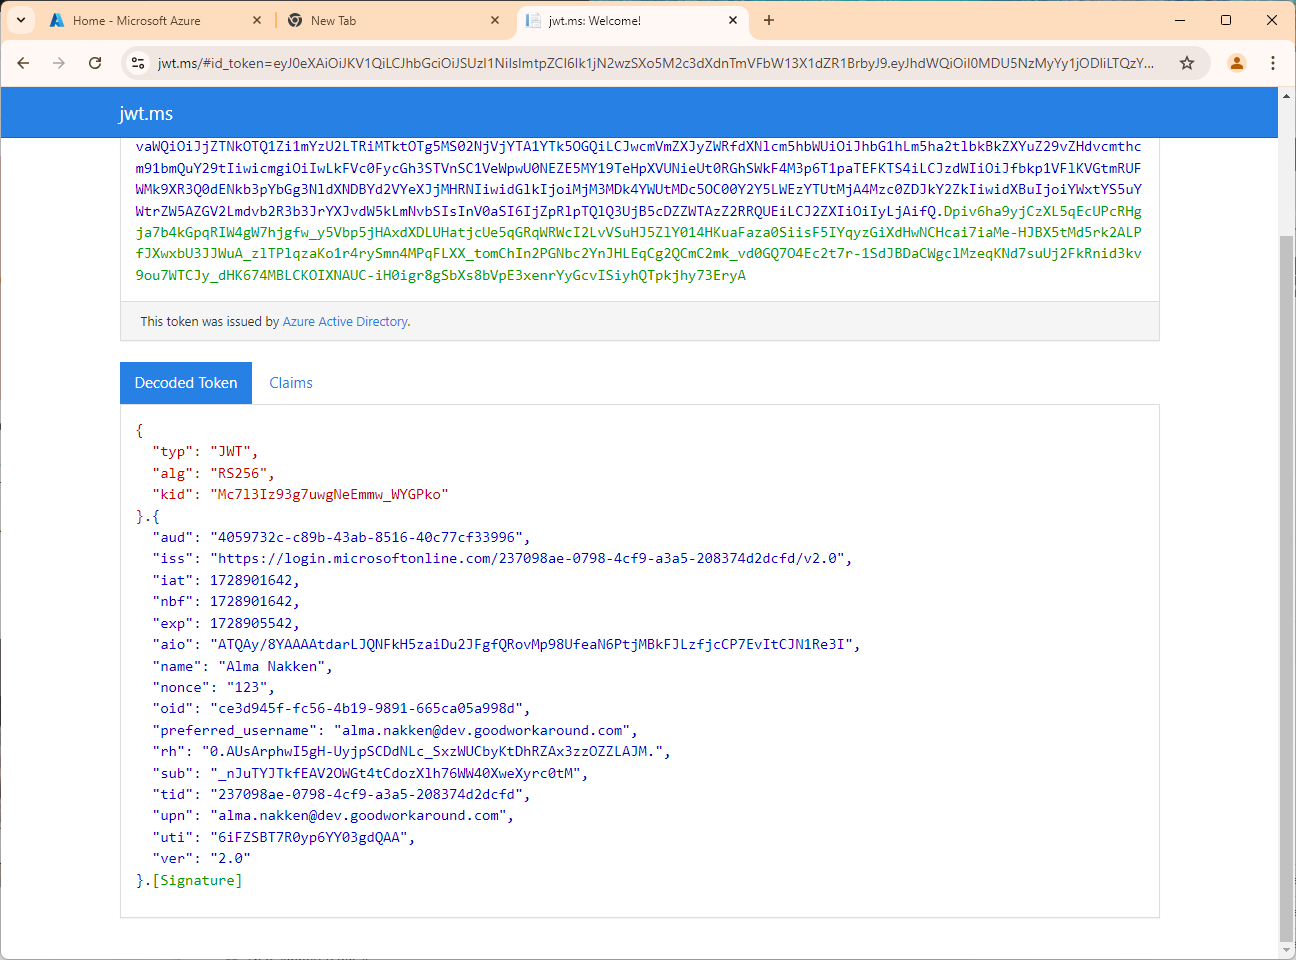
After this, the following url can be used to test the application:
https://login.microsoftonline.com/<TENANTID>/oauth2/v2.0/authorize?redirect_uri=https://jwt.ms&response_type=id_token&client_id=<CLIENTID>&scope=openid&nonce=123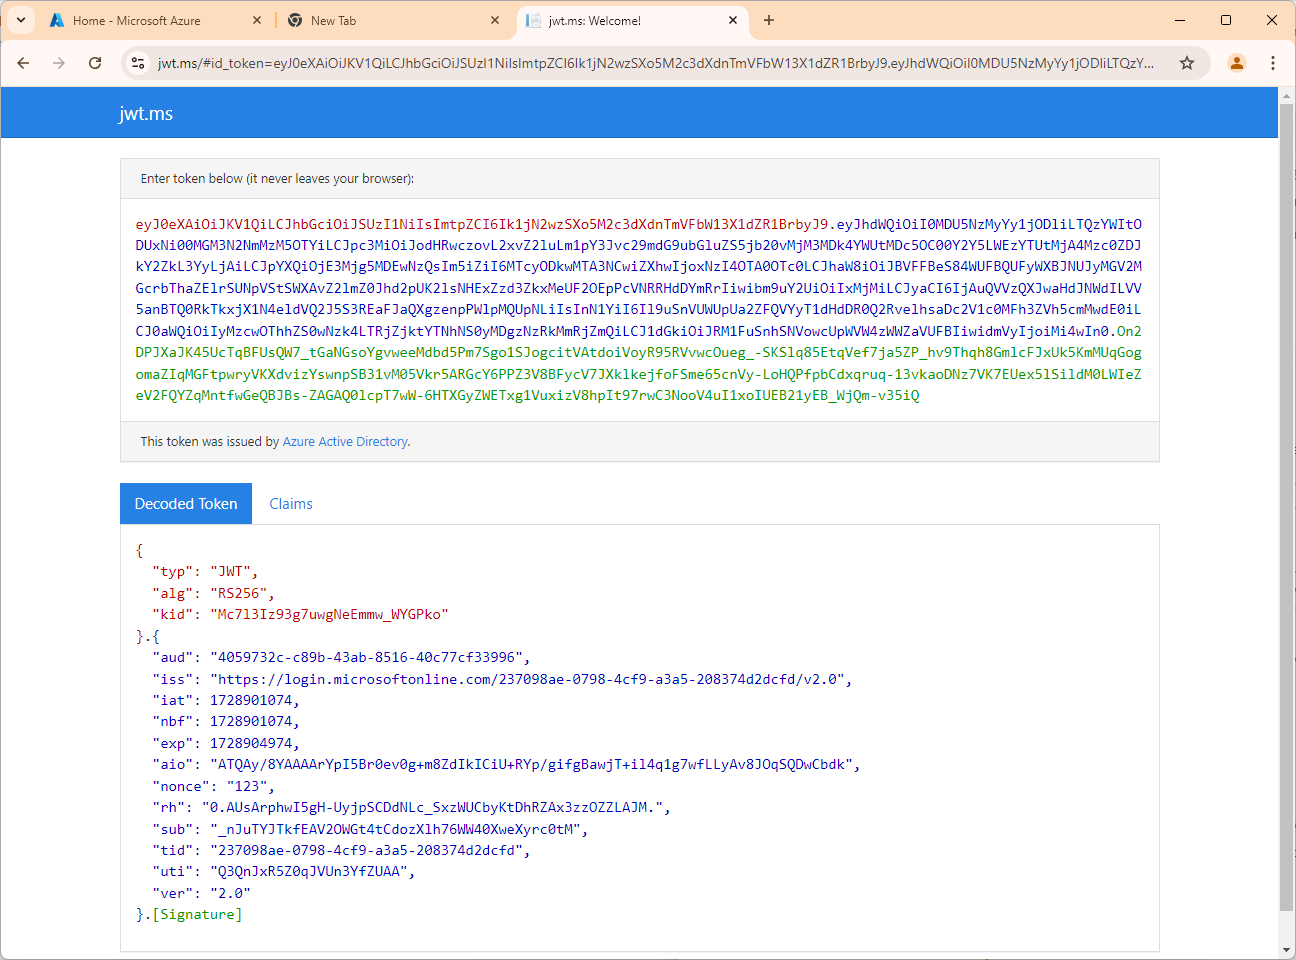
As you can see, no attribute of relevance is present currently. Let’s do something about that.
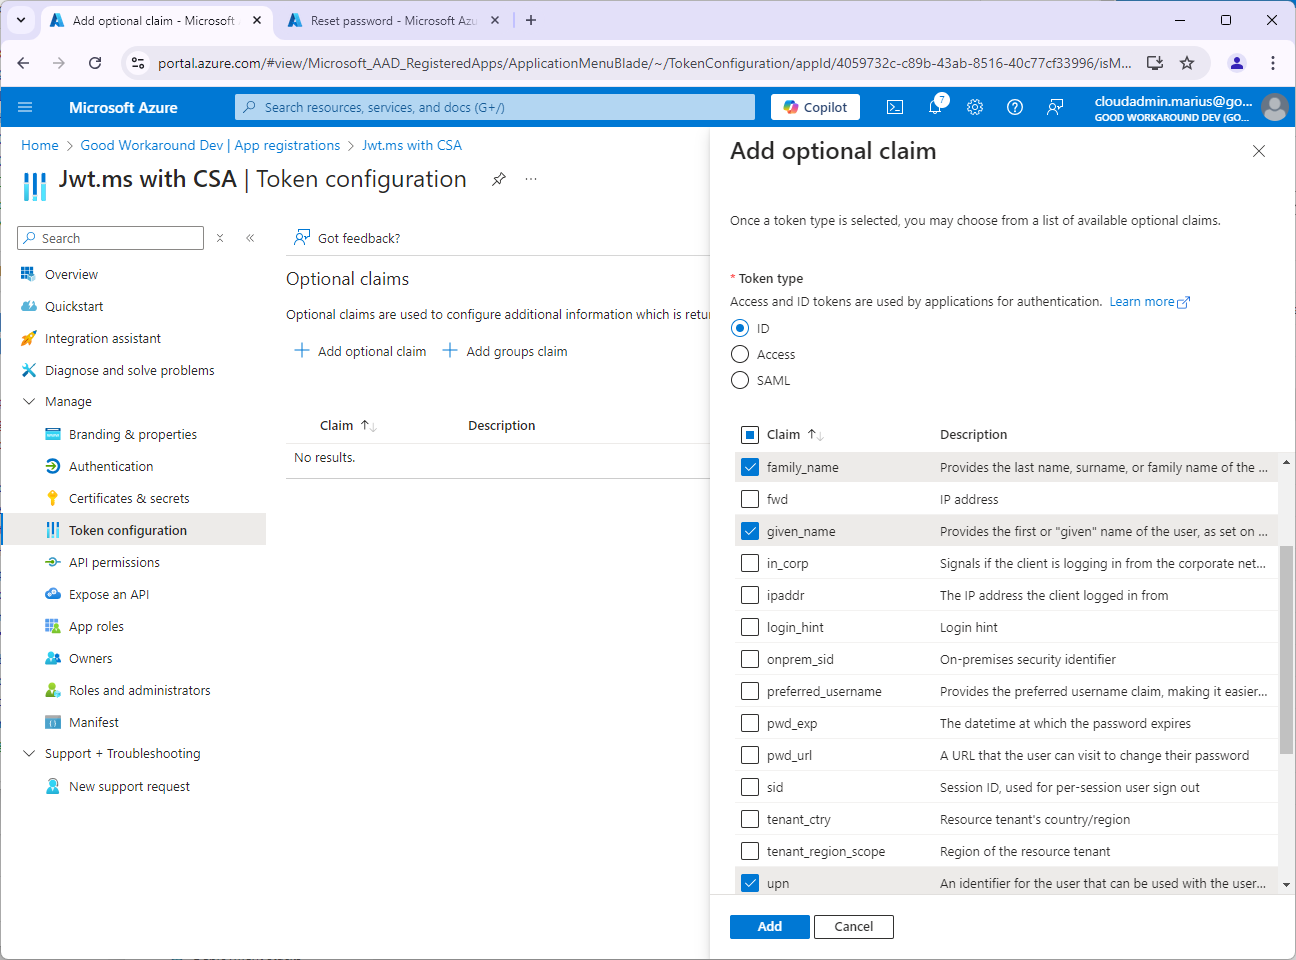
We can start a bit by discussing the Token configuration of the app registration. Here you can find two buttons for +Add optional claim and +Add groups claim.
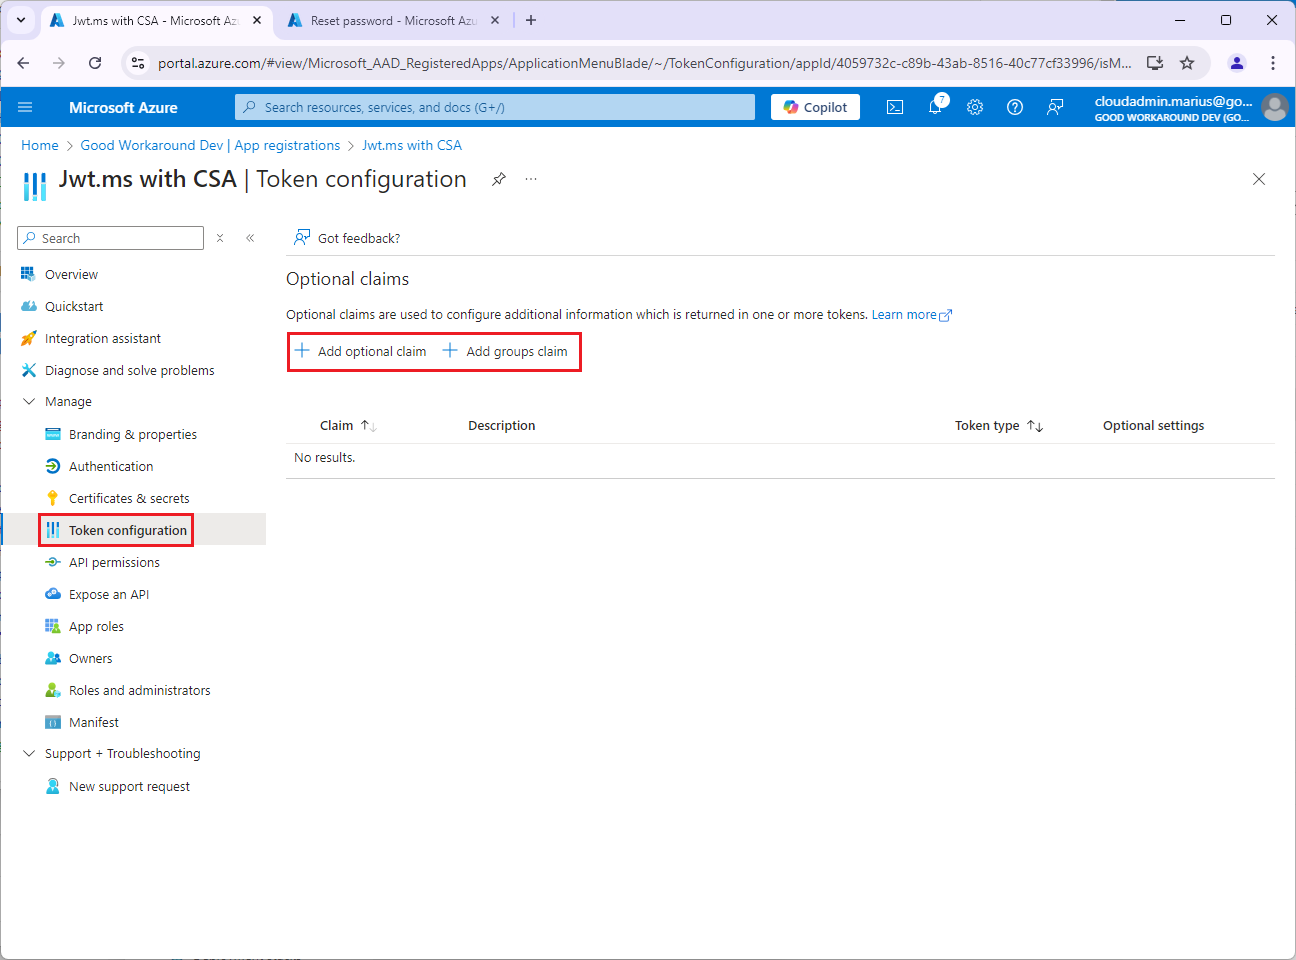
If you click +Add optional claim, you’ll see that you can enable things like upn, family_name and given_name, but there are no pointers to custom authentication extensions or custom security attributes:

After adding these we’ll see that the issued token contains more information:
The reason for why we do not have information about custom security attributes on the app registration level, is due to the fact that the app registration is the definition and enterprise app is the instance of an app registration. Multiple tenants can have instances of the same app registration in a multi tenant scenario, and these tenants may have different custom security attributes defines. Hence, the CSA must be on enterprise app level. The claims we just looked at is a way for an app to request certain default built-in claims, simply. Let’s now check the Enterprise application:
Under Single sign-on, we can find Attributes & Claims. This is where, in a multi tenant scenario, you as a customer can customize the claims provided to an integrated application:
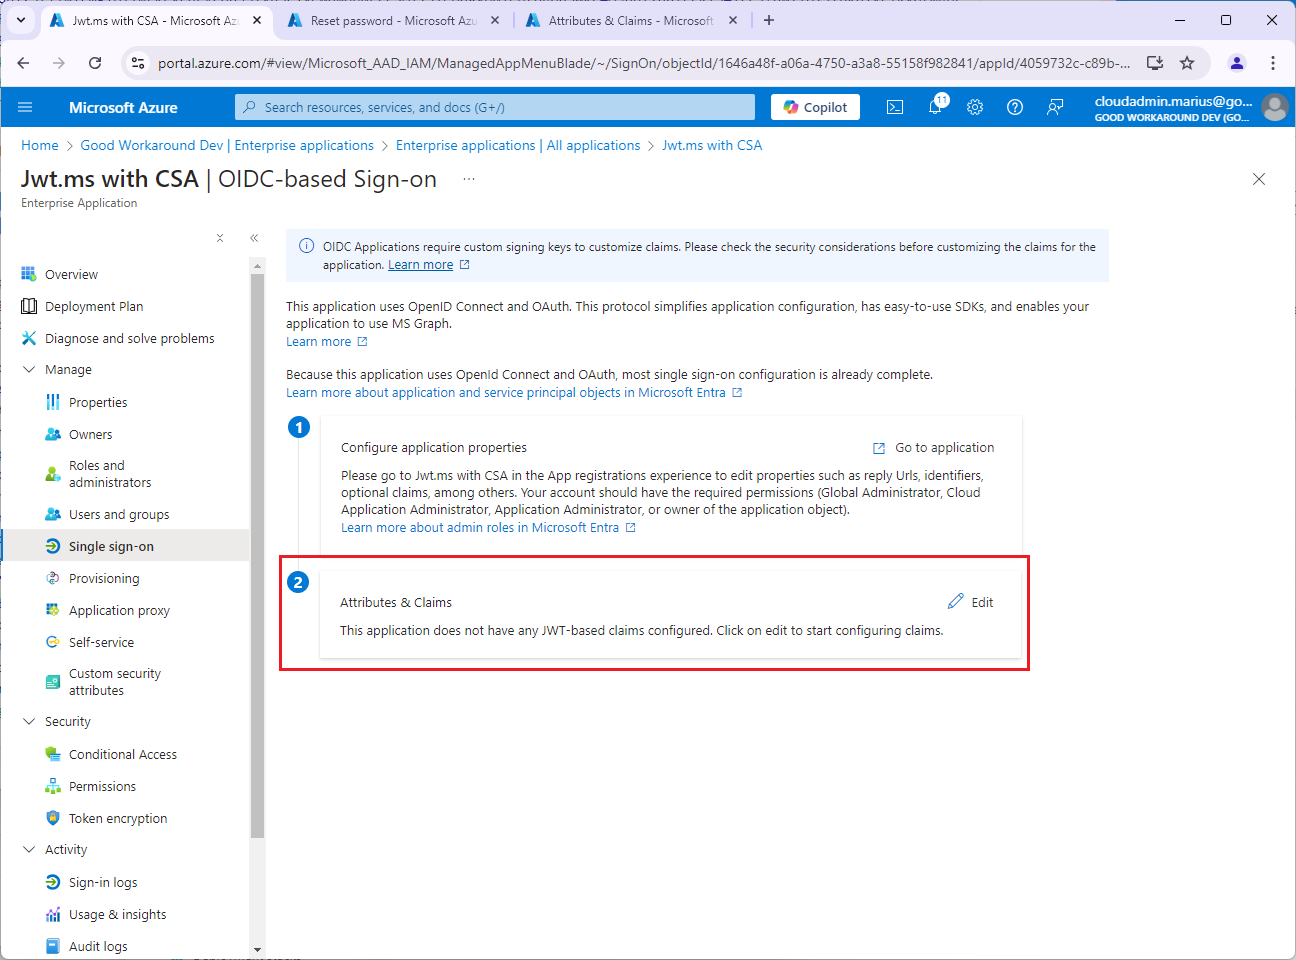
Clicking Edit and after that Advanced settings, will show you the Custom claims provider functionality:
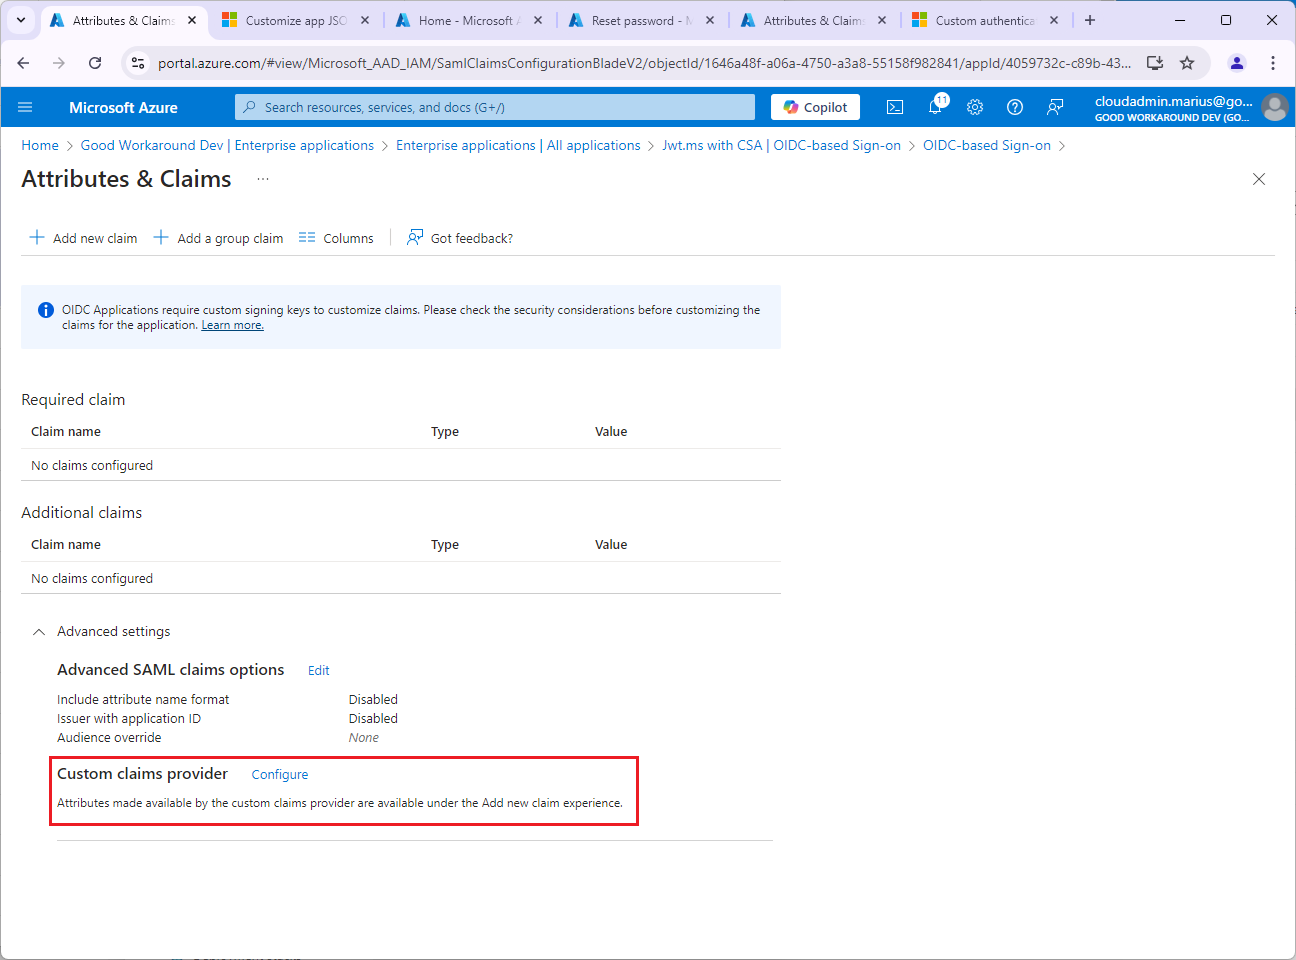
However, first we need to actually create the custom claims provider. Let’s do that.
Creating the custom claims provider
Navigate to Entra ID –> Enterprise applications –> Custom authentication extensions and click +Create a custom extension:
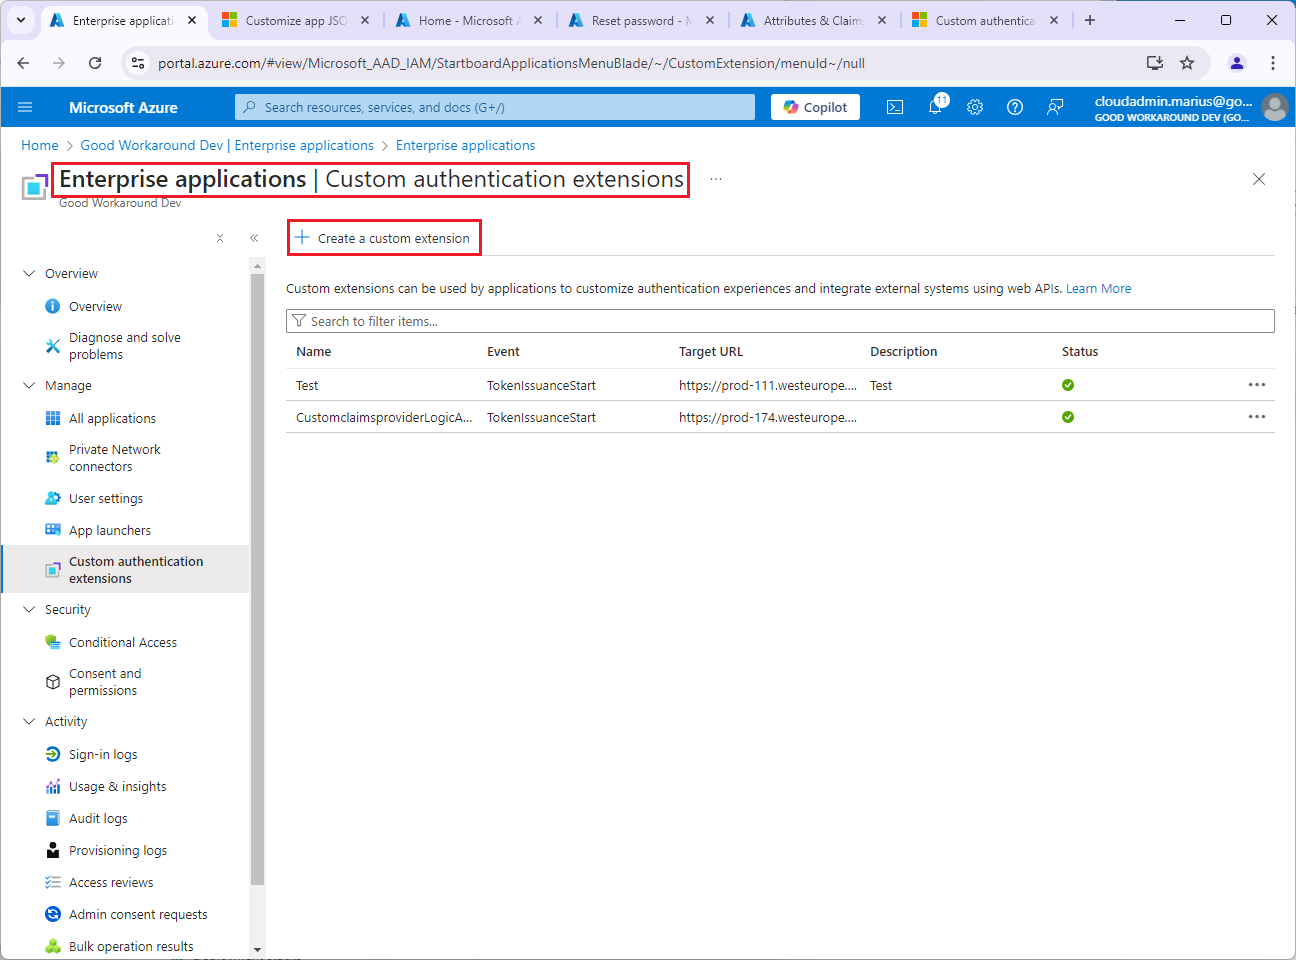
We are not yet ready to actually create the custom extension, but I just wanted to show you that under Endpoint Configuration we must point to a target url, and under API Authentication we can select which application we use to authentication towards that target url.
What we actually need to do first, is to create something that we can call. That something will be a logicapp in this example, but could easily have been a function app, web api or something else.
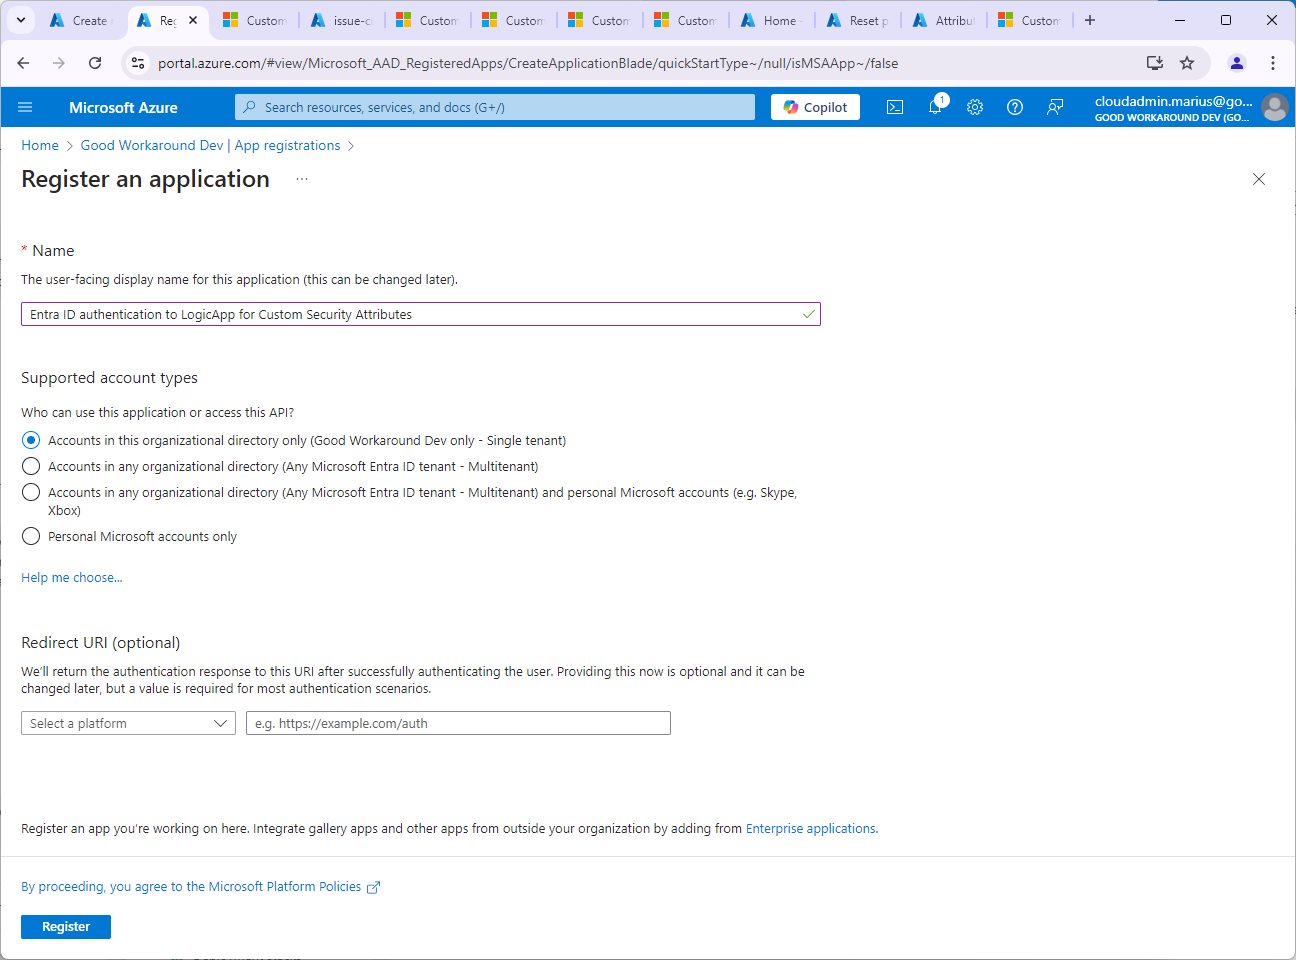
Let’s create the logicapp! But first we need another app registration. Or actually we do not really need it, but we will have a simple dummy app registration that we will use for Entra ID to autenticate towards our logicapp:
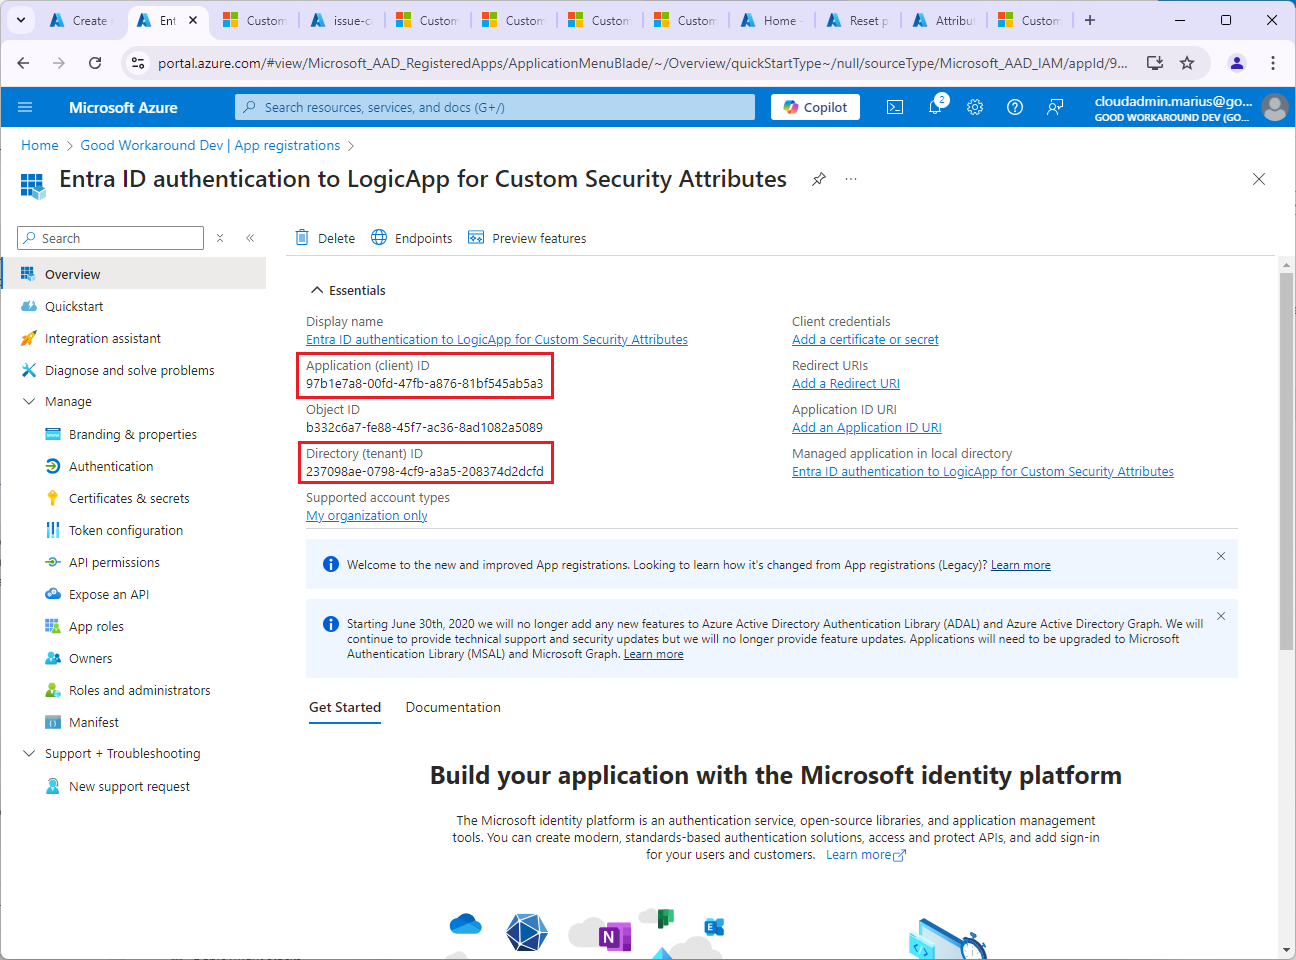
Note down the tenantid and clientid:
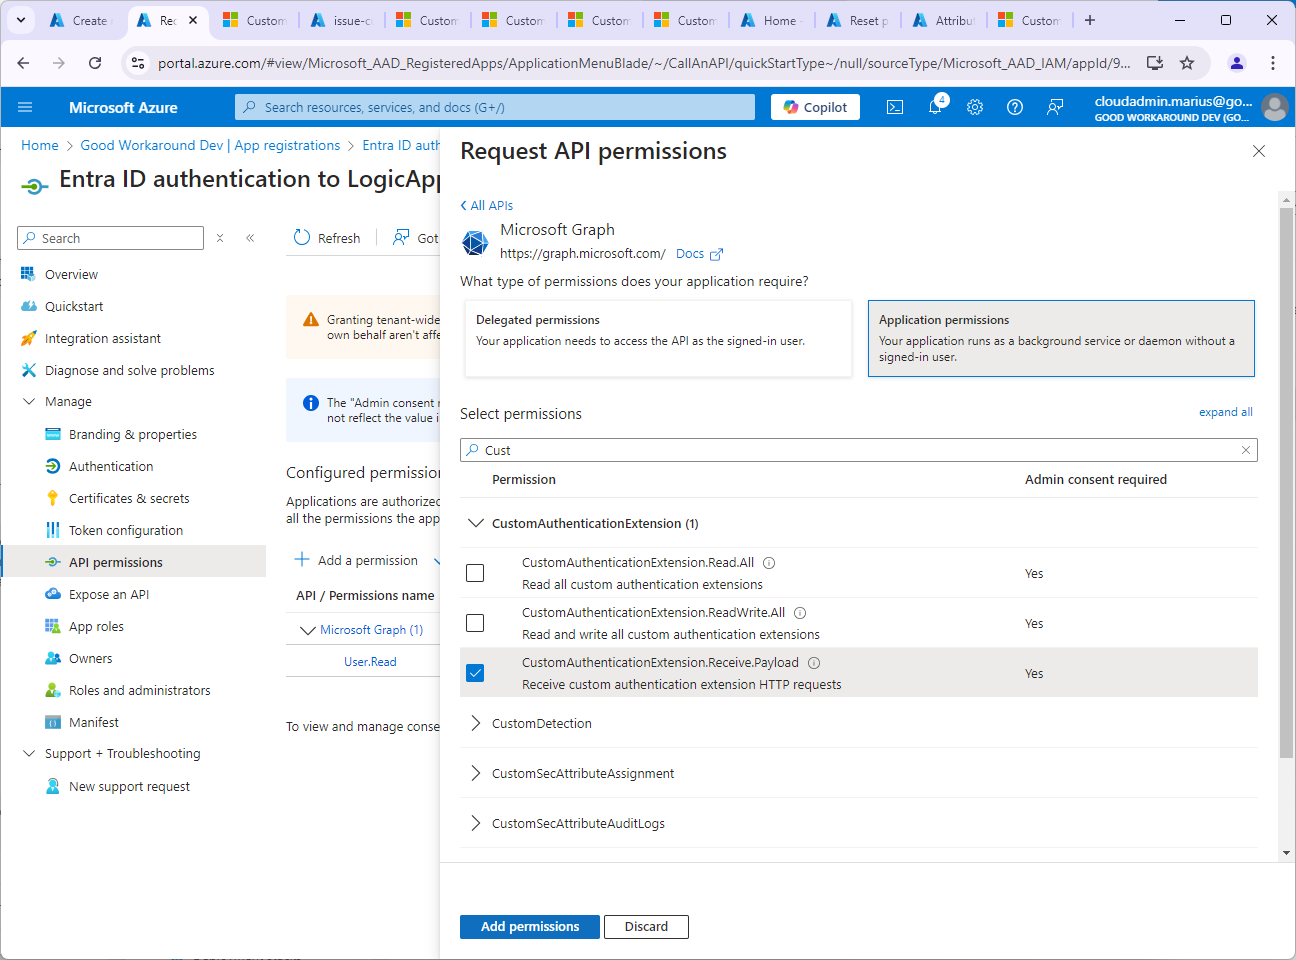
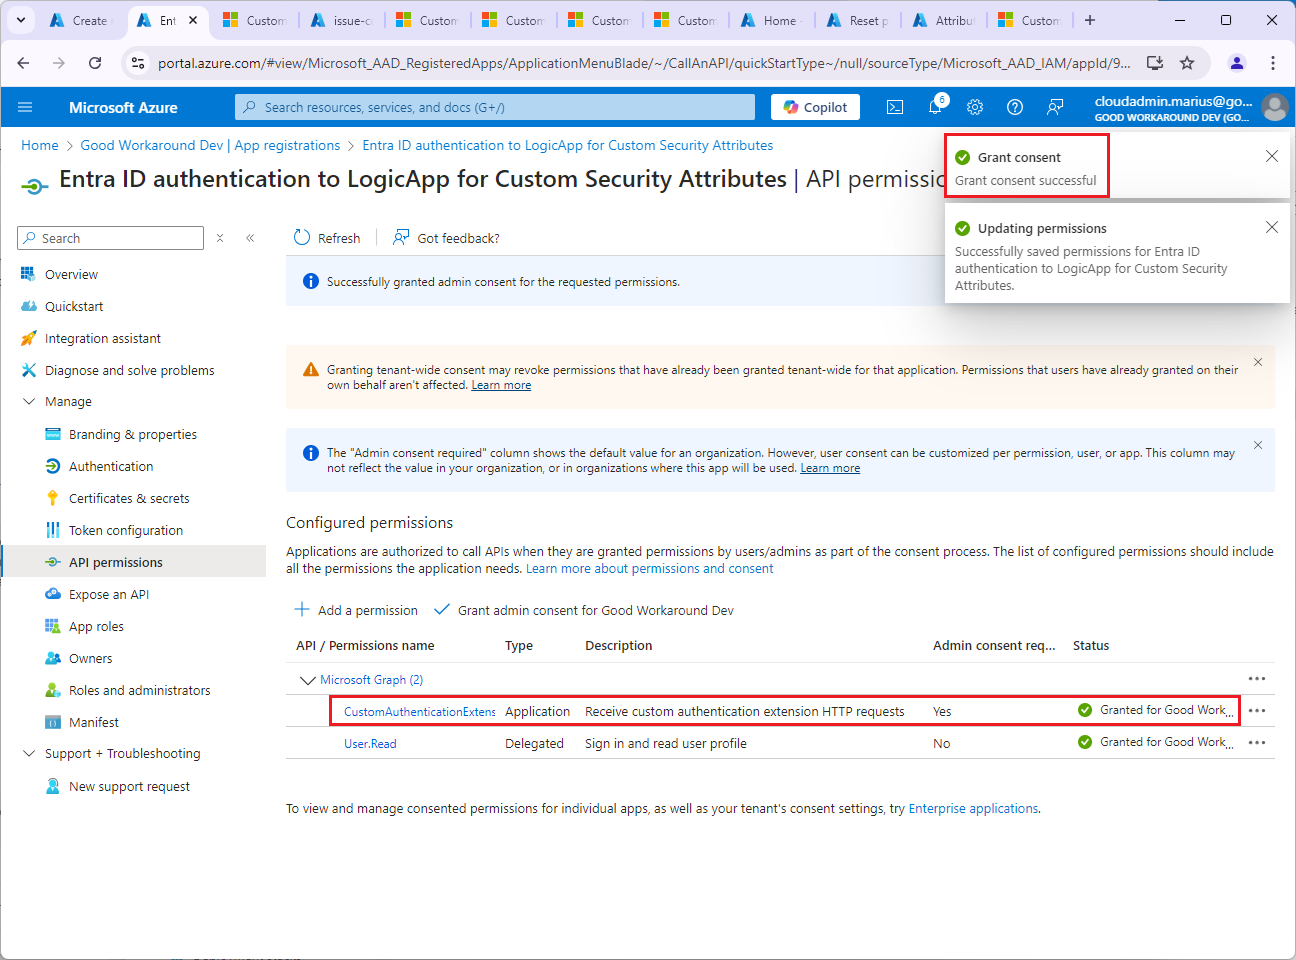
Under API Permissions add the scope CustomAuthenticationExtension.Receive.Payload, and admin consent:
Last thing, edit the Manifest in the left menu, finding requestedAccessTokenVersion and set the value to 2:

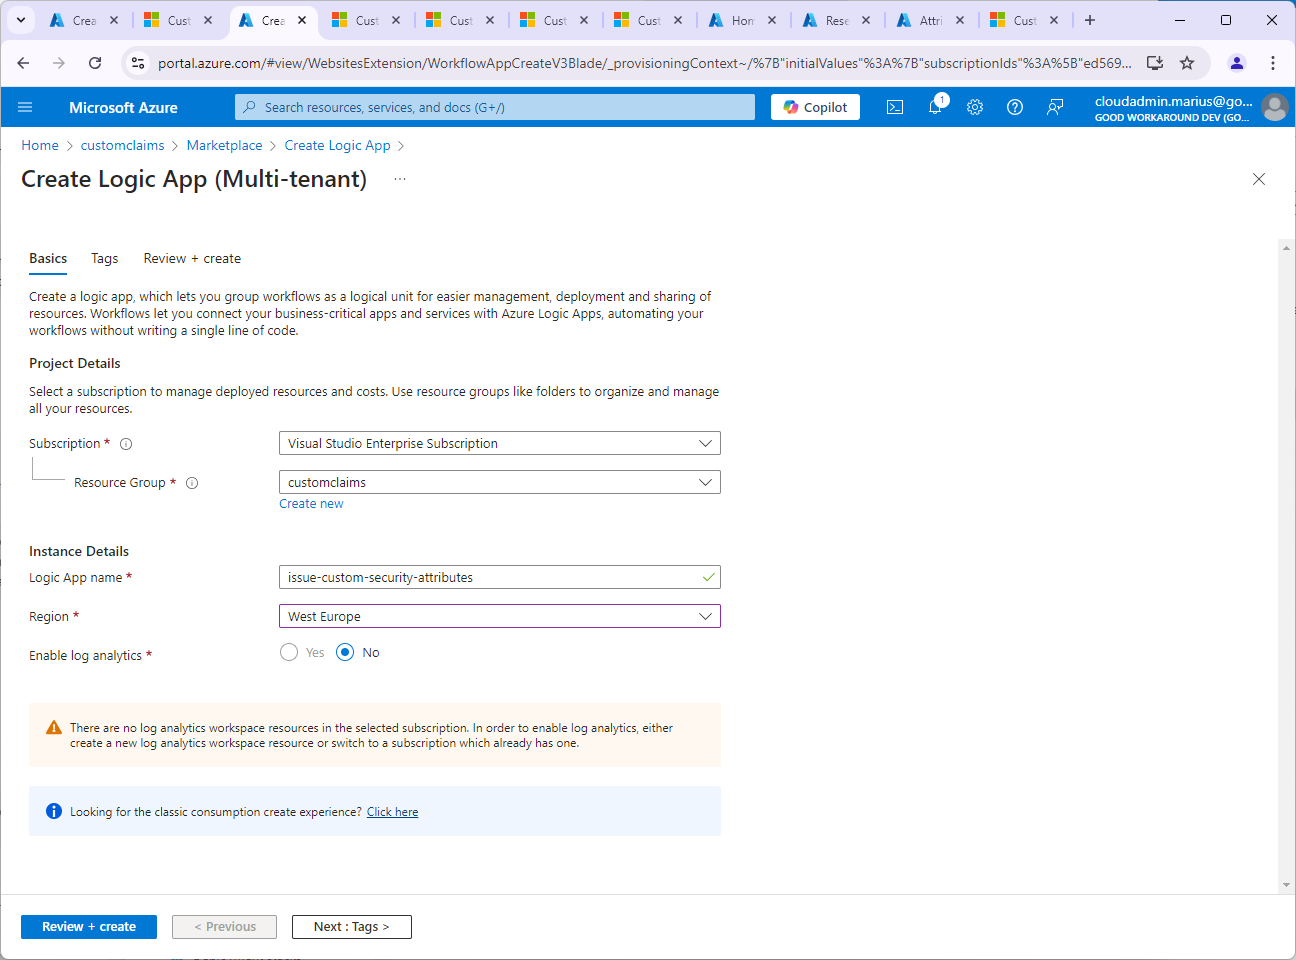
Now that we have this app, we can create our Logic App:

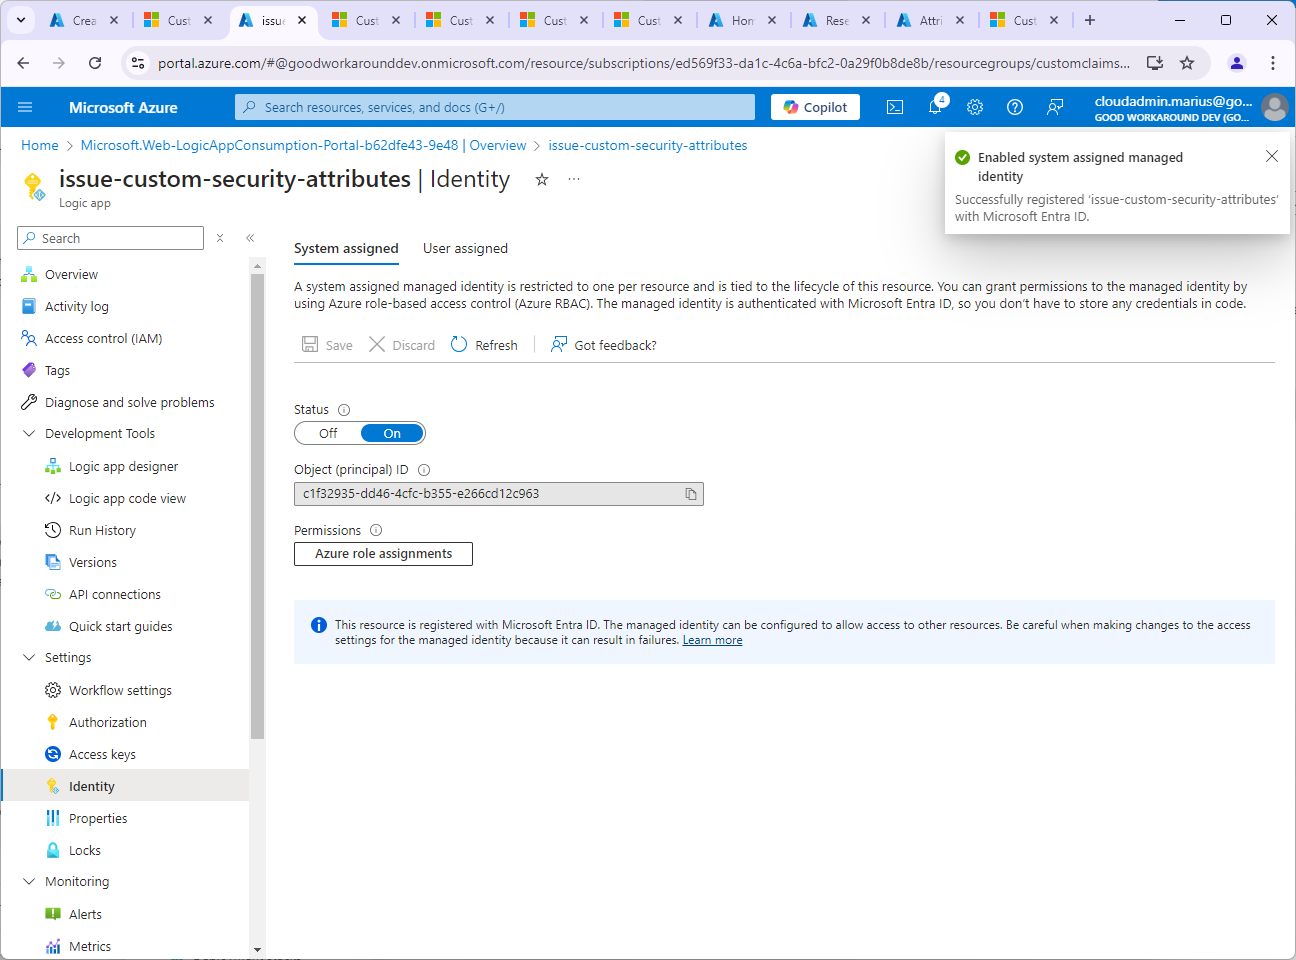
After creating the Logic App, enable a System assigned managed identity. This will be used to read the Custom Security Attributes.
And now we will create an authorization policy. This is what actually makes sure it is Entra ID that sends a request to the the Logic App, not some random attacker:
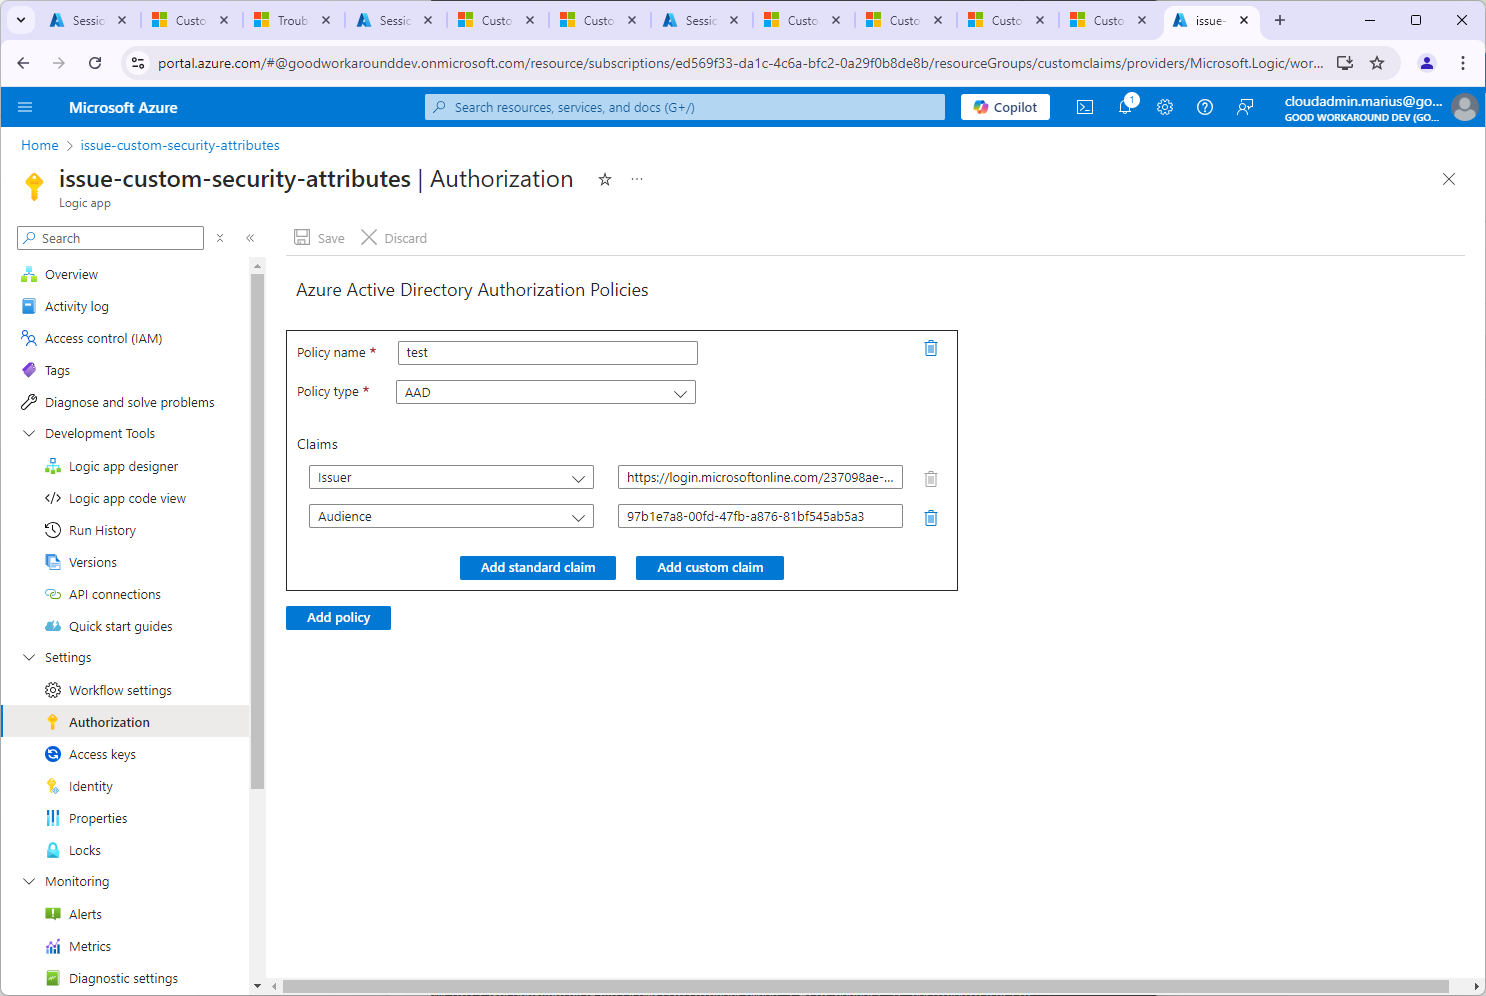
The values should be AAD, the Audience should be the client id of the app we created for authenticating Entra ID to our logic app, and the issuer should be https://login.microsoftonline.com/<TENANTID>/v2.0
Note: During testing it can be clever to do it this way. But you should add one more required claim, and that is “appid” = “99045fe1-7639-4a75-9d4a-577b6ca3810f”, which is the appid used by the custom extensions functionality.
After authorization policy and managed identity is present, we can add our trigger to the Logic App (Which we will expand soon).Under Logic app designer, add an HTTP request trigger (“When a HTTP request is received”) and save.
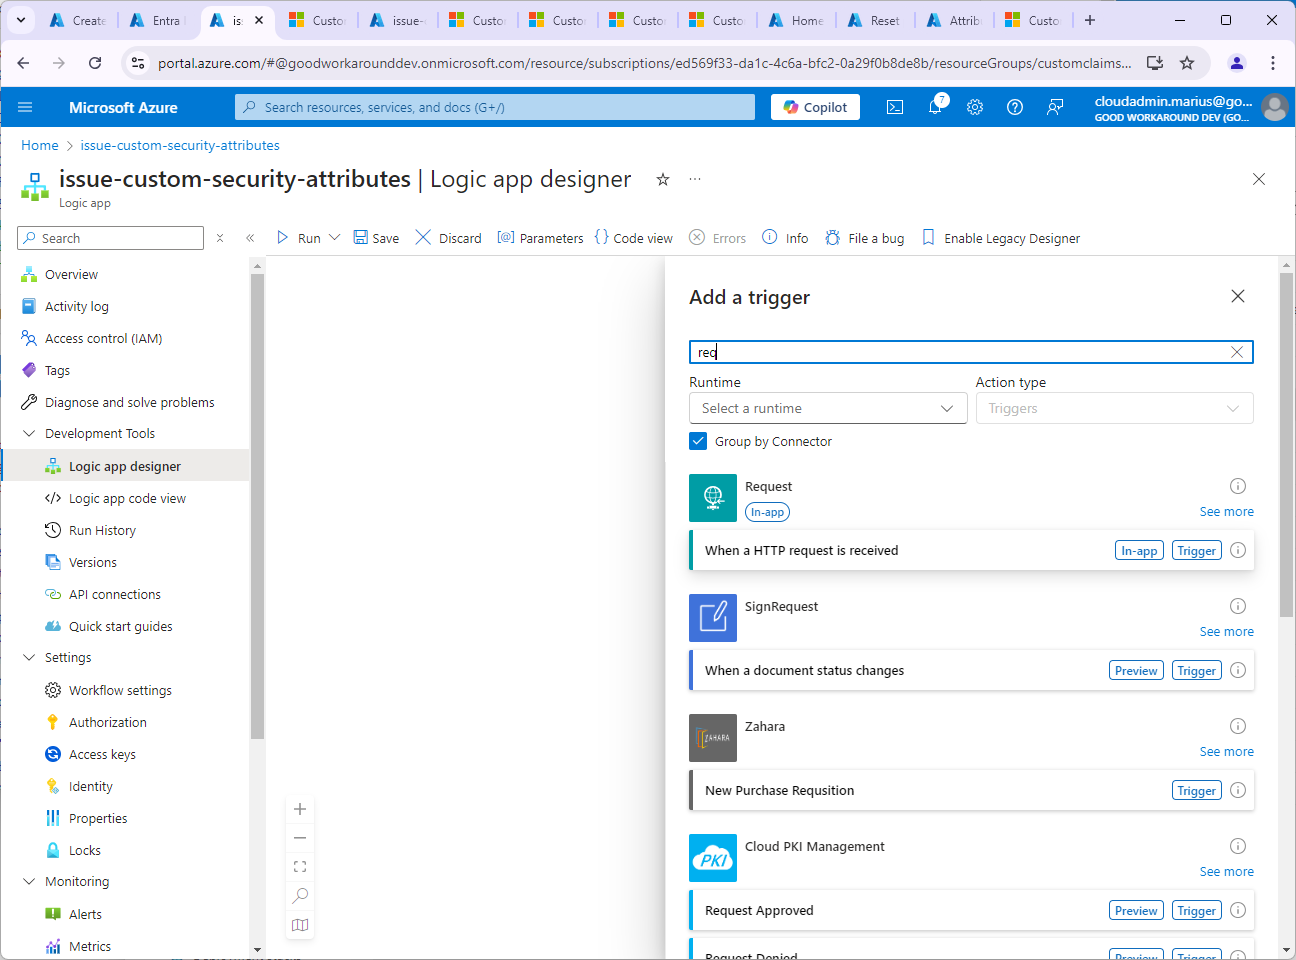
Click on the step that was created and copy the HTTP URL:

Now we are ready to create the custom extension in Entra ID. Notice that this Logic App is empty for now. We’ll circle back to it soon.
Actually creating our custom authentication extension
As before – Navigate to Entra ID –> Enterprise applications –> Custom authentication extensions and click +Create a custom extension:
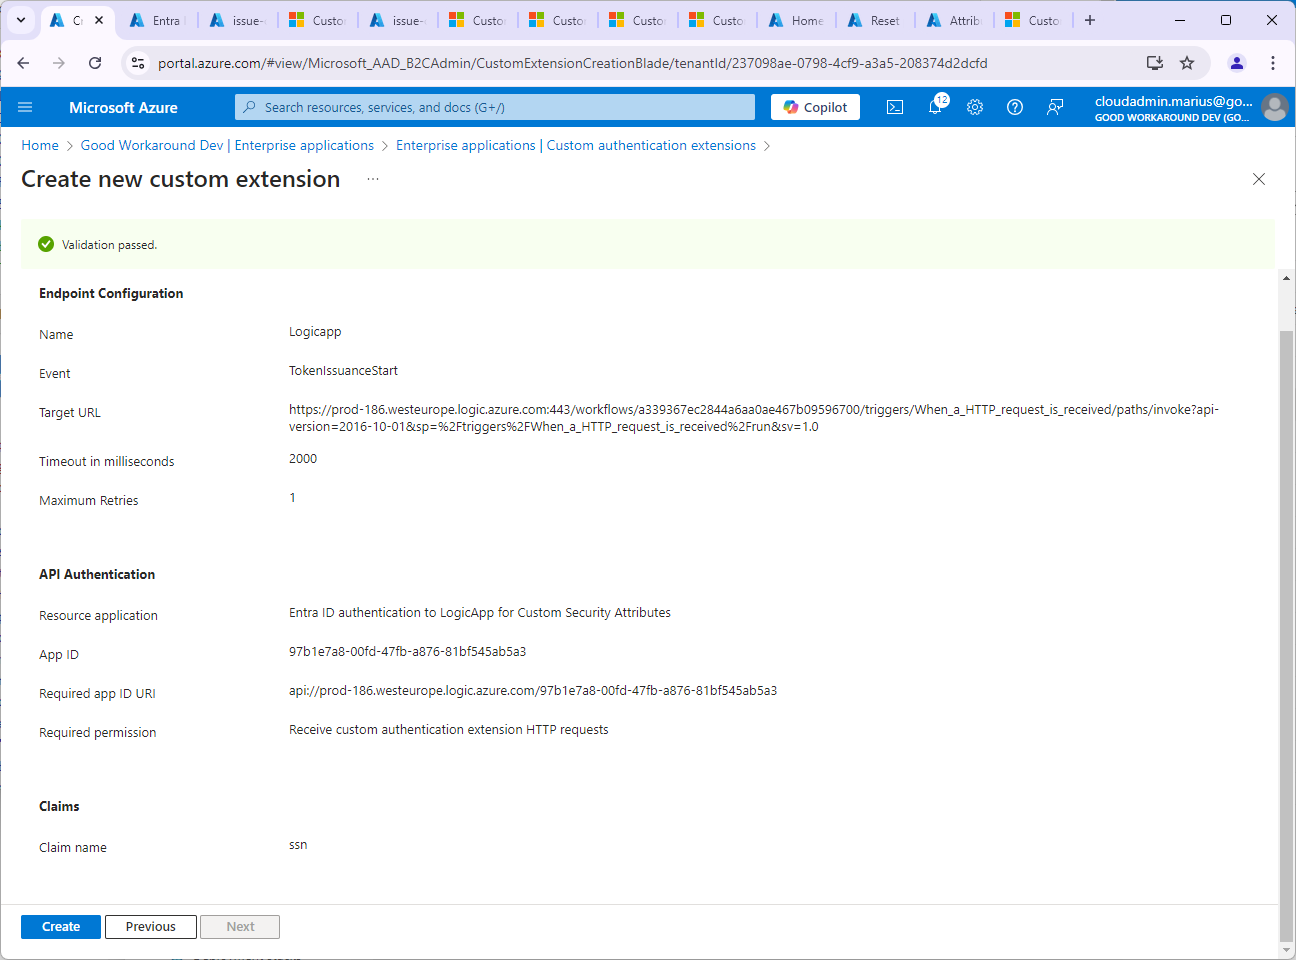
On Basics, select TokenIssuanceStart (Which as of October 2024 is the only one for workforce tenants) and Next:

On Endpoint configuration, name the endpoint whatever, and paste your Logic App url – buuuut, remove the sig= part of the url: https://prod-186.westeurope.logic.azure.com:443/workflows/a339367ec2844a6aa0ae467b09596700/triggers/When_a_HTTP_request_is_received/paths/invoke?api-version=2016-10-01&sp=%2Ftriggers%2FWhen_a_HTTP_request_is_received%2Frun&sv=1.0&sig=Lg6Z_ZSkSRXxfQuggID9a9F…CH4HP-MkU
The reason for removing the sig part is that we use the authorization policy for authenticating Entra, not shared access key.
Click Next.
Choose Select an existing app registration in this directory and find the app you created for authenticating Entra ID to your Logic App. It is expected that you get this error message:
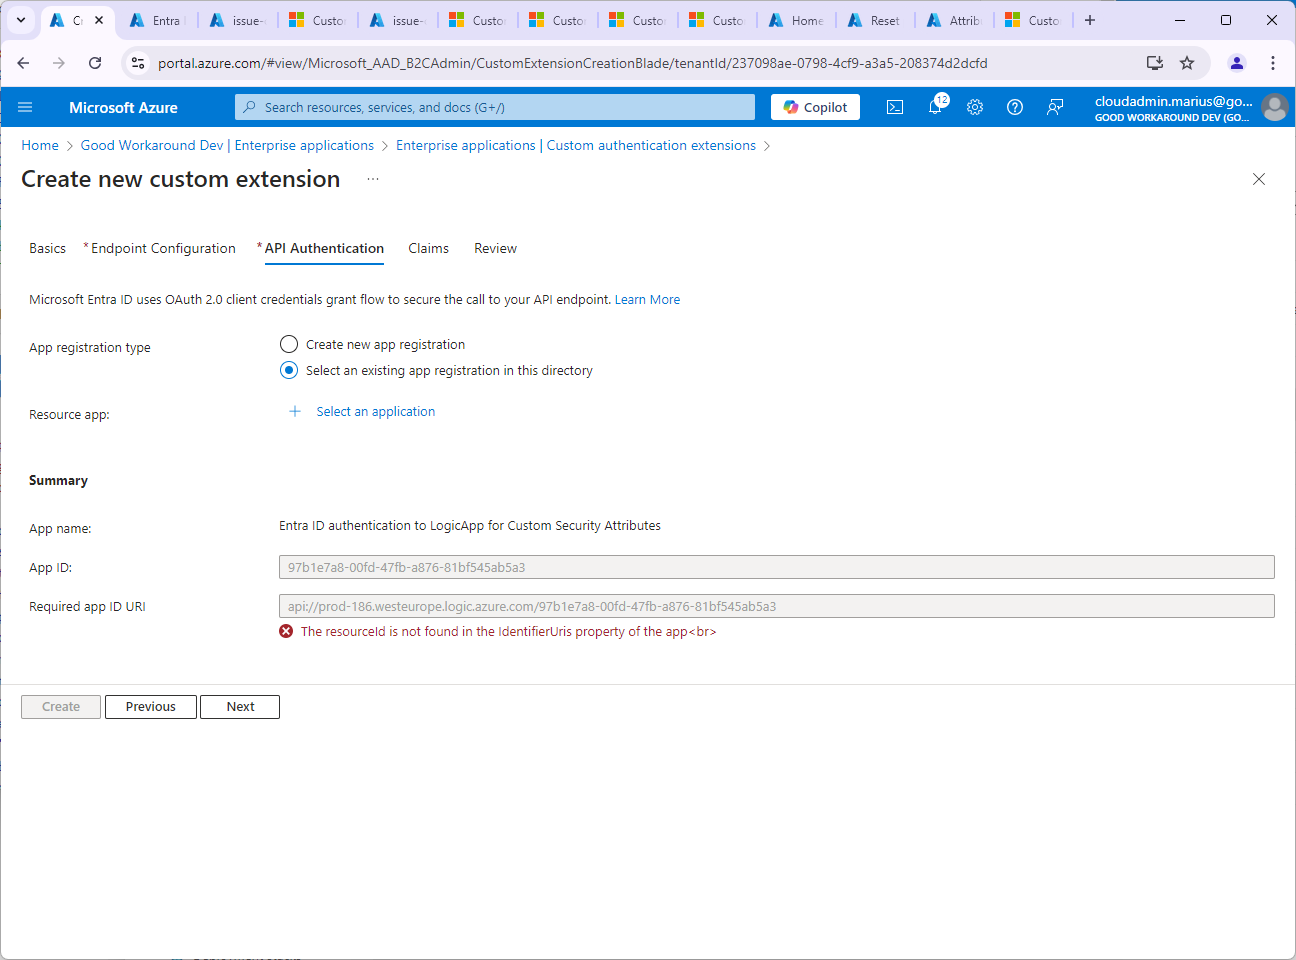
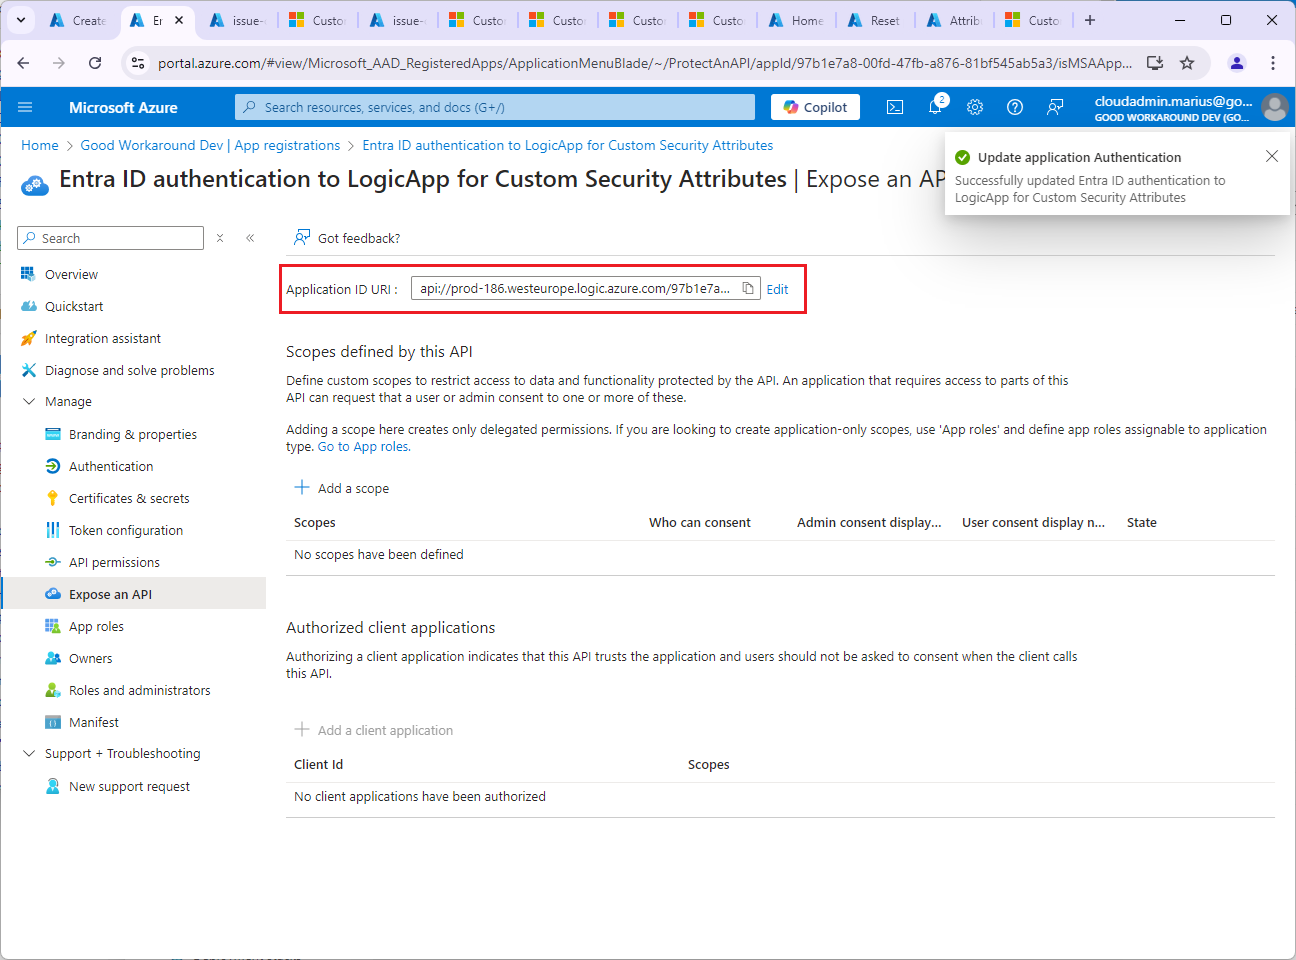
Copy the Required app ID URI and – in a new tab – go to your app registration again, updating this value:
Continue the custom extension wizard. Under Claims, we add our ssn claim. Note that the claims provider may issue multiple claims.

Ok, so now we have the custom extension up and running, and we can add it to our app (that I called “Jwt.ms with CSA”.
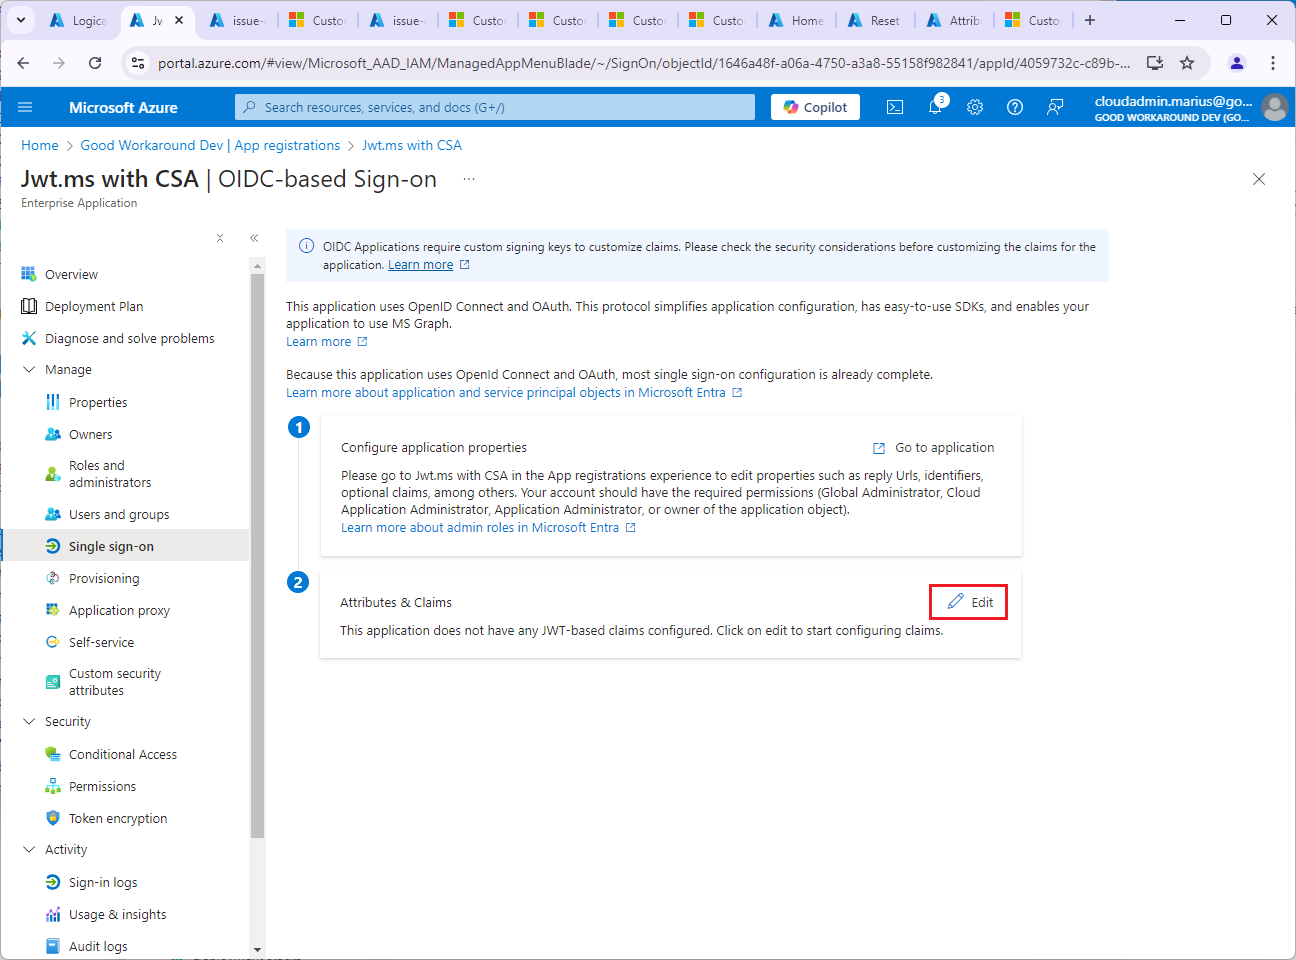
Navigate to the Enterprise app –> Single sign-on –> Attributes & Claims and click Edit:
Under Advanced settings and Custom claims provider, click Configure and select the claims provider we just created:
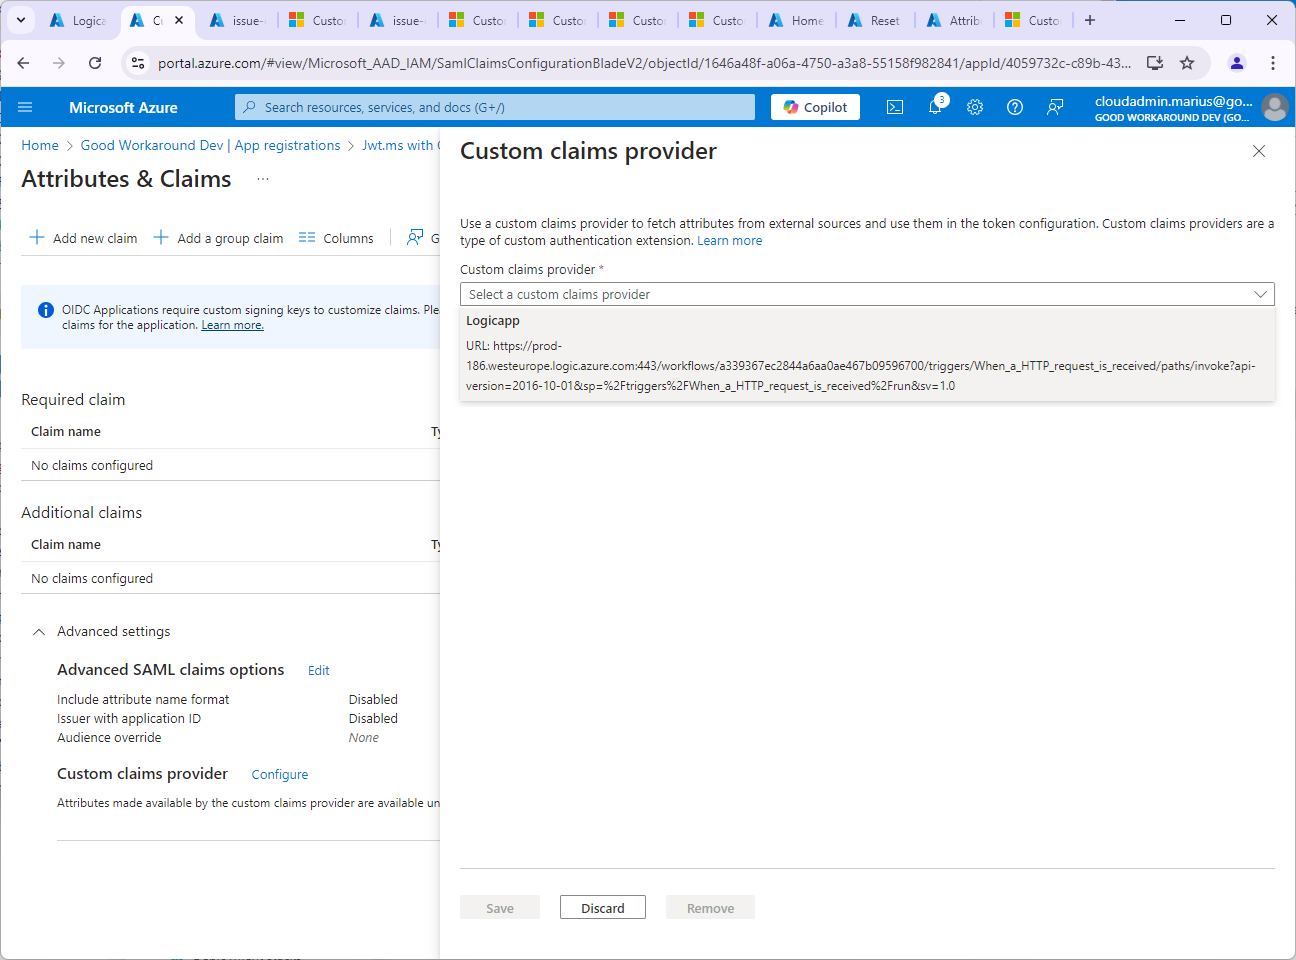
You should see the attributes you chose to make available, in our circumstance ssn:

After clicking Save, refresh (F5) your browser and click Add new claim:
Under Source attribute, you should now see customclaimsprovider.ssn available:
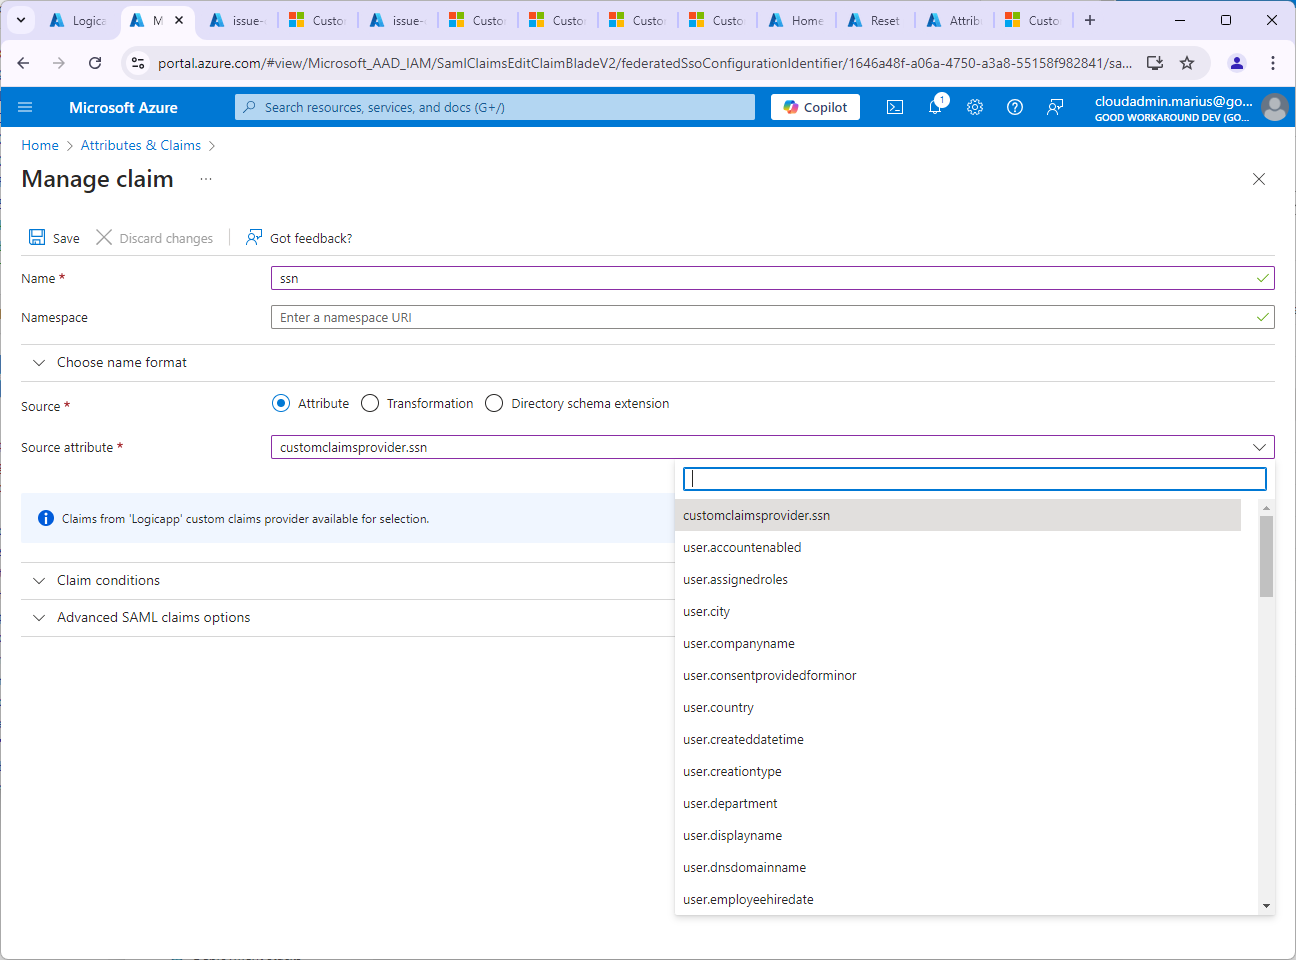
Name the new attribute ssn and click Save, and we should now see our additional claim:
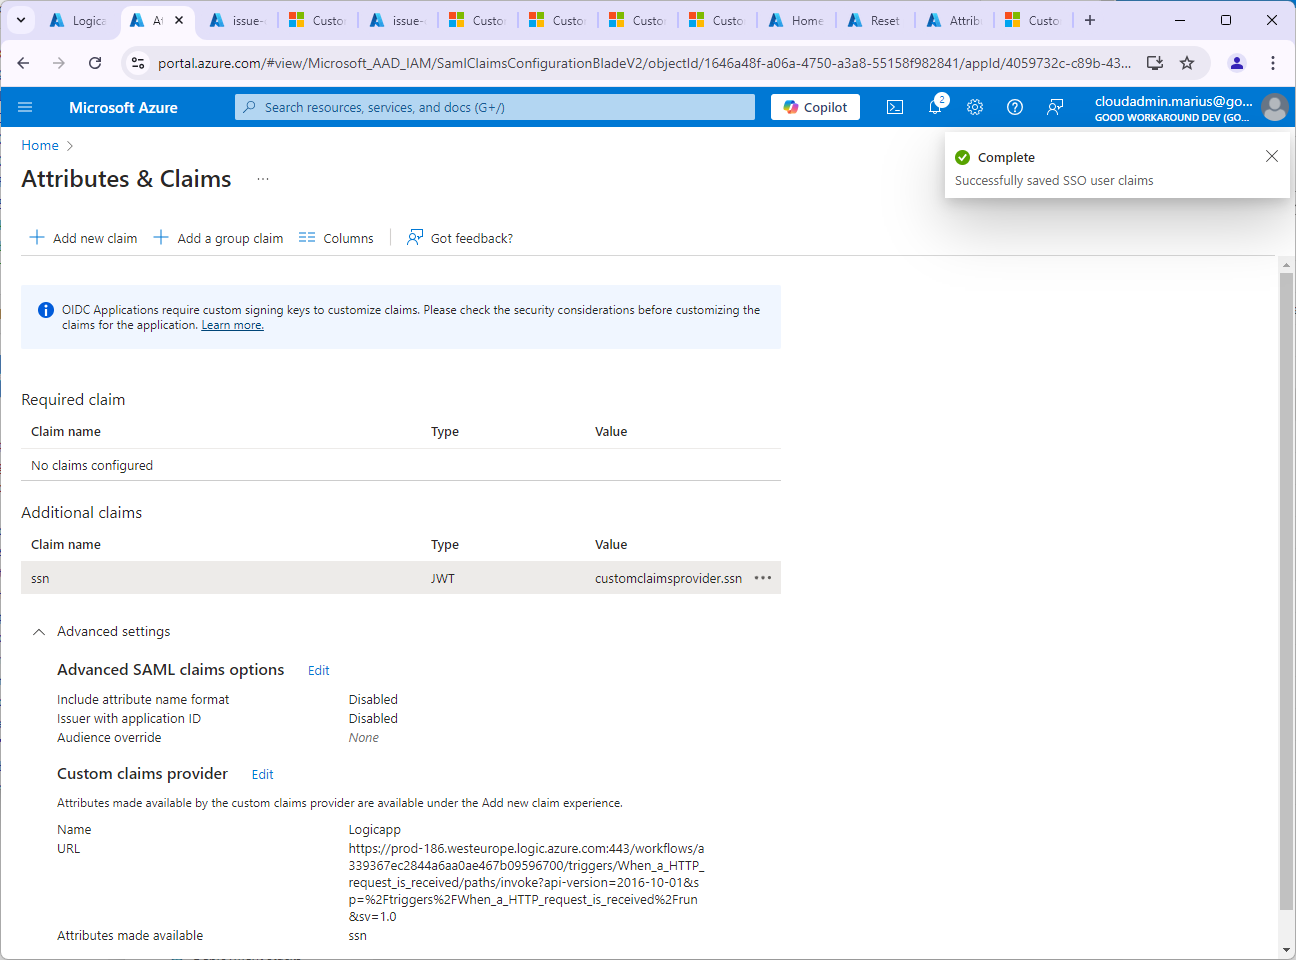
We’re done, right? No… Notice that topmost informational message?
OIDC Applications require custom signing keys to customize claims. Please check the security considerations before customizing the claims for the application. Learn more.
Now we need to configure a custom signing key… I will not go into the details of that, as it is very well documented on the learn more link. I am using a single tenant app, so I will simply set acceptMappedClaims to true in the app reg manifest:

After all of this is configured, we are yet to implement the Logic App, but let’s trigger authentication for some testing:
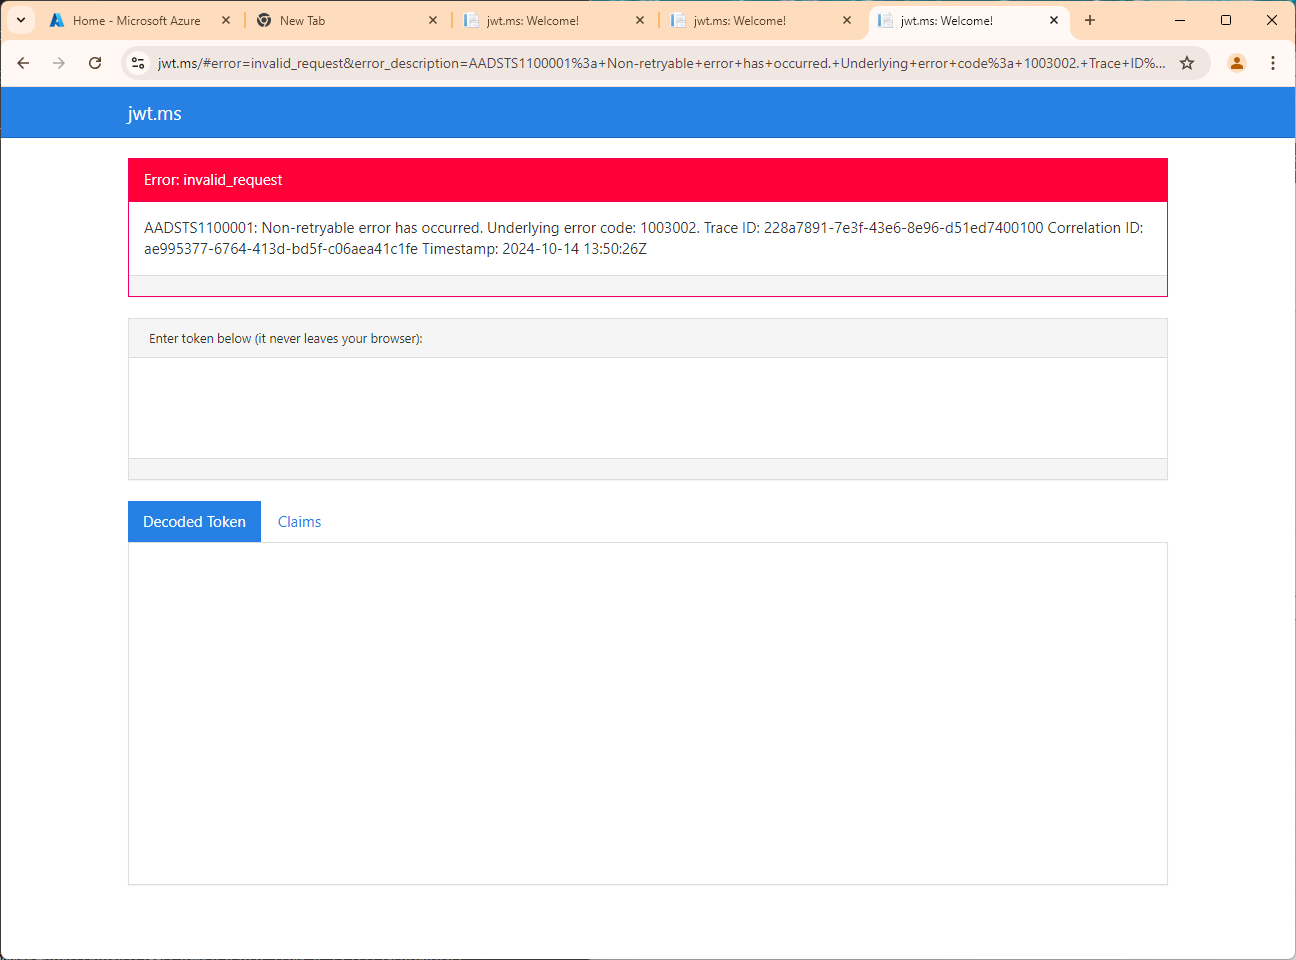
Ok, this was expected. We have no content in our Logic App. Let’s see if it was actually triggered?
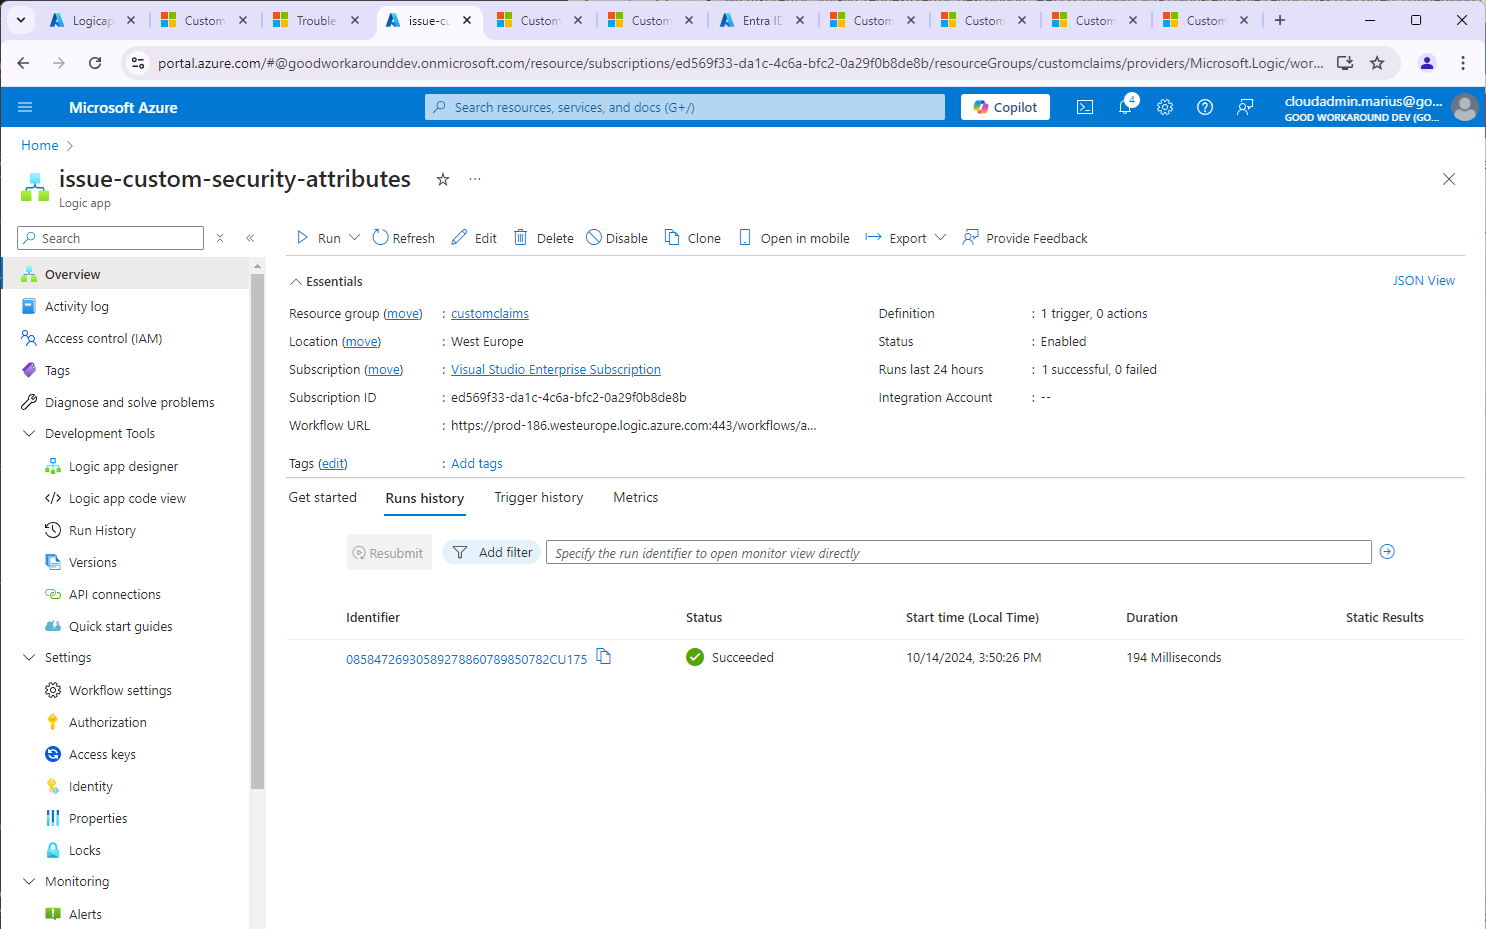
Indeed it was! Now to the final steps of actually reading the custom security attributes and issuing them.
Assigning the Logic App permissions to read Custom Security Attributes
On the Logic App, locate the object id of the managed identity:

Now, do one of these:
- Assign the service principal the “Attribute assignment reader” role on tenant level
- Assign the service principal the “Attribute assignment reader” role on the required attribute set
Example:

Completing the Logic App
Finally, we can put the finishing touches on our masterpiece – reading the CSA and issuing the token.
Edit the Logic App and go into the logic app code view, and paste this code:
{
    "definition": {
        "$schema": "https://schema.management.azure.com/providers/Microsoft.Logic/schemas/2016-06-01/workflowdefinition.json#",
        "actions": {
            "HTTP": {
                "inputs": {
                    "authentication": {
                        "audience": "https://graph.microsoft.com",
                        "type": "ManagedServiceIdentity"
                    },
                    "method": "GET",
                    "uri": "https://graph.microsoft.com/v1.0/users/@{triggerBody()['data']['authenticationContext']['user']['id']}?$select=customSecurityAttributes"
                },
                "runAfter": {},
                "runtimeConfiguration": {
                    "contentTransfer": {
                        "transferMode": "Chunked"
                    }
                },
                "type": "Http"
            },
            "Response": {
                "inputs": {
                    "body": {
                        "data": {
                            "@@odata.type": "microsoft.graph.onTokenIssuanceStartResponseData",
                            "actions": [
                                {
                                    "@@odata.type": "microsoft.graph.tokenIssuanceStart.provideClaimsForToken",
                                    "claims": {
                                        "ssn": "@body('HTTP')?['customSecurityAttributes']?['IssueTokenCSA']?['ssn']"
                                    }
                                }
                            ]
                        }
                    },
                    "statusCode": 200
                },
                "kind": "Http",
                "runAfter": {
                    "HTTP": [
                        "Succeeded"
                    ]
                },
                "type": "Response"
            }
        },
        "contentVersion": "1.0.0.0",
        "outputs": {},
        "parameters": {
            "$connections": {
                "defaultValue": {},
                "type": "Object"
            }
        },
        "triggers": {
            "When_a_HTTP_request_is_received": {
                "kind": "Http",
                "type": "Request"
            }
        }
    },
    "parameters": {
        "$connections": {
            "value": {}
        }
    }
}
In summary, we have three steps:
- Http request trigger
- Request https://graph.microsoft.com/v1.0/users/<objectid>?$select=customSecurityAttributes
- Return a JSON document with claims
Save. Finally, let’s test!

There we go! And if we check our Logic App run:

With the following details:
Request body:
{
  "type": "microsoft.graph.authenticationEvent.tokenIssuanceStart",
  "source": "/tenants/237098ae-0798-4cf9-a3a5-208374d2dcfd/applications/4059732c-c89b-43ab-8516-40c77cf33996",
  "data": {
    "@odata.type": "microsoft.graph.onTokenIssuanceStartCalloutData",
    "tenantId": "237098ae-0798-4cf9-a3a5-208374d2dcfd",
    "authenticationEventListenerId": "80d9337a-3bc1-46db-b475-3b8f35c3ae8a",
    "customAuthenticationExtensionId": "ac4af82d-e627-4102-92e4-663929ab43b0",
    "authenticationContext": {
      "correlationId": "38356c55-2085-4f62-a259-1b08bc073168",
      "client": {
        "ip": "158.248.117.155",
        "locale": "en-us",
        "market": "en-us"
      },
      "protocol": "OAUTH2.0",
      "clientServicePrincipal": {
        "id": "1646a48f-a06a-4750-a3a8-55158f982841",
        "appId": "4059732c-c89b-43ab-8516-40c77cf33996",
        "appDisplayName": "Jwt.ms with CSA",
        "displayName": "Jwt.ms with CSA"
      },
      "resourceServicePrincipal": {
        "id": "1646a48f-a06a-4750-a3a8-55158f982841",
        "appId": "4059732c-c89b-43ab-8516-40c77cf33996",
        "appDisplayName": "Jwt.ms with CSA",
        "displayName": "Jwt.ms with CSA"
      },
      "user": {
        "createdDateTime": "2024-05-31T08:10:41Z",
        "displayName": "Alma Nakken",
        "id": "ce3d945f-fc56-4b19-9891-665ca05a998d",
        "mail": "alma.nakken@dev.goodworkaround.com",
        "userPrincipalName": "alma.nakken@dev.goodworkaround.com",
        "userType": "Member"
      }
    }
  }
}
Graph call
GET https://graph.microsoft.com/v1.0/users/ce3d945f-fc56-4b19-9891-665ca05a998d?$select=customSecurityAttributes
{
  "@odata.context": "https://graph.microsoft.com/v1.0/$metadata#users(customSecurityAttributes)/$entity",
  "customSecurityAttributes": {
    "IssueTokenCSA": {
      "@odata.type": "#microsoft.graph.customSecurityAttributeValue",
      "ssn": "12345"
    }
  }
}
And last our response to Entra ID
{
  "data": {
    "actions": [
      {
        "claims": {
          "ssn": "12345"
        },
        "@odata.type": "microsoft.graph.tokenIssuanceStart.provideClaimsForToken"
      }
    ],
    "@odata.type": "microsoft.graph.onTokenIssuanceStartResponseData"
  }
}
And that’s it. We can now issue our Custom Security Attributes through the custom claims provider method of Entra ID authentication extensions. 🙂

Surely you are joking Mr Feynmann! This seems overly complicated. What if I already have an app that contains other ‘standard’ entra-id user attributes, groups etc. Is there a simpler way to get these custom attributes into the Token?
To my astonishment, and without an alternative approach, I was able to get this working. Thank you Marius! A few months later I added a new attribute (as the Java SDK code snippets are broken) and now the authentication for the Extension no longer works. I have spent many days trying to work out what is going wrong but until I can figure it out all User testing is stopped. Can anyone help? Many thanks