Using the Azure AD Graph Reporting API from PowerShell

In an earlier article (source) i demonstrated how to use the Azure AD Graph REST API to do things in Azure AD such as creating users, getting users and license users. This time, we will use the new Repoting API.

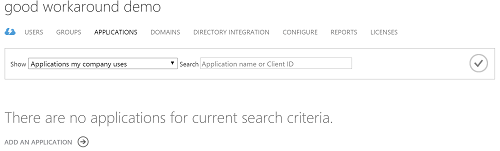
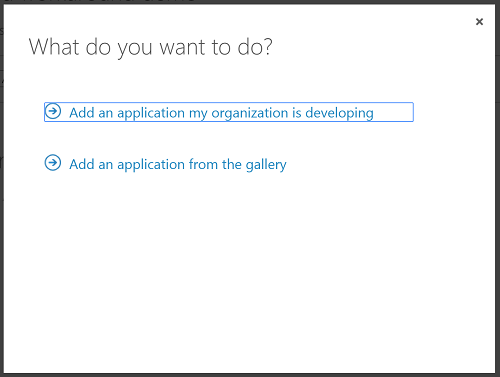
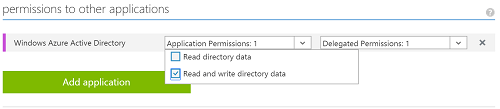
What you must first do, is to follow the first steps in this article to create your application. Follow the same steps all the way to “permissions to other applications”. The Reporting API only requires “read directory data”, not “read and write directory data”. As of writing, it actually seems it does not work with “read and write directory data” at all, only if you check “read directory data” does things start to work (you will see an error message like “Unable to check Directory Read access for appId”).

Here is an example of application that gets an oauth token using ADAL and requests a list of all reports:

Add-type -Path C:\GraphAPI\Microsoft.IdentityModel.Clients.ActiveDirectory.2.18.206251556\lib\net45\Microsoft.IdentityModel.Clients.ActiveDirectory.dll

$clientID = "26b2e067-291d-4ad7-9cd2-2e1fae15c905"
$clientSecret = "7dAkpp6sCfc3n6bfsBRoBYORnMFYeA7LsLVkQX+rAn0="
$resAzureGraphAPI = "https://graph.windows.net";

$serviceRootURL = "https://graph.windows.net/goodworkarounddemo.onmicrosoft.com"
$authString = "https://login.windows.net/goodworkarounddemo.onmicrosoft.com";

[Microsoft.IdentityModel.Clients.ActiveDirectory.AuthenticationContext]$AuthContext = [Microsoft.IdentityModel.Clients.ActiveDirectory.AuthenticationContext]$authString
[Microsoft.IdentityModel.Clients.ActiveDirectory.ClientCredential]$clientCredential = New-Object -TypeName "Microsoft.IdentityModel.Clients.ActiveDirectory.ClientCredential"($clientID, $clientSecret)

$authenticationResult = $AuthContext.AcquireToken($resAzureGraphAPI, $clientCredential);


Invoke-RestMethod -Uri "$serviceRootURl/reports?api-version=beta" -Headers @{Authorization=$authenticationResult.CreateAuthorizationHeader()} -ContentType "application/json" | select -ExpandProperty value

This will return something like:

Here are some further examples on what you can do. Please note that if the reports are empty, you seem to be getting the error “An error occurred while processing this request” for some of the reports.

# Gets the Multi-Geo signin report and outputs to screen, grouped by username.
Invoke-RestMethod -Uri "$serviceRootURl/reports/signInsFromMultipleGeographiesEvents?api-version=beta" -Headers @{Authorization=$authenticationResult.CreateAuthorizationHeader()} -ContentType "application/json" |
    Select -ExpandProperty Value |
    Group UserName |
    Foreach {
        Write-Host -ForegroundColor Yellow "----- $($_.Group[0].DisplayName) ($($_.Name)) -----"
        $_.Group | Foreach {
            Write-Host "First signin from:   $($_.firstSignInFrom)"
            Write-Host "Second signin from:  $($_.secondSignInFrom)"
            Write-Host "Time:                $($_.timeOfSecondSignIn)"
            Write-Host "Time between:        $($_.timeBetweenSignIns)"
            Write-Host "Estimated travel:    $($_.estimatedTravelHours) hours"
            Write-Host ""
        }
    }


# Gets the report for users with many failed logon attemps, before suddenly being able to sign in
Invoke-RestMethod -Uri "$serviceRootURl/reports/signInsAfterMultipleFailuresEvents?api-version=beta" -Headers @{Authorization=$authenticationResult.CreateAuthorizationHeader()} -ContentType "application/json" | Select -ExpandProperty Value


# Sends an email to each user informing them of the irregular sign ons the last 24 hours
$uri = '{0}/reports/signInsFromMultipleGeographiesEvents?api-version=beta&$filter=timeOfSecondSignIn gt {1}' -f $serviceRootURl, ((Get-Date (Get-Date).AddDays(-1) -Format "u") -replace " ", "T")
Invoke-RestMethod -Uri $uri -Headers @{Authorization=$authenticationResult.CreateAuthorizationHeader()} -ContentType "application/json" |
    Select -ExpandProperty Value |
    Foreach {
        #Send-MailMessage -From '"IT Department" ' -To
        $params = @{
            Body = "Hi,<br /><br />According to our reports your account was first signed in from '$($_.firstSignInFrom)', and then $($_.timeBetweenSignIns) later, you were signed in from '$($_.secondSignInFrom)'. The estimated travel time is $($_.estimatedTravelHours) hour(s). <br /><br />Please review, and if this looks suspicious to you, change your password.<br /><br />- IT"
            To = ('"{0}" ' -f $_.displayName, $_.username)
            From = '"IT Department" '
            Subject = "Suspicious logon activity for your account"
            BodyAsHtml = $true
            SmtpServer = "smtp.office365.com"
            UseSSL = $true
            Credential = (Get-Credential -Message "Input office 365 credentials for sending mail")
        }

        Send-MailMessage @params
    }

Hope it helps!

Using the Azure AD Graph API with PowerShell

I am implementing a custom synchronization solution between a member register and Office 365, as well as using a custom identity provider. I therefore need to create, update and delete users in Azure AD using the Graph API, here is how I did it.

Start by downloading the NuGet.exe tool to a folder. I will be using C:\GraphAPI in these examples. If you are not familiar with NuGet, this is a tool for downloading libraries and their dependencies, used a lot by Microsoft. Open a PowerShell and run the following.


cd c:\GraphAPI
.\nuget.exe install Microsoft.IdentityModel.Clients.ActiveDirectory

You should see the following:
PowerShell Result

After running the commands, the folder where you run nuget.exe from should contain some new folders and some files. The following file should now exist (the version number might be different): C:\GraphAPI\Microsoft.IdentityModel.Clients.ActiveDirectory.2.14.201151115\lib\net45\Microsoft.IdentityModel.Clients.ActiveDirectory.dll.

Now, in order to access the Graph API we need to create an application in the Azure AD that you are accessing. Let us start by creating a brand new Azure AD for demo purposes.

Menu to create Azure AD

You should end up with an Azure AD like this:
Menu to create Azure AD

Go to Applications and click “Add an Application”:
Menu to create Azure AD

Choose “Add an application my organization is developing”:
Menu to create Azure AD

Give the application a name of your choice and choose “WEB APPLICATION AND/OR WEB API”:
Menu to create Azure AD

Input a url for your application. This url is never used and does not need to be working or anything, it is just an identifier for your application.
Menu to create Azure AD

Your new application should display. Go to the configuration tab of the new application.
Menu to create Azure AD

Scroll down until you find the Client ID. Copy this, we will use this later.
Menu to create Azure AD

In the Keys section, create a new key and save the application.
Menu to create Azure AD

As soon as you save the application, the key will appear.This is the only time you can see the key so make sure you copy it.

A little note here. As you can see the max lifetime of a key is 2 years, meaning that your application will stop working after two years. What you should do then is to create a new key, input this key into your application and let the old key expire.

Menu to create Azure AD

Last thing to configure on the application is permissions. Go down to the “permissions to other applications” section and change the following to “Read and write directory data”. This operation can take a few minutes to complete (even though it already says completed), so you should wait a few minutes before you try the PowerShell examples below.

As a side note, here you can actually also give permissions to other applications such as Exchange Online to query the API there.

Menu to create Azure AD

You are now finished configuring the application. Now, here is an example PowerShell for you. You need to make sure the path, the client id (which we copied earlier), the key (which we copied earlier) and the tenant name is changed. The rest should be pretty self explanatory.

#
# PowerShell examples created by Marius Solbakken - https://goodworkaround.com/node/73
#

# Change to correct file location
Add-Type -Path "C:\GraphAPI\Microsoft.IdentityModel.Clients.ActiveDirectory.2.14.201151115\lib\net45\Microsoft.IdentityModel.Clients.ActiveDirectory.dll"

# Change these three values to your application and tenant settings
$clientID = "26b2e067-291d-4ad7-9cd2-2e1fae15c905" # CLIENT ID for application
$clientSecret = "qxUG3anGzOi9mfDoV7tHVNWOOM9k2FKo08Xs3bG4APs=" # KEY for application
$tenant = "goodworkarounddemo.onmicrosoft.com" # The tenant domain name

# Static values
$resAzureGraphAPI = "https://graph.windows.net";
$serviceRootURL = "https://graph.windows.net/$tenant"
$authString = "https://login.windows.net/$tenant";

# Creates a context for login.windows.net (Azure AD common authentication)
[Microsoft.IdentityModel.Clients.ActiveDirectory.AuthenticationContext]$AuthContext = [Microsoft.IdentityModel.Clients.ActiveDirectory.AuthenticationContext]$authString

# Creates a credential from the client id and key
[Microsoft.IdentityModel.Clients.ActiveDirectory.ClientCredential]$clientCredential = New-Object -TypeName "Microsoft.IdentityModel.Clients.ActiveDirectory.ClientCredential"($clientID, $clientSecret)

# Requests a bearer token
$authenticationResult = $AuthContext.AcquireToken($resAzureGraphAPI, $clientCredential);

# Output the token object
Write-Host -ForegroundColor Yellow "Token object:"
$authenticationResult | Format-List


# Example to get all users
Write-Host -ForegroundColor Yellow "Getting all users"
$users = Invoke-RestMethod -Method GET -Uri "$serviceRootURL/users?api-version=1.5" -Headers @{Authorization=$authenticationResult.CreateAuthorizationHeader()} -ContentType "application/json"
$users.value | Format-Table UserPrincipalName,DisplayName


# Example to create a user
Write-Host -ForegroundColor Yellow "Creating user"

$newUserJSONObject = @{
    "accountEnabled" = $true
    "displayName" = "Donald Duck"
    "mailNickname" = "donald.duck"
    "passwordProfile" = @{
        "password" = "Test1234"
        "forceChangePasswordNextLogin" = $false
    }
    "userPrincipalName" = "donald.duck@$tenant"
} | ConvertTo-Json

Invoke-RestMethod -Method POST -Uri "$serviceRootURL/users?api-version=1.5" -Headers @{Authorization=$authenticationResult.CreateAuthorizationHeader()} -ContentType "application/json" -Body $newUserJSONObject


# Example to update a user
Write-Host -ForegroundColor Yellow "Updating user"
$updateUserJSONObject = @{
    "givenName" = "Donald"
    "surname" = "Duck"
} | ConvertTo-Json
Invoke-RestMethod -Method PATCH -Uri "$serviceRootURL/users/donald.duck@${tenant}?api-version=1.5" -Headers @{Authorization=$authenticationResult.CreateAuthorizationHeader()} -ContentType "application/json" -Body $updateUserJSONObject


# Example to get a single user
Write-Host -ForegroundColor Yellow "Getting user"
$user = Invoke-RestMethod -Method GET -Uri "$serviceRootURL/users/donald.duck@${tenant}?api-version=1.5" -Headers @{Authorization=$authenticationResult.CreateAuthorizationHeader()} -ContentType "application/json"
$user


# Example to delete a user - please note that this requires a special permissions set with the MsOnline PowerShell module
Write-Host -ForegroundColor Yellow "Deleting user"
Invoke-RestMethod -Method DELETE -Uri "$serviceRootURL/users/donald.duck@${tenant}?api-version=1.5" -Headers @{Authorization=$authenticationResult.CreateAuthorizationHeader()} -ContentType "application/json"

PowerShell and EWS Managed API

Here is a script that lets you download mail objects with attachments from an Exchange mailbox (works with Office 365). First, install Exchange Web Services Managed API 2.2.

# Destination folder
$destinationFolder = "C:\Users\marius\Downloads\Attachment Downloader"

# replace with your email address
$email    = "username@mytenant.onmicrosoft.com"
$username = "username@mytenant.onmicrosoft.com"
$password = "Password123!"

# File extensions to download
$extensions = "pdf","pdfa","doc","docx","dot","dotx","xls","xlsx","ppt","pptx"

# load the assembly
Add-Type -Path "C:\Program Files\Microsoft\Exchange\Web Services\2.2\Microsoft.Exchange.WebServices.dll"

# Create Exchange Service object
$s = New-Object Microsoft.Exchange.WebServices.Data.ExchangeService([Microsoft.Exchange.WebServices.Data.ExchangeVersion]::Exchange2013_SP1)
$s.Credentials = New-Object Net.NetworkCredential($username, $password)
# $s.TraceEnabled = $true
Write-Host "Trying AutoDiscover... "
$s.AutodiscoverUrl($email, {$true})

if(!$s.Url) {
    Write-Error "AutoDiscover failed"
    return;
} else {
    Write-Host -ForegroundColor Green "AutoDiscover succeeded - $($s.Url)"
}

# Create destination folder
$destinationFolder = "{0}\{1}" -f $destinationFolder, (Get-Date -Format "yyyyMMdd HHmmss")
mkdir $destinationFolder | Out-Null

# get a handle to the inbox
$inbox = [Microsoft.Exchange.WebServices.Data.Folder]::Bind($s,[Microsoft.Exchange.WebServices.Data.WellKnownFolderName]::Inbox)

#create a property set (to let us access the body & other details not available from the FindItems call)
$psPropertySet = new-object Microsoft.Exchange.WebServices.Data.PropertySet([Microsoft.Exchange.WebServices.Data.BasePropertySet]::FirstClassProperties)
$psPropertySet.RequestedBodyType = [Microsoft.Exchange.WebServices.Data.BodyType]::Text;

# Find the items
$inc = 0;
$maxRepeat = 50;
do {
    $maxRepeat -= 1;

    Write-Host "Searching for items in mailbox... " -NoNewline
    $items = $inbox.FindItems(100)
    Write-Host -ForegroundColor Green "found $($items.items.Count)"

    foreach ($item in $items.Items)
    {
        # Create mail folder
        $inc += 1
        $mailFolder = "{0}\{1}" -f $destinationFolder, $inc;
        mkdir $mailFolder | Out-Null

        # load the property set to allow us to get to the body
        try {
            $item.load($psPropertySet)
            Write-Host ("$inc - $($item.Subject)") -ForegroundColor Yellow

            # save the metadata to a file
            $item | Export-Clixml ("{0}\metadata.xml" -f $mailFolder)

            # save all attachments
            foreach($attachment in $item.Attachments) {
                if(($attachment.Name -split "\." | select -last 1) -in $extensions) {
                    Write-Host " - $($attachment.Name) - $([Math]::Round($attachment.Size / 1024))KB"
                    $fileName = ("{0}\{1}" -f $mailFolder, $attachment.Name) -replace "/",""
                    $attachment.Load($fileName)
                }
            }

            # delete the mail item
            $item.Delete([Microsoft.Exchange.WebServices.Data.DeleteMode]::HardDelete, $true)
        } catch [Exception] {
            Write-Error "Unable to load item: $($_)"
        }
    }
} while($items.MoreAvailable -and $maxRepeat -ge 0)

Using your PowerShell profile for something very useful

Have you ever found yourself writing the same PowerShell code over and over, thinking “there should be a built-in function for this”. Here is my trick for an even better PowerShell day! First I’ll show you how to create a PowerShell profile where you can define all of our favorite methods, and then I’ll show you how to use it on many computers, as you will probably want this on your servers as well as your desktop.

Start by opening a PowerShell and type $profile. This default variable contains a path to your PowerShell profile, usually located in the Documents\WindowsPowerShell, which does not exist by default. Run the following two lines to create the folder, and create an empty file.

mkdir (Split-Path $profile) -ErrorAction SilentlyContinue;
if(!(Test-Path $profile))
{
	Set-Content -Path $profile -Value ""
}

After running these you have an empty profile. Use your favorite editor to edit the file.

# PS> ise $profile

The code inside this file will run each time your start a new PowerShell. Here you can define your own methods. What makes this very usefull is the possibility to create a method to download your PowerShell profile from the internet. Here is an example of such a function:

# Function to update the powershellprofile from the internet
function Update-PowerShellProfile() {
    [CmdletBinding()]
    Param()
    Write-Verbose "Updating PowerShell profile"

    if(!(Test-Path (Split-Path $profile))) {
        Write-Verbose ("Profile path did not exist, creating {0}" -f (Split-Path $profile))
        mkdir (Split-Path $profile)
    }

    Write-Debug "Creating System.Net.WebClient"
    $wc = New-Object System.Net.WebClient
    Write-Debug "Downloading file http://pastebin.com/raw.php?i=tdySrDgz"
    $wc.DownloadFile("http://pastebin.com/raw.php?i=tdySrDgz", $profile)

    Write-Output "Reload profile with the cmdlet:  . `$profile"
}

Basically it downloads a some stuff from pastebin and puts into the PowerShell profile. After this, you can either open a new PowerShell to run the profile again, or you can type “. $profile” to re-load the profile.

Here is an example of a full profile (a subset of methods I have in mine). I have my own PowerShell profile hosted in my Dropbox folder, but you choose wherever you want, just change the Update-PowerShellProfile method.


function Connect-ExchangeOnline{
    [CmdletBinding()]
    Param(
        [Parameter(Mandatory=$True,Position=0)]
        [System.Management.Automation.PSCredential]$Credentials
    )
    $Session = New-PSSession -ConfigurationName Microsoft.Exchange -ConnectionUri https://ps.outlook.com/powershell -Authentication Basic -AllowRedirection -Credential $Credentials
    Import-PSSession $session -DisableNameChecking
}

function Disconnect-ExchangeOnline {
    [CmdletBinding()]
    Param()
    Get-PSSession | ?{$_.ComputerName -like "*outlook.com"} | Remove-PSSession
}

# Function to update the powershellprofile from the internet
function Update-PowerShellProfile() {
    [CmdletBinding()]
    Param()
    Write-Verbose "Updating PowerShell profile"

    if(!(Test-Path (Split-Path $profile))) {
        Write-Verbose ("Profile path did not exist, creating {0}" -f (Split-Path $profile))
        mkdir (Split-Path $profile)
    }

    Write-Debug "Creating System.Net.WebClient"
    $wc = New-Object System.Net.WebClient
    Write-Debug "Downloading file http://pastebin.com/raw.php?i=tdySrDgz"
    $wc.DownloadFile("http://pastebin.com/raw.php?i=tdySrDgz", $profile)

    Write-Output "Reload profile with the cmdlet:  . `$profile"
}

# Set the PowerShell prompt to PS>
function prompt{
    Write-Host -ForegroundColor Red "PS" -NoNewline
    Write-Host -ForegroundColor White -NoNewline ">"
    return " "
}


function ConvertTo-Base64
{
    [CmdletBinding(DefaultParameterSetName='String')]
    [OutputType([String])]
    Param
    (
        # String to convert to base64
        [Parameter(Mandatory=$true,
                   ValueFromPipeline=$true,
                   ValueFromRemainingArguments=$false,
                   Position=0,
                   ParameterSetName='String')]
        [ValidateNotNull()]
        [ValidateNotNullOrEmpty()]
        [string]
        $String,

        # Param2 help description
        [Parameter(ParameterSetName='ByteArray')]
        [ValidateNotNull()]
        [ValidateNotNullOrEmpty()]
        [byte[]]
        $ByteArray
    )

    if($String) {
        return [System.Convert]::ToBase64String(([System.Text.Encoding]::UTF8.GetBytes($String)));
    } else {
        return [System.Convert]::ToBase64String($ByteArray);
    }
}


function ConvertFrom-Base64 {
    [CmdletBinding()]
    Param(
        [Parameter(Mandatory=$True,
                   Position=0,
                   ValueFromPipeline=$true)]
        [ValidateNotNull()]
        [ValidateNotNullOrEmpty()]
        [string]
        $Base64String
    )

    return [System.Text.Encoding]::UTF8.GetString(([System.Convert]::FromBase64String($Base64String)));
}


function Split-String
{
    [CmdletBinding()]
    [OutputType([string[]])]
    Param
    (
        # The input string object
        [Parameter(Mandatory=$true,
                   ValueFromPipeline=$true,
                   Position=0)]
        [String] $InputObject,

        # Split delimiter
        [Parameter(Mandatory=$false,
                   ValueFromPipeline=$false,
                   Position=1)]
        [String] $Delimiter = "`n",

        # Do trimming or not
        [Parameter(Mandatory=$false,
                   ValueFromPipeline=$false,
                   Position=2)]
        [Boolean] $Trim = $true

    )

    if($Trim) {
        return $InputObject -split $Delimiter | foreach{$_.Trim()}
    } else {
        return $InputObject -split $Delimiter
    }
}


function ConvertFrom-ImmutableID
{
    [CmdletBinding()]
    [OutputType([GUID])]
    Param
    (
        # Param1 help description
        [Parameter(Mandatory=$true,
                   ValueFromPipelineByPropertyName=$false,
                   ValueFromPipeline=$true,
                   Position=0)]
        $ImmutableID
    )

    return [guid]([system.convert]::frombase64string($ImmutableID) )
}


function New-ObjectFromHashmap
{
    [CmdletBinding()]
    Param
    (
        # Param1 help description
        [Parameter(Mandatory=$true,
                   ValueFromPipeline=$true,
                   Position=0)]
        $Hashmap
    )

    Begin
    {
    }
    Process
    {
        New-Object -TypeName PSCustomObject -Property $Hashmap
    }
    End
    {
    }
}

Then for each new server you are working on, just find a way to bring the Update-PowerShellProfile method, run it and you have the same profile everywhere, such as my Connect-ExchangeOnline method or the Split-String method.

Have fun!

Outlook AutoDiscover redirect limit (0x800c8206)

Today I encountered something I’ve not seen before, and I am sure more people will encounter this. If a client is in an Active Directory site without an AutoDiscover serviceConnectionPoint (SCP), it will try to connect to all AutoDiscover instances in the organization simultaneously. If the user have been cross-forest migrated, a redirect response will come from each server, and if there are more than 8 of them, Outlook reaches a redirect limit and fails to AutoDiscover.

After a cross-forest migration, the targetAddress of the source Active Directory object will be set to an address in the routing domain. For example when you do migrate to Office 365 / Exchange Online, your user will get a tenant.mail.onmicrosoft.com address, in my case mailNickname@gwrnd.mail.onmicrosoft.com. After the migration, when requesting details from AutoDiscover On-Premise, the response will be a redirect to the Exchange Online autodiscover. The problem is that when SCP is enabled in Outlook, it will count each response On-Premise as a redirect. This means that if it requests from all of your AutoDiscover instances, it will fail (the limit is 10).

If you believe this is your issue, you can look for error code 0x800c8206 in “Test E-mail Autoconfiguration” in Outlook. If you find this error code, here is your solution.

Disable SCP on the client

Instead of having Outlook look for SCPs in AD, you can disable this feature by adding the following to the registry on the client.


[HKEY_CURRENT_USER\Software\Microsoft\Office\14.0\Outlook\AutoDiscover]
"ExcludeScpLookup"=dword:00000001

With this disabled, Outlook will work more like on the internet. It will look at the UserPrincipalName (UPN), and try autodiscover.goodworkaround.com if your UPN ends with @goodworkaround.com. The reason this helps is that it will only get one response On-premise, not one per AutoDiscover virtual directory.

Configure AutoDiscoverSiteScope

By default a CAS only serves its own site. You can use the cmdlet Set-ClientAccessServer -identity -AutodiscoverSiteScope Oslo,Beijing,Boston,Seattle to configure it to serve more sites. This can help if you for example have 4 datacenters with 3 AutoDiscover instances in each, and some sites in AD does not have an Exchange server. The sites with the Exchange server will try all of the 12 AutoDiscover instances, and fail because it reaches the limit. If you configure the site to only try one of the sites, it will succeed because it will only try 3 servers.

Reduce the number of AutoDiscover instances

Do you really need 12? Remember that this is a lightweight service, and you can have a CAS without AutoDiscover. If you can manage to have 8 or less AutoDiscover instances you are safe.

Hope this helps someone.