Windows Server 2012 R2 is RTM and published on MSDN. Active Directory Federation Services (ADFS) 3.0 have some major differences from the 2012 version (ADFS 2.1). The ADFS Proxy is gone, replaced by the Web Application Proxy (WAP), a part of the Remote Access role. The WAP is an replacement for the ADFS proxy and can also be used to publish other applications such as SharePoint and Outlook Web Access. Also Bring Your Own Device (BYOD) is possible with the new Device Registration Service / Workplace Join and there are better support for two-factor authentication. IIS is no longer used, which removes a lot of the customization possibilities. This article is about how to configure the new ADFS for Office 365.
Let’s get right to it. My setup is a non-redundant system with a single ADFS server and a single Web Application Proxy (WAP). My federation server farm will in this case be called sts.goodworkaround.com. From this guide it should be easy to extrapolate how to set up the service in a load balanced and highly available cluster.
In earlier versions of ADFS, it was recommended to install it on dedicated servers. This was partly because ADFS ran inside IIS and required quite a lot of resources. Since ADFS no longer reqiures IIS, there is much less overhead, and you can now install ADFS on your domain controllers. Keep in mind that you cannot use Windows Network Load Balancing (NLB) with DCs, and must use an external load balancer if you require high availability in this configuration.
Start by installing the Active Directory Federation Services role with Server Manager.


After completing, click “Configure the federation service on this server”. In the new window that opens, choose default option which is “Create the first federation server in a federation server farm”. Even though you do not plan to create a farm, even a single server is still a farm and you can at any time extend your one-server farm to a bigger farm by adding additional nodes.

Choose the account used for the action. I recommend using a Domain Administrator, but you can get away with using an account by granting write permissions to a container in AD.

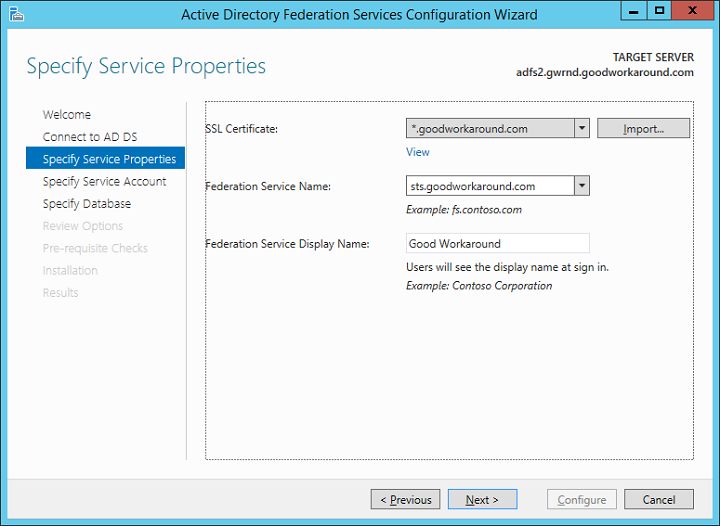
After choosing the account, it’s time to import the certificate and setting the federation server farm name. The certificate can be a wildcard (like mine), or with a subject. The federation server farm name must match the subject of the certificate. The certificate must be 2048-bit or more.
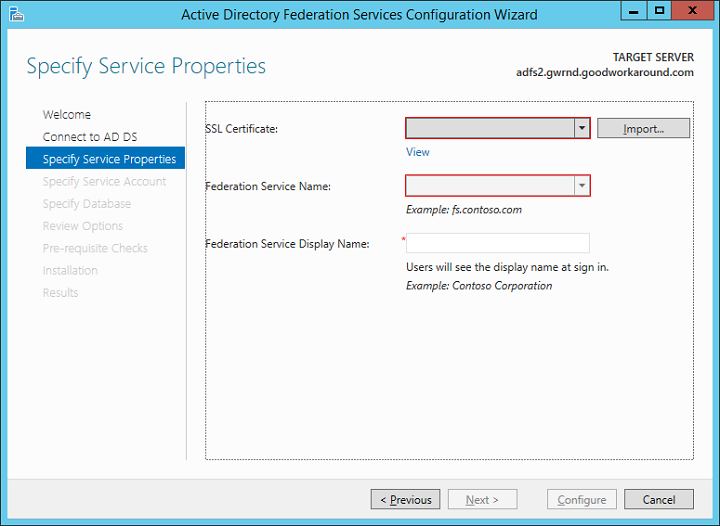
Click import and type the password for the pfx file. If you do not have the certificate available as a pfx container, you must convert it to this format. An easy way is to use IIS on a different host and import and export it from there.

After importing the certificate, depending on the certificate type, choose a federation server name and a display name. The display name can be changed at a later stage, but the federation server name can not.
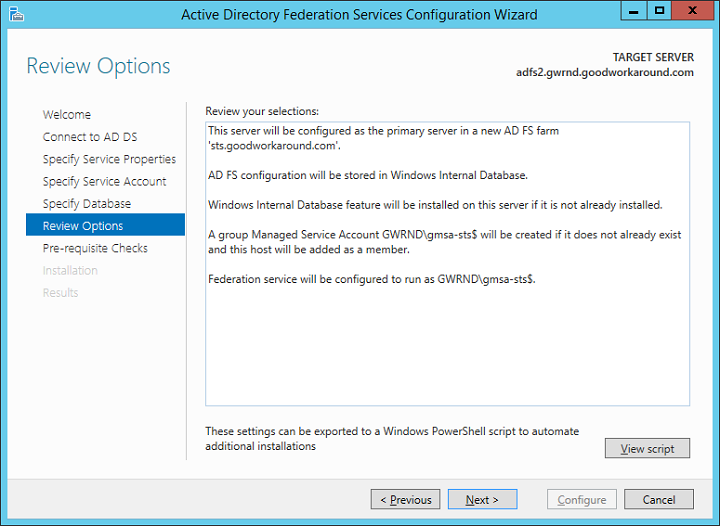
On the specify service account page, there are two options. The first option is to create a group managed service account (GMSA). This option requires at least one Windows Server 2012 domain controller in the domain where the GMSA is created. The GMSA option is the easiest and automates both password management and servicePrincipalName. The second option is to use an already existing GMSA or a regular user account. The wizard will automatically configure SPN for the user, if it has permissions. The user will automatically be granted the necessary permissions.

Next, choose the type of configuration database. Here too there are two options. The default option is using Windows Integrated Database (WID). WID is mostly the same as SQL Server Express, and to my experience, this is sufficient for most customers and actually recommended when the federation server farm contains less than 8 servers. If installing more than 8 servers in the federation server farm, choose SQL instead. Note that there are some security features that requires SQL server.

Next yourself through the following screens.


Voila! You have deployed your first ADFS server. Now let’s continue configuring DNS and testing the server.
Start by creating a A-record (Do not use a cname record, as this will give you errors with windows authentication / single sign-on!) that points to the server’s IP address. If you are doing a highly available setup, point the A record to your load balancing IP address.
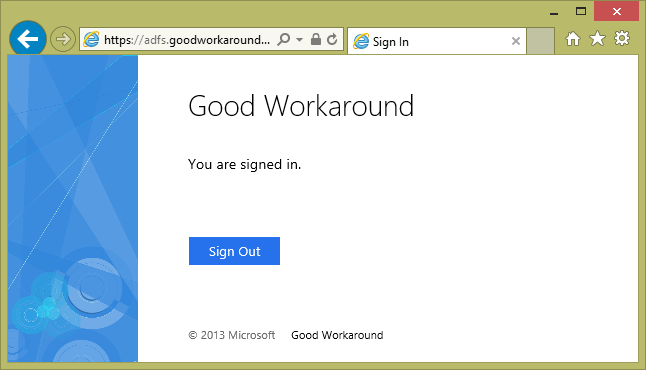
Now, use the url https://sts.goodworkaround.com/adfs/ls/IdpInitiatedSignon.aspx to test your federation server. Start by testing from a domain user on a domain joined client. You should see something like the following.

If you have added the site as a Intranet Site in security settings, you should get Single Sign-On (SSO) and get directly to the following.
If your browser do not trust the site or do not support Windows authentication, you will be requested for credentials.
Now that the ADFS server is tested, let’s continue on and installing the Web Application Proxy (WAP). The WAP will be used to present ADFS to the internet. You can use any kind of reverse proxy to do this, such as TMG or F5. The WAP server requires to resolve your federation server name to your federation server. It is best practice to have the server running the WAP standalone and not part of the same domain as the ADFS servers. This because the WAP server is directly presented to the internet.
WAP is new in 2012 R2 and is a part of the Remote Access role. Use Server Manager to install the Remote Access role.

Next, next, next to the Role Features page and choose Web Application Proxy.

Start the Web Application Proxy wizard.

In the wizard, read the text and click next.

Type in the federation server name and administrator credentials. These credentials will only be used once in order to create a proxy trust, and they are not stored.
Import and choose the same certificate as on your ADFS server. This can also be different, but that’s just one more certificate to keep valid.

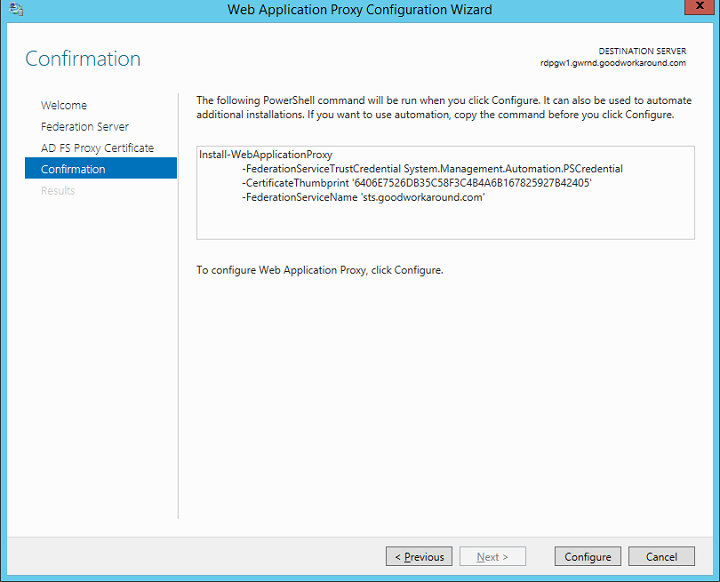
Hit “configure” and you are done.
After finishing the wizard, the Remote Access Management console will automatically start. Create a new pass-through publishing by clicking publish in the right menu.

Fill in your information. The external and internal url must be the same.


Now you have published ADFS. What you now must do is to make the WAP accessible from the internet and point the federation server name in public/internet DNS to the WAP. In my case this means pointing sts.goodworkaround.com to the WAP server.
Now you should verify that https://sts.goodworkaround.com/adfs/ls/IdpInitiatedSignon.aspx is available and working from the internet.
Federating Office 365
Your ADFS setup is now ready to be used with Office 365. You can follow the same guides for configuring your ADFS with 2012 R2 as with 2008 R2 and 2012. Anyway, here is how.
Start by installing the Microsoft Online Services Sign-In Assistant and the Microsoft Online Services Sign-In Assistant. You can find instructions for this here at TechNet. It can be a good idea to install this on the ADFS server, but you can also do this from other computers as long as they can contact the ADFS server.
After installing these two components, on the ADFS server start a PowerShell as administrator and type the cmdlet Import-Module MsOnline. After successfully importing the module, continue with Connect-MsolService. You will be asked for credentials. Type a global administrator i Office 365.
If running the PowerShell on another computer, use the Set-MsolADFSContext cmdlet to point to the ADFS server.
In order to federate domains, they must be verified in the Office 365 portal. You can check this with the Get-MsolDomain cmdlet. This should show the domain as verified.
If the domain is verified, use the Convert-MsolDomainToFederated with the DomainName parameter to federate a domain. You should also use the SupportMultipleDomains parameter, or you will not be able to use the same ADFS servers to federate other domains in the same tenant. Here is the whole PowerShell.
Import-Module MsOnline
Connect-MsolService
Get-MsolDomain
Convert-MsolDomainToFederated -DomainName goodworkaround.com -SupportMultipleDomain:$true
Testing Office 365 sign-on
After you have successfully federated the domain, you are ready to test signing into Office 365 via federation. In order for this to work you should already have set up Windows Azure Directory Synchronization Tool, and your UPN suffixes should match federated domains.
No matter whether a user have an Exchange Online license assigned or not, we can test federation by going to http://outlook.com/goodworkaround.com. This should now automatically redirect to your ADFS server. If you use this URL externally, you will get to ADFS through WAP. If you use this URL internally, you should get to ADFS directly, and possibly have single sign-on. Log on with a upn such as marius@goodworkaround.com and you should be redirected to Outlook Web Access (if you have no license, you should get an error from OWA that you do not have a mailbox).
It is also a good idea to test the proxy by testing other sign-on options than web redirect. My suggestion is that you grant a user Global Administrator in the Office 365 portal and try to sign into the Microsoft Online PowerShell with the UPN marius@goodworkaround.com and the password.
Hope this helps someone! If you have any questions, use the comment section below. I have done this so many times that there might be some steps I forget to mention.

when i get to the ad fs proxy cert page nothing is available.
excellent doc
Great Document I have one question though. Can you install both the ADFS Service and WAP on the same server?
Hi John, no you cannot. Also the WAP should be in the DMZ. If you want to use Kerberos Constrained Delegation (KCD) the WAP must be a domain member, otherwise it should be either standalone or member of a DMZ AD forest 😊