The documentation on how to authenticate to Azure AD using a client credentials grant and certificate is decent, but it leaves a few open questions, I have experienced. Here is a quick guide on how to actually do this, properly detailed, with a simple Azure Function as an example using KeyVault.
You might have seen the below screen, where you can choose to either upload a certificate, or to create a new client secret, and thought – “hey, certificates sounds a lot safer than these secrets!”.

Then you might have googled a few things, found nothing, given up, and gone down the client secret route after all. I will now demonstrate how you can easily use a certificate instead of a secret. I will be using an Azure Function, but all concepts are simple and portable to any scenario that require you to authenticate as an application, using a client credential grant.
Start by creating a new app registration, and end up at the following:

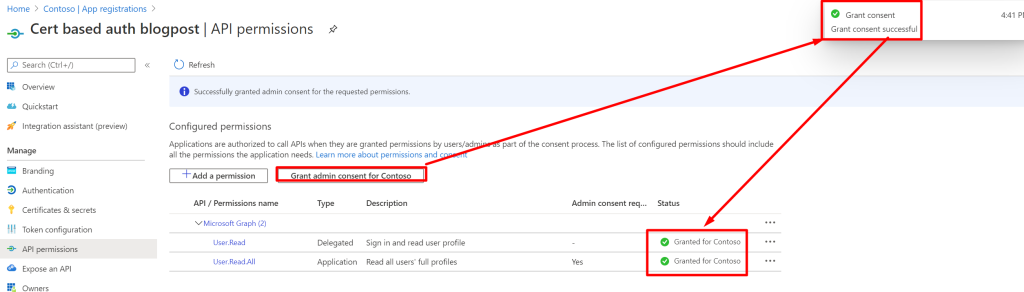
Note down the Application (client) ID and the Directory (tenant) ID values. Next, for demonstration purposes, go to “API permissions”, and add “User.Read.All”, and click “Grant admin consent”:


Now that we have granted the application access to read any user, let’s start by creating our certificate using KeyVault. The certificate does not have any particular requirements when it comes to subject, issuer etc. It simply needs to be uploaded to the app registration.
Also, KeyVault is absolutely not required here, and you can use any certificate service that allows you to sign stuff, as well as locally installed certificates.


When the KeyVault is ready, go to certificates and click “Generate/Import”.

Give it any name, and a subject. The subject can be anything. Also, make sure the validity period is long, or you will need to update the certificate (which is not a bad thing of course).

When the certificate has been created, and finished processing, click on it, click in the active version and download the CER-version:


Next, go back to your app registration, click on “Certificates & secrets” and upload your certificate file:


You should see that the thumbprint listed is the same as the certificate in the KeyVault. Now, let’s create our Azure Function that we will use.

Give it a name, select PowerShell and create:

When the function app (or App Service) has been created, go to “Identity” and enable Managed Service Identity:

Go back to KeyVault and add an access policy allowing the Managed Service Identity (MSI) of the Azure Function the “Get” permission on Certificate and “Sign” permission on “Key”.

Now that our app has the certificate and we have an empty app service that has access to KeyVault, we are ready to complete the Azure Function. Essentially, what the Azure Function needs to do is to:
- Build a JWT header
- Build a JWT payload
- Create a string being Base64(JWT Header) DOT Base64(JWT Payload)
- Create a sha256 hash of the string
- Use MSI to access the sign operation of our certificate
- Sign the sha256 hash with our certificate
- Append .SIGNATURE to our string
- Send it to the Azure AD token endpoint
Start by creation a new function in our App Service:

And here is the sample code for you:
using namespace System.Net

# Input bindings are passed in via param block.
param($Request, $TriggerMetadata)

Write-Host ("MSI_ENDPOINT:" + $env:MSI_ENDPOINT)
Write-Host ("MSI_SECRET:" + $env:MSI_SECRET)

# The name of our KeyVault
$vault = "certbasedauthblogpost"

# The thumbprint, name and id of our certificate (thumbprint can be fetched based on the other two, but laziness is gold)
$certificateid = "cfb75a1d58664b6aa83107f3efd2e8b6"
$certificatename = "certbasedauthblogpost"
$thumbprint = "D9739AAD2C53FB932381E533A7286439445B9C32"

# ClientID and TenantID of that app we want to authenticate as towards Azure AD
$clientid = "ac9a7bd5-30cf-42f2-94b3-5db833a60302"
$tenantid = "937a3b05-1264-406f-ade1-3f4a42d4e26f"

# Endpoint for getting vault access token
$vaultTokenURI = 'https://vault.azure.net&api-version=2017-09-01'

# Endpoint of our sign request
$vaultKeyUri = "https://$vault.vault.azure.net/keys/$certificatename/$certificateid/sign?api-version=7.0"

# Certificate endpoint
$vaultCertUri = "https://$vault.vault.azure.net/certificates/$certificatename/$($certificateid)?api-version=7.0"

# Get KeyVault access token
$authenticationResult = Invoke-RestMethod -Method Get -Headers @{Secret = $env:MSI_SECRET} -Uri ($env:MSI_ENDPOINT +'?resource=' +$vaultTokenURI)
$headers = @{Authorization = "Bearer $($authenticationResult.access_token)"}

#
# Here starts the actual certificate authentication towards Azure AD:
#

# Get our certificate
$certificate = Invoke-RestMethod -Method GET -Uri $vaultCertUri -ContentType 'application/json' -Headers $headers

# Build our JWT header
$JWTHeader = @{
  "alg" = "RS256"          # Always this value
  "typ" = "JWT"            # This is a JWT
  "x5t" = $certificate.x5t # The certificate x5t gotten from keyvault
} | ConvertTo-Json

# Build our JWT Payload
$JWTPayload = @{
  "aud" = "https://login.microsoftonline.com/$tenantid/oauth2/token"
  "exp" = [Math]::Floor([decimal](Get-Date(Get-Date).AddHours(1).ToUniversalTime()-uformat "%s")) # Unixtime + 3600
  "iss" = $clientid
  "jti" = [guid]::NewGuid().ToString() # Random GUID
  "nbf" = [Math]::Floor([decimal](Get-Date(Get-Date).ToUniversalTime()-uformat "%s")) # Unixtime
  "sub" = $clientid
} | ConvertTo-Json

# Create JWT without signature (base64 of header DOT base64 of payload)
function ConvertTo-Base64($String) {[System.Convert]::ToBase64String(([System.Text.Encoding]::UTF8.GetBytes($String)))}
$JWTWithoutSignature = (ConvertTo-Base64 $JWTHeader) + "." + (ConvertTo-Base64 $JWTPayload)

# Hash it with SHA-256:
$hasher = [System.Security.Cryptography.HashAlgorithm]::Create('sha256')
$hash = $hasher.ComputeHash([System.Text.Encoding]::UTF8.GetBytes($JWTWithoutSignature))

# Use KeyVault to sign our hash using RS256 (matching jwt header)
$signature = Invoke-RestMethod -Method POST -Uri $vaultKeyUri -ContentType 'application/json' -Headers $headers -Body (@{
    alg = "RS256"
    value = [Convert]::ToBase64String($hash)
} | ConvertTo-Json)

# Create full JWT with the signature we got from KeyVault (just append .SIGNATURE)
$JWT = $JWTWithoutSignature + "." + $signature.value
# Run this to check the JWT manually: start "https://jwt.ms/#id_token=$JWT"

# Exchange the JWT for an access token by sending client_assertion
$token = Invoke-RestMethod "https://login.microsoftonline.com/$tenantid/oauth2/v2.0/token" -ContentType "application/x-www-form-urlencoded" -Body "client_id=$clientid&scope=https://graph.microsoft.com/.default&grant_type=client_credentials&client_assertion_type=urn:ietf:params:oauth:client-assertion-type:jwt-bearer&client_assertion=$JWT" -Method POST

# Simply return the access token through HTTP (don't to this in production, please!)
Push-OutputBinding -Name Response -Value ([HttpResponseContext]@{
    StatusCode = [HttpStatusCode]::OK
    Body = $token
})
There are a few things that require some explanation:
- Line 31 uses the MSI in order to get an access token that can be used to access the REST API of KeyVault, which again can be used to sign the JWT
- Lines 42-46 is our JWT Header, which is almost static expect for x5t, which represents which certificate our signature stems from (which again must be registered on our app)
- Lines 49-56 is our Payload, which can seem weird:
| Key | Long name | Description |
| aud | Audience | The audience the JWT is intended for, i.e. the token endpoint of our tenant |
| exp | Expiry | Time when the JWT becomes invalid |
| iss | Issuer | Issuer of the cert, which is ourselves, so our client id |
| jti | JWT ID | Random GUID |
| nbf | Not before | Time when the JWT becomes valid |
| sub | Subject | The subject of the cert, which is ourselves, so our client id |
- Then these two dictionaries are base64’ed and concatinated with a dot between them – base64(header).base64(payload)
- Then a sha256 of this is calculated, and a base64 of this is then signed using KeyVault, which will return the signature, which again will be appended to our JWT to complete the JWT. So essentially as pseudo-code:
JWTWithoutSignature = BASE64(header).BASE64(payload)
JWT = JWTWithoutSignature.SIGNATURE(JWTWithoutSignature)- Then when the JWT has been created, it is sent to the token endpoint of Azure AD, in order to actually get an access token for our app. There are a few parameters that are required for this to work:
| Parameter | Value |
| client_id | The app id / client id of our applicaiton |
| scope | If you grant manually in the portal, simply use https://graph.microsoft.com/.default, which will use whatever configured in the portal |
| grant_type | “client_credentials”, which is the kind of grant we are using this time (no username, password etc.) |
| client_assertion_type | “urn:ietf:params:oauth:client-assertion-type:jwt-bearer”, simply an explanation of what we are sending to identity ourselves |
| client_assertion | The actual JWT |
And now, if I simply run the function:

You can see that it actually returns the access token (which is not good practice!) 🙂

Marius,
I am really struggling trying to protect an AAD App Registration in the manner that you described here. Well, this blog is at least the closest thing that I can find to what I am trying to do that is. A couple of things that I just don’t understand, the cert that is uploaded to the app, I see no way to create that cert using my internal MS PKI. Everyone seems to point to using a self-signed certificate but is that really secure? I would expect to be able to upload my root cert, subordinate CA cert and a cert for the service and then each of my devices already have client auth certs but this doesn’t seem to be how this works. Next, on the AAD App Registrations there is no identity tab as you show in your example here for the logic app. Does that mean that AAD App Registrations do not support using managed identities?
Correct, that is not how it works. There is no PKI functionality, with CRLs and stuff for app certificates currently.
App registrations is essentially the opposite of managed service identities (MSI). App reg is the definition and service principal is the instance of that definition. In MSI, Microsoft handles the app-reg level for you, and your service only exists as a service principal.
Is this correct ? Microsoft says “Self-signed certificates are not trusted by default and they can be difficult to maintain. Also, they may use outdated hash and cipher suites that may not be strong. For better security, purchase a certificate signed by a well-known certificate authority.” (https://learn.microsoft.com/en-us/azure/active-directory/develop/howto-create-self-signed-certificate) So they recommend to use a ca authority (CBA supports onprem pki) but you can not build it ? Can you untie the knot in my head?
This has been a great article. I have done the Function App/Key Vault/App Registration on my end and been able to get the access/bearer token.
I have also created another backend App Registration that represents the backend API, integrated it to the Client/Front End application and able to call the API from postman, by using secret ID, and value instead of certificate.
And I can do a HTTP Post to the Function APP URL from Postman on my PC and get the access/bearer token just by using the Function Key.
My question is; how an external party/client would now use this Certificate based authentication/authorization integration to access the API. I am a bit confused on how to do the certificate part with 3rd party, like use self-signed, CA, what to share etc. Please help.