Up until now there has been no good way to have a managed service identity on tenant A granted access to resources or graph scopes in tenant B. Finally there is a way to achieve this!
There is a little caveat though, and that is that you will still need another app registration, but by using this new preview, we no longer need client secrets or certificates. Let’s have a look at how this works!
Let me explain what we are going to configure in this blog post:
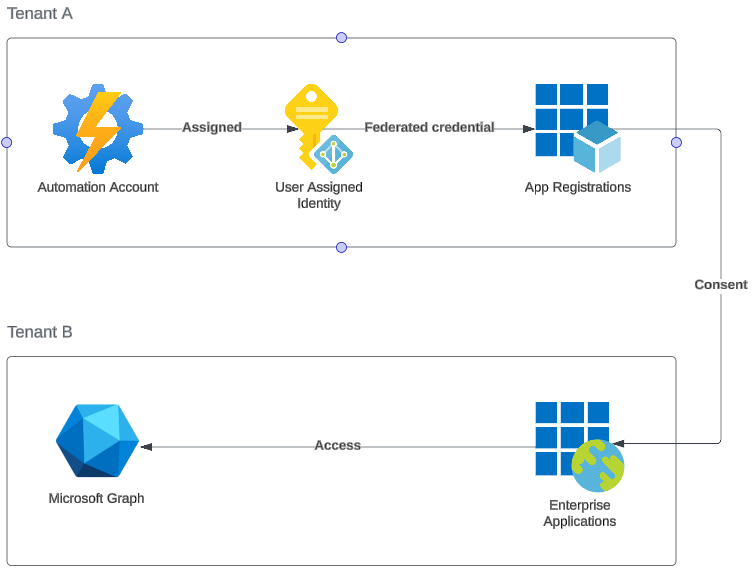
- Automation account has a user assigned identity (it could also be system assigned)
- The user assigned identity is used as a federated credential to a multi tenant app registration (still in tenant A)
- Tenant B has consented to the app registration (we will be using the user.read.all scope)
- The enterprise application created through the consent process is used to access resources in tenant B
So, as you can see, there are a few components involved, but let’s go!
Creating the user assigned identity
Let’s start by creating a user assigned identity:

After creating it, we need the object id for later:

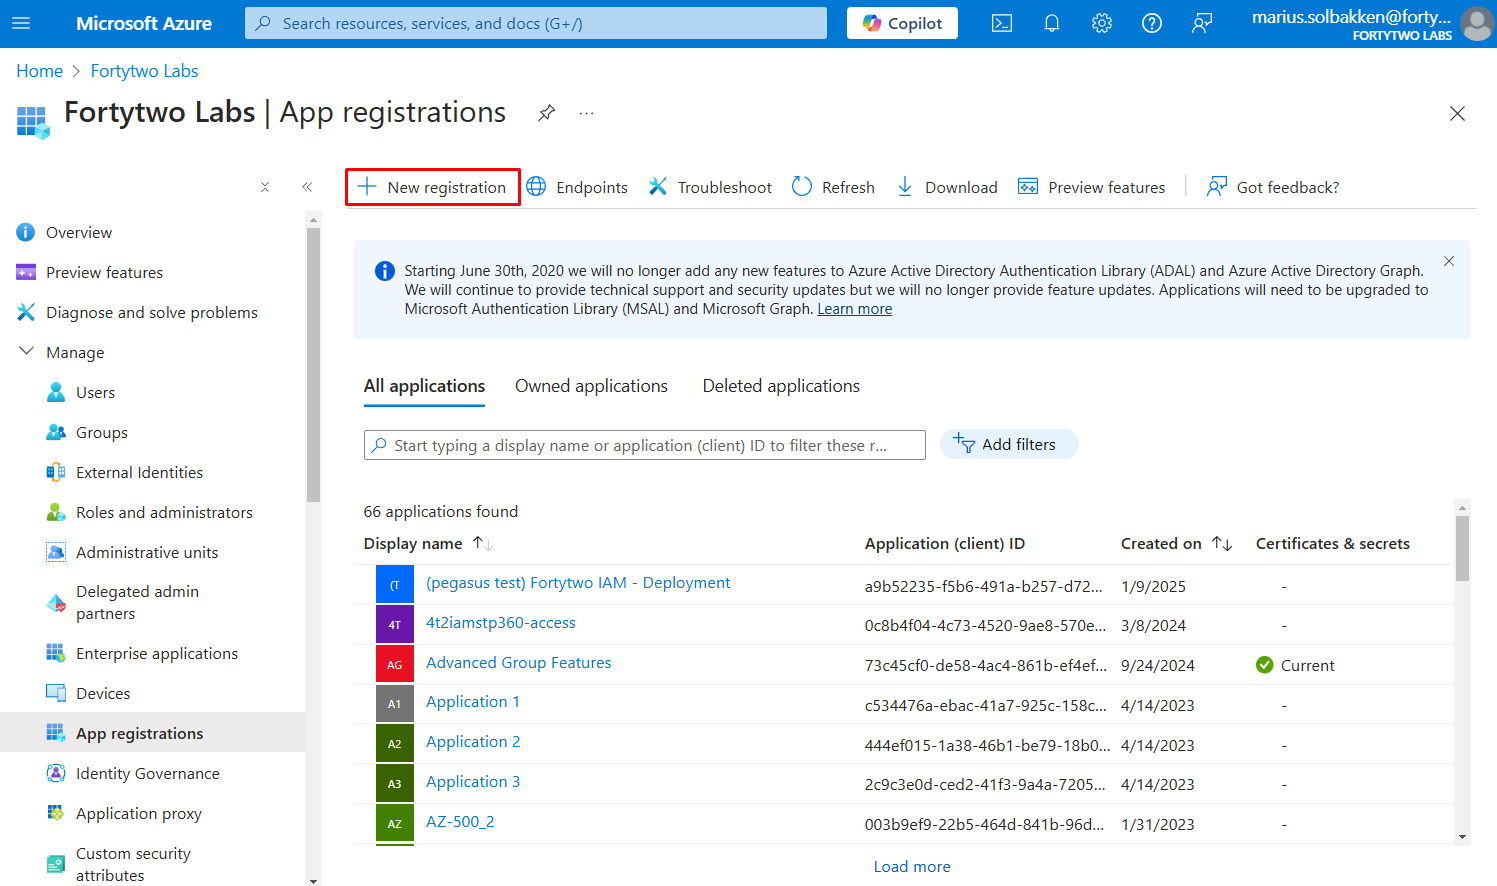
Creating the app registration
Now we’ll create our multi tenant app registration. This is what tenant B will consent to.
Go to Entra ID > App registrations and click + New registration
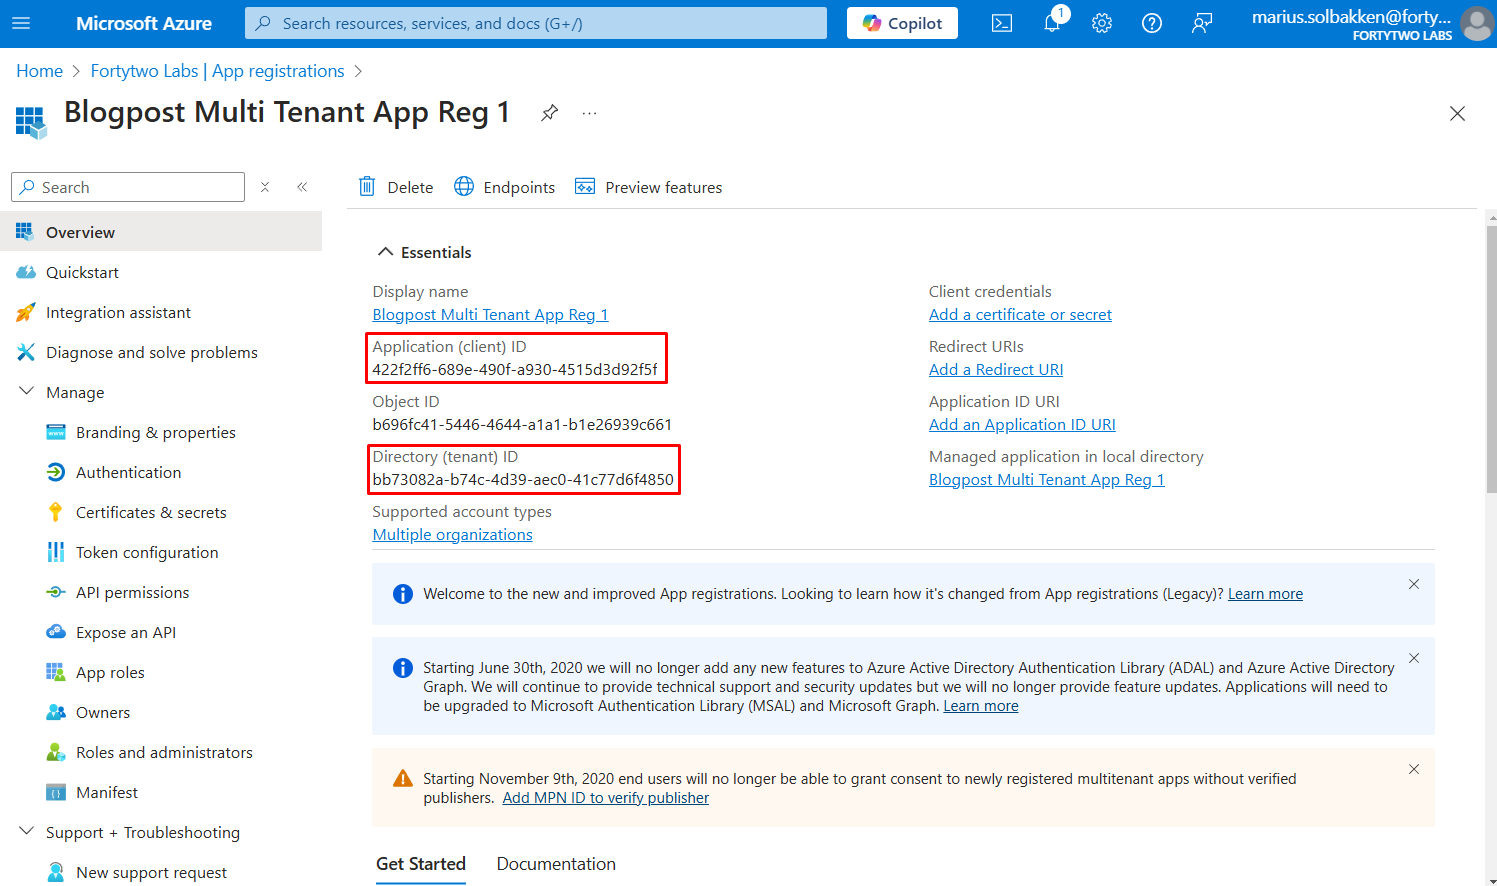
Give it a proper name and select Accounts in any organizational directory (Any Microsoft Entra ID tenant – Multitenant). We do not need any redirect uris.

Note down the tenant id and the client id of the created app registration:
Please note: This is a multi tenant application. We actually do not need the enterprise app created in tenant A at all, and no access to tenant A to be consented. It is just that the UI always created a service principal / enterprise app. If you create the app reg using New-MgApplication this is not created.
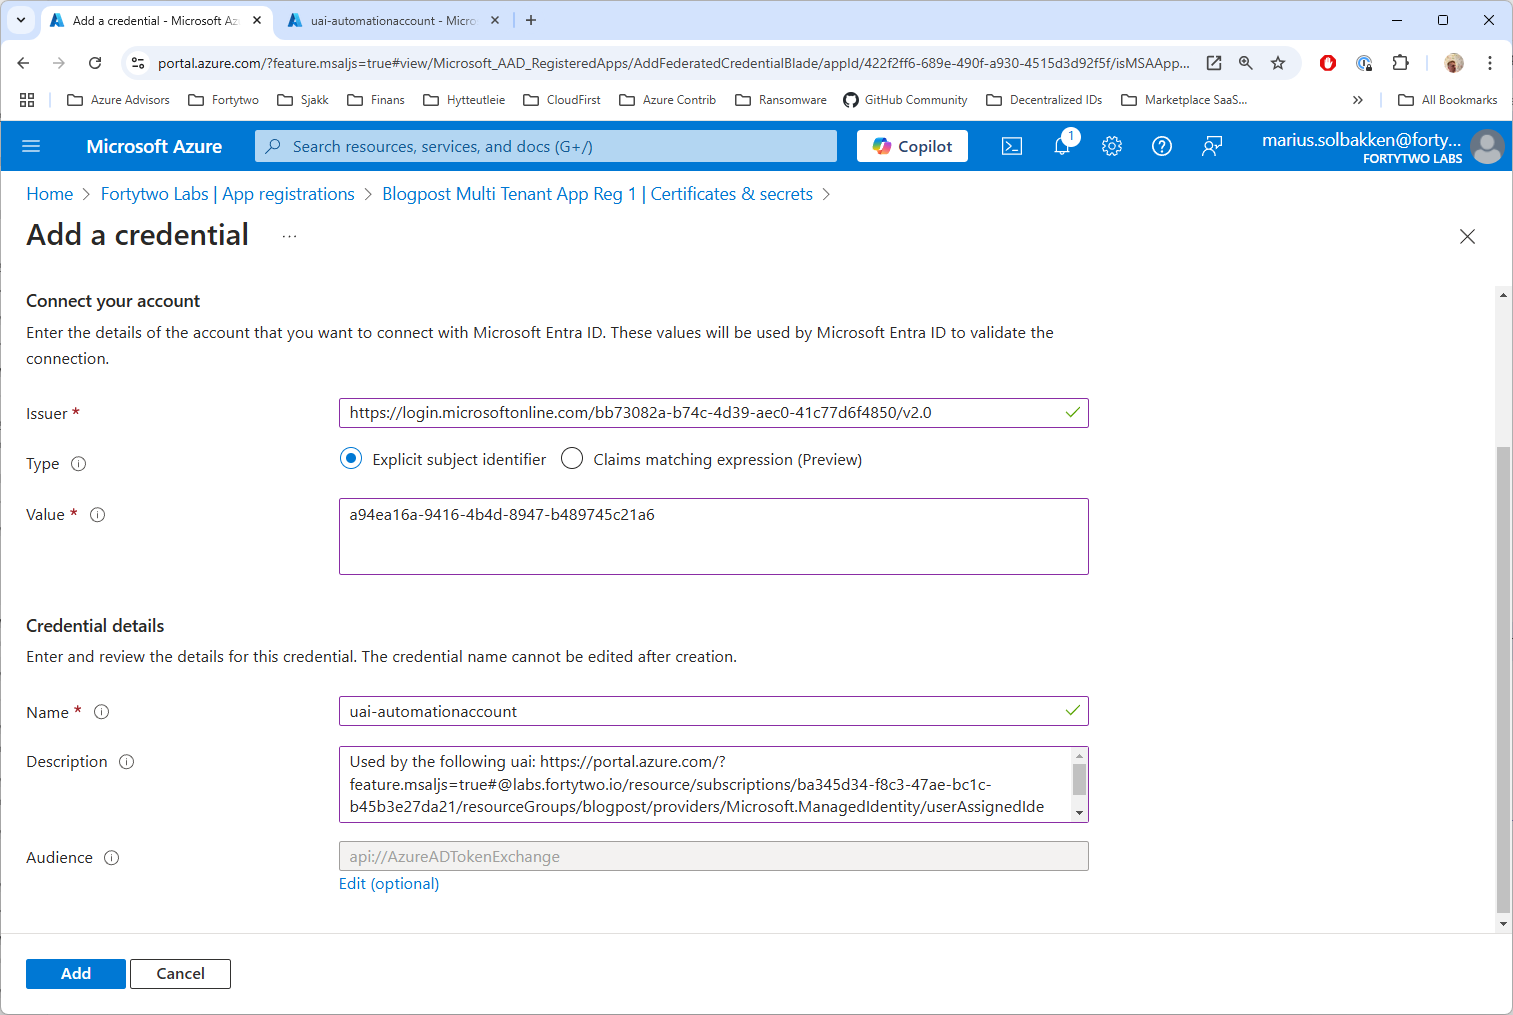
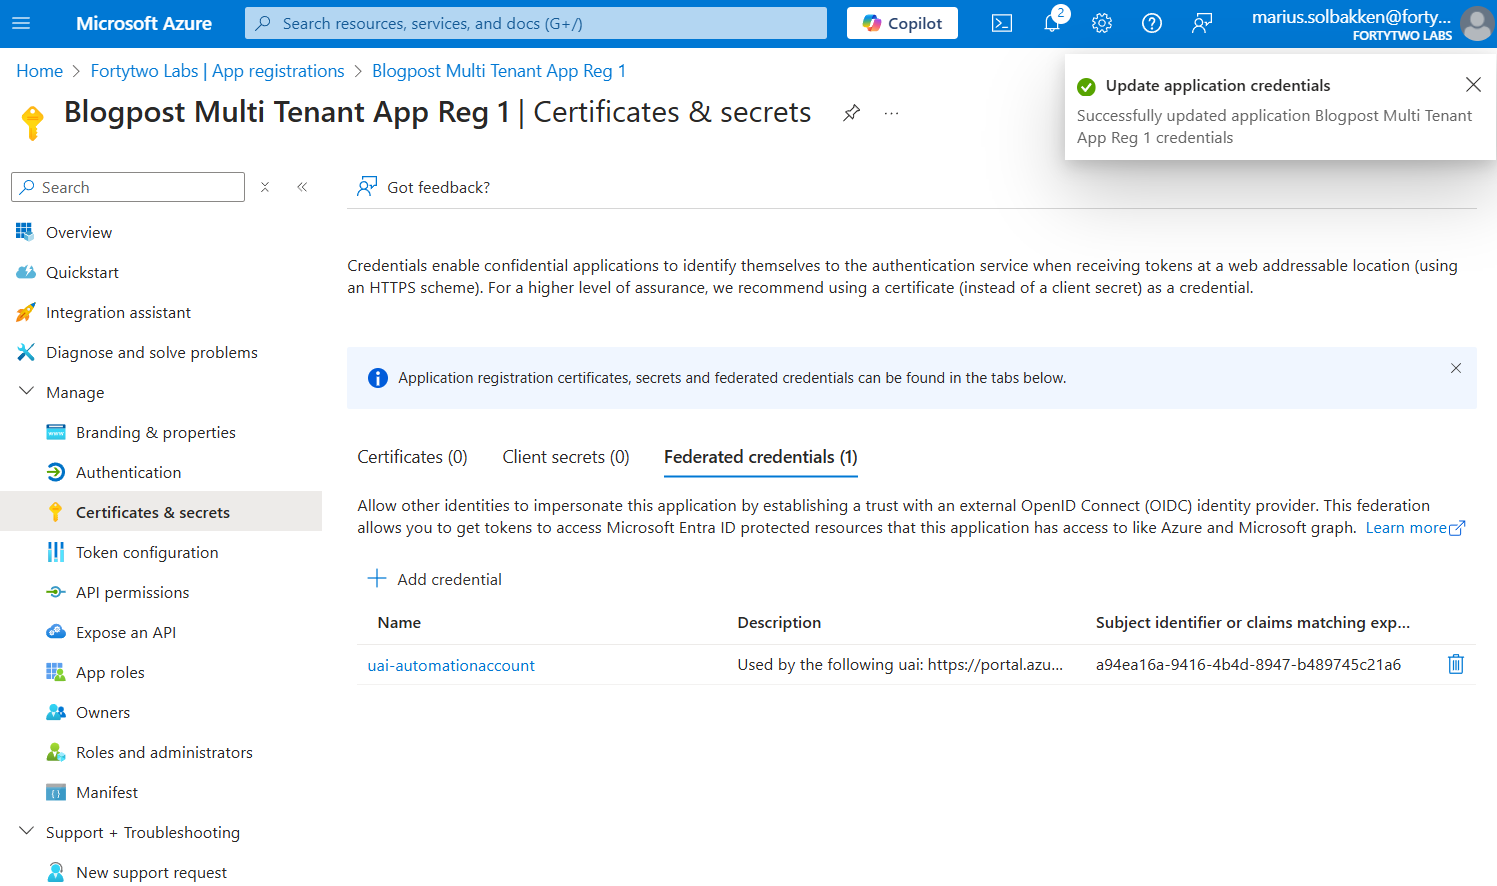
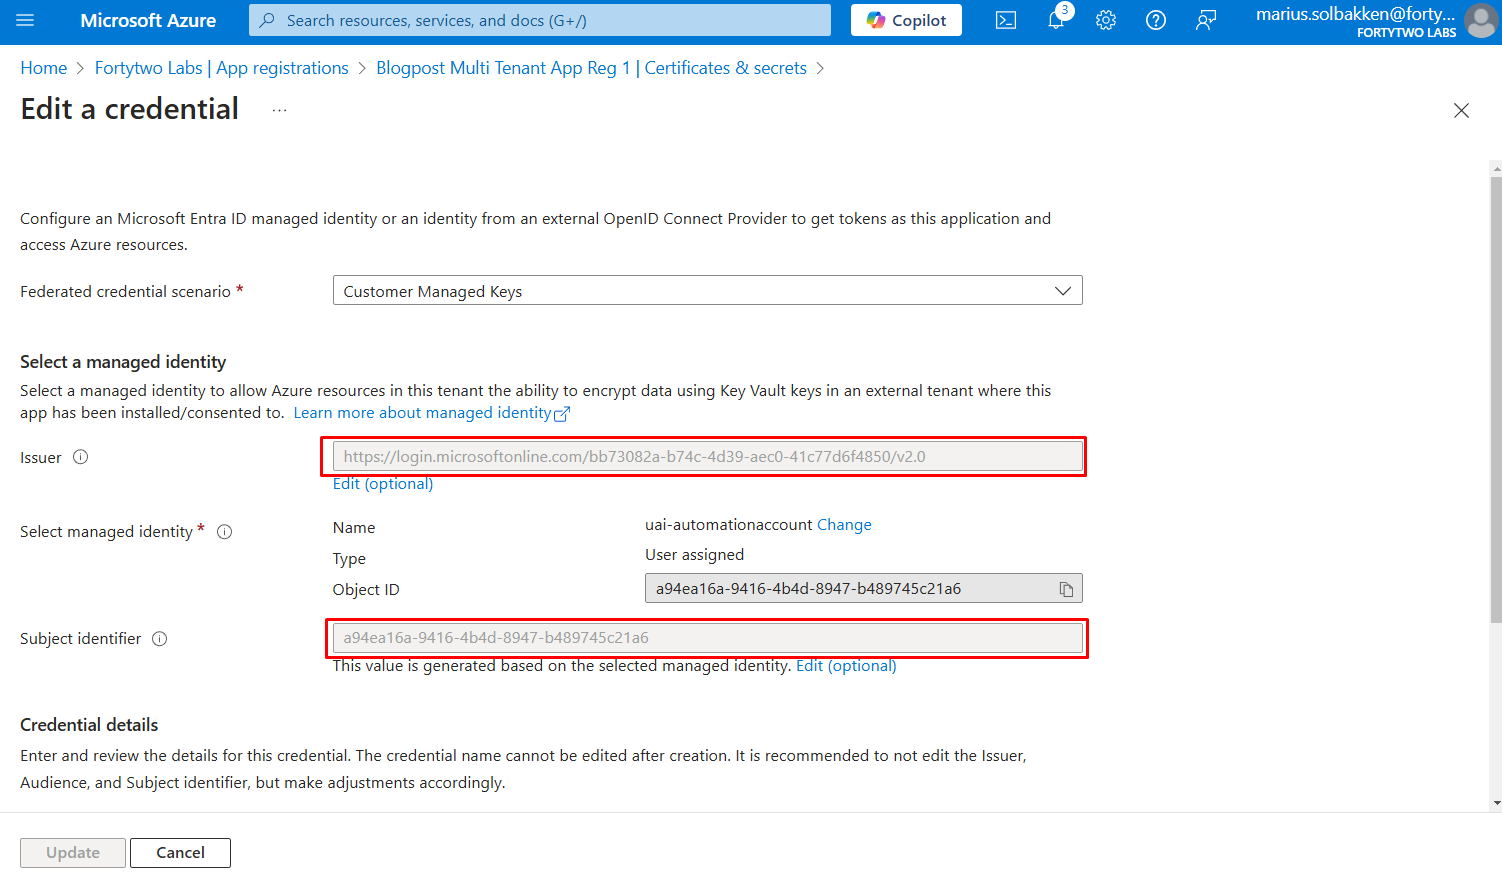
Navigate to Certificates & Secrets > Federated credentials and blick +Add credential:
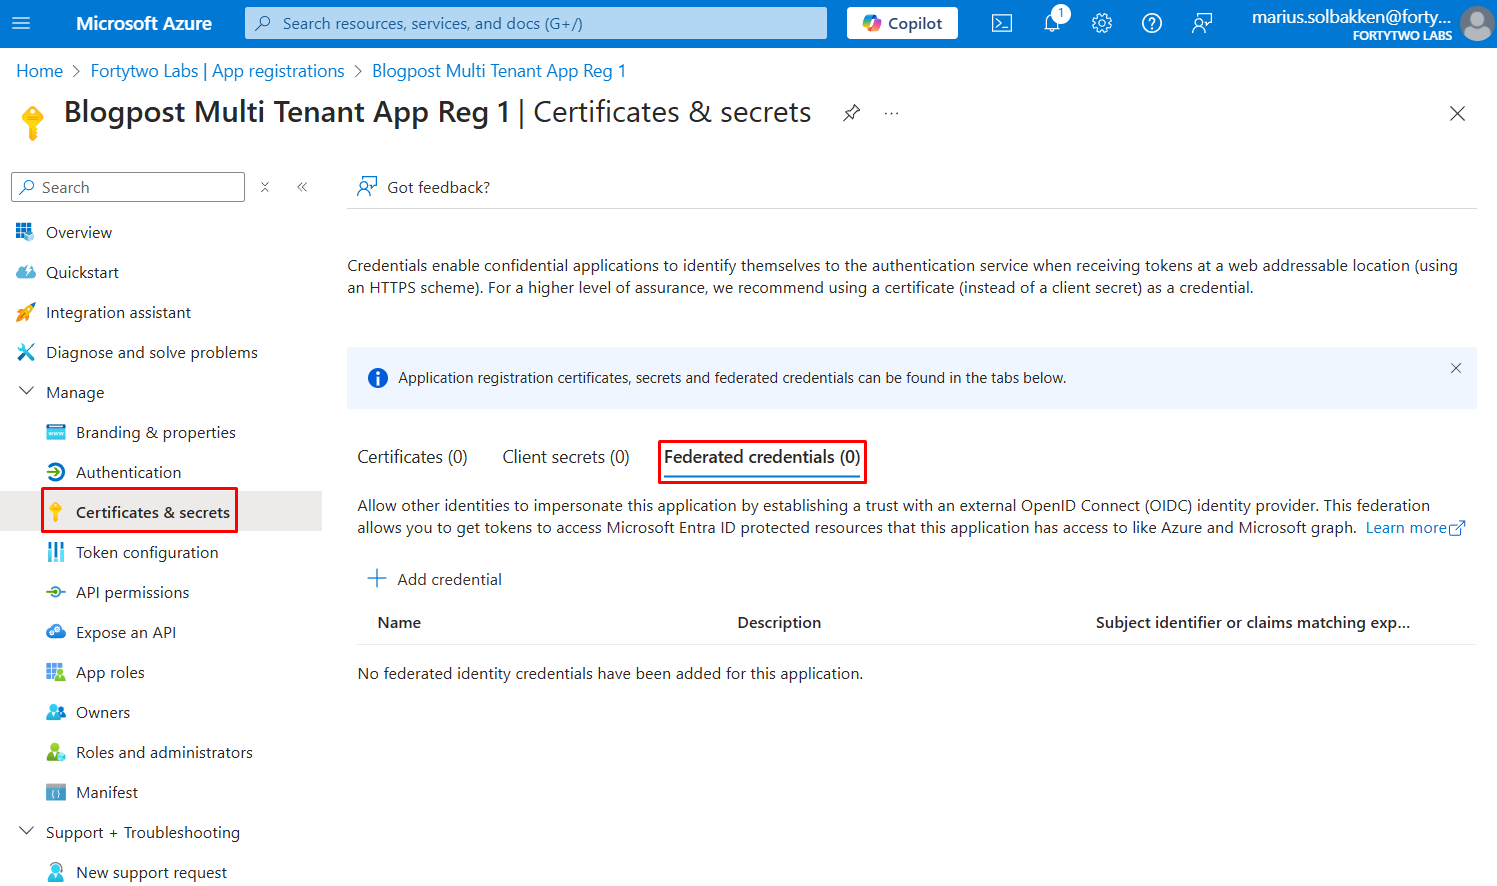
Choose the scenario Other issuer and use https://login.microsoftonline.com/{tenant}/v2.0 as the issuer (remember to replace the tenant with the tenant id) and use the object id of the user assigned identity as the value:
If you are in any “other” Microsoft Cloud, find your audience values here, or otherwise leave it default.
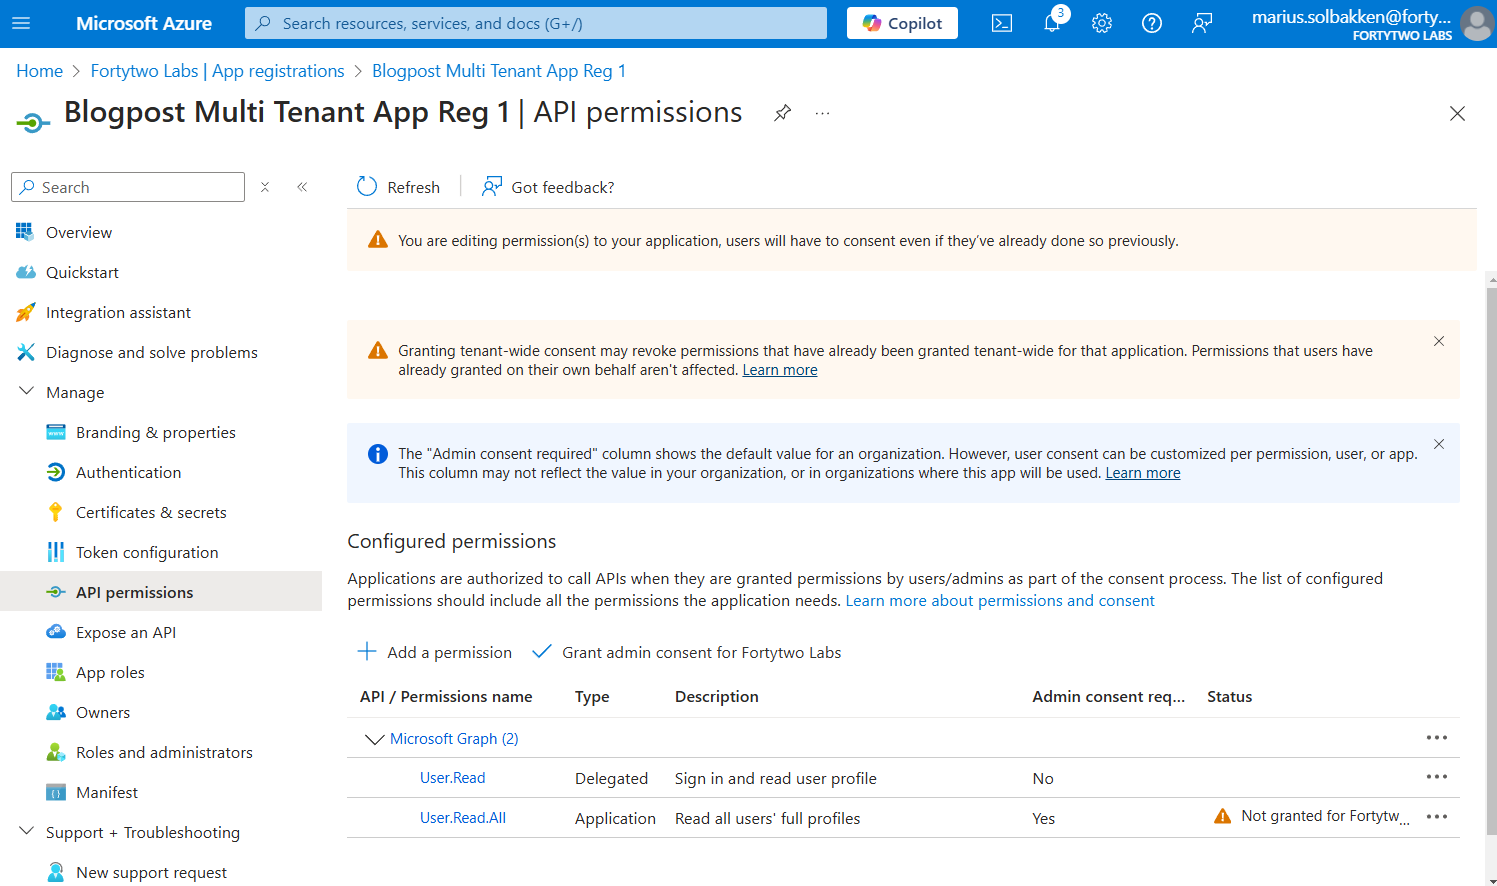
Next, find API permissions, and add Microsoft Graph User.Read.All scope. Leave it unconsented, as you are now in tenant A, where we do not need any permissions at all:
Consenting in tenant B
Now that the app registration has been created, go to tenant B and consent by navigating to this url: https://login.microsoftonline.com/common/adminConsent?client_id={client id of the app registration}
You should be seeing something like this, where our app requests access to read all users’ full profiles:

After accepting, ignore the error message AADSTS500113: No reply address is registered for the application. This is normal for this type of application.
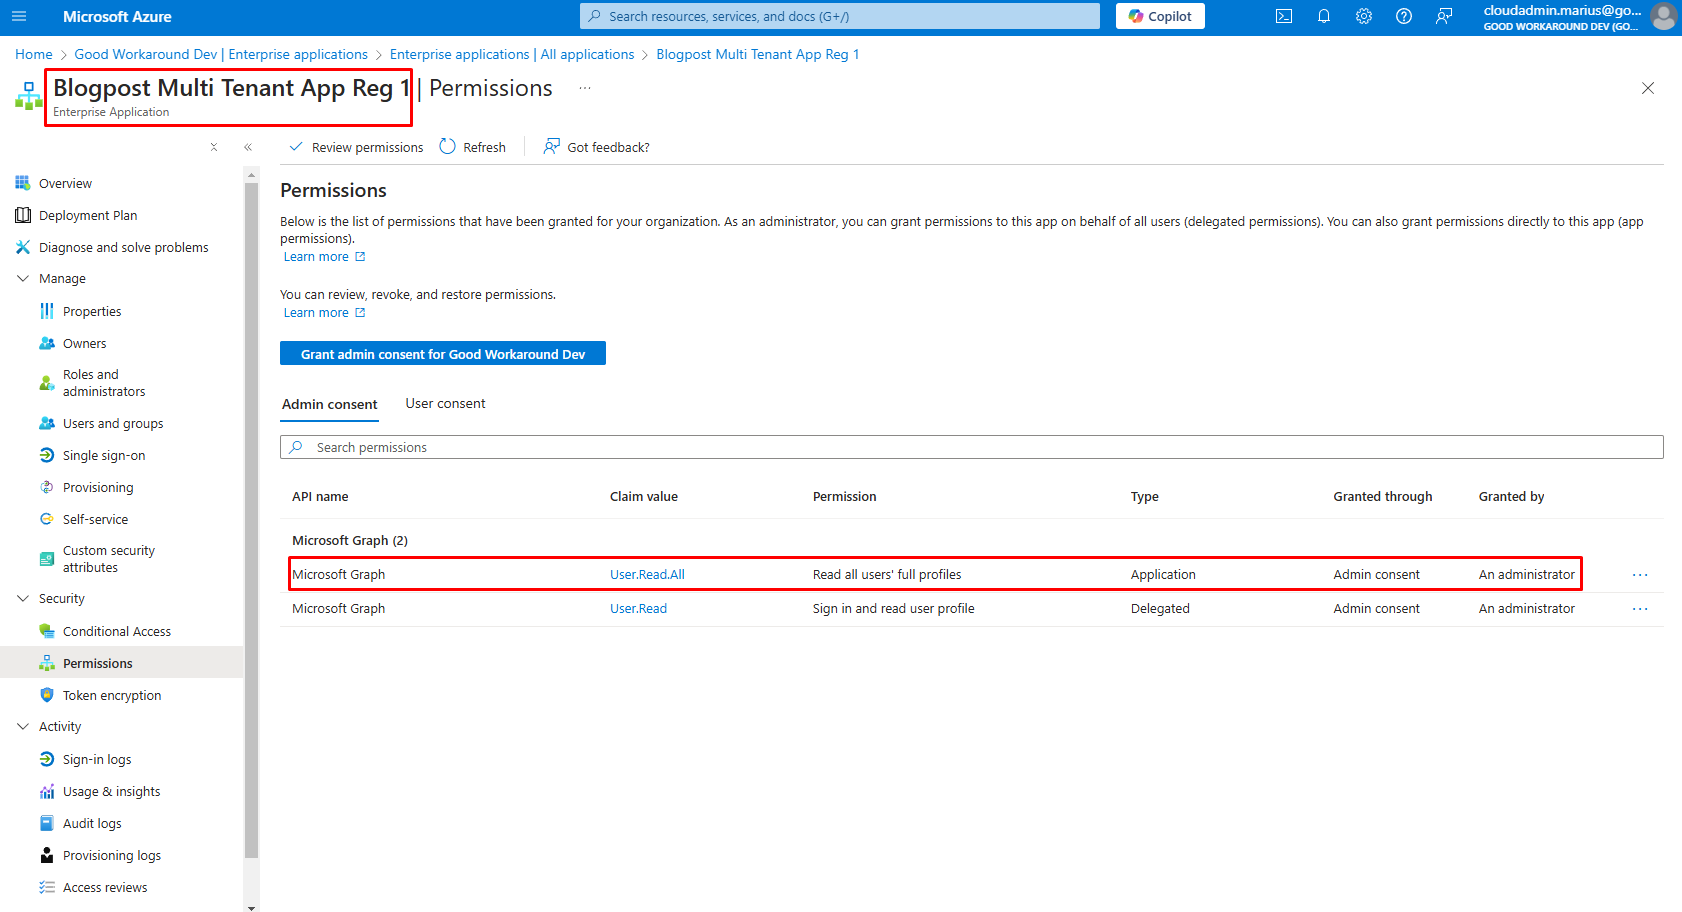
In tenant B you will now find the following enterprise app, but you will find no app registration for this application:
Using the identity in an automation account
We have now created all required resources except for the automation account that will be using the identity. You could also use a virtual machine, logic app, function app, web site or any other service that supports managed service identities for this purpose.
During the creation process of the automation account, we specify the user assigned identity we created under the Advanced tab:


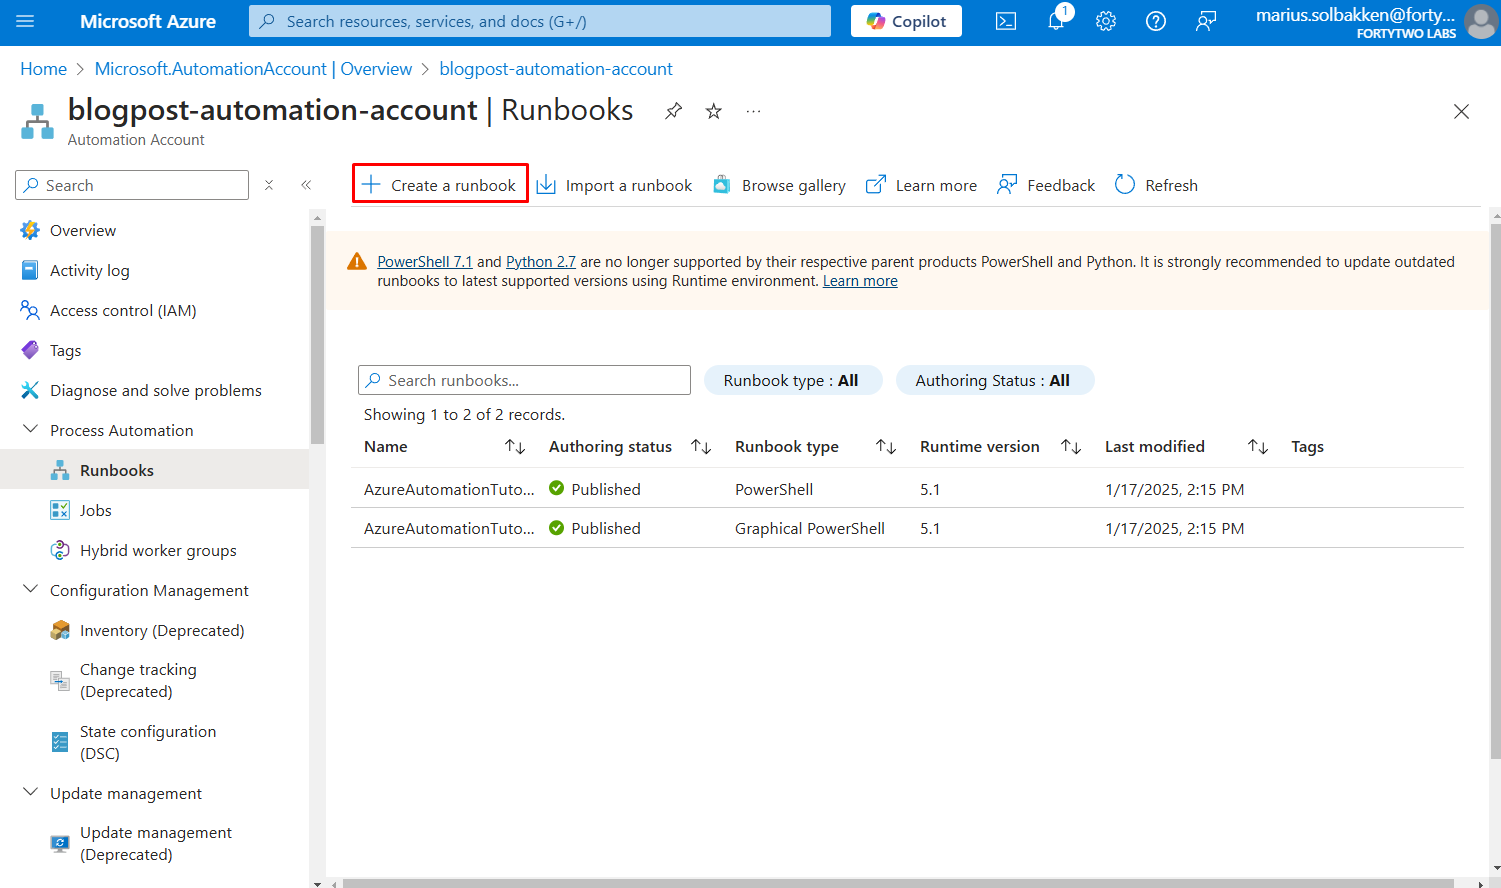
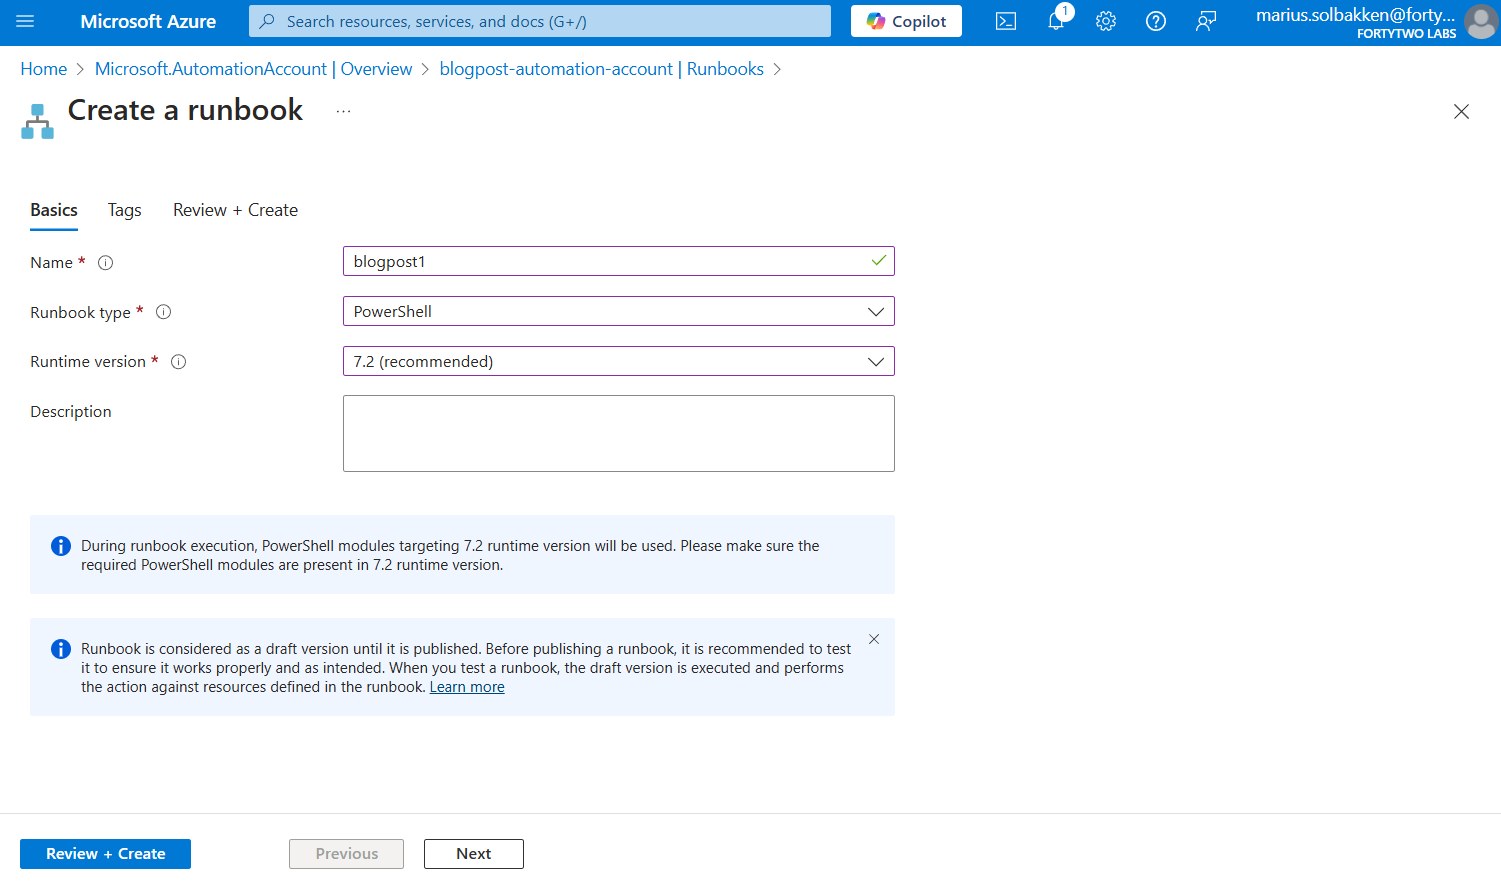
After creating the automation account, let’s create a runbook using PowerShell 7.2:
Coding the runbook
The runbook is actually pretty simple, split into four steps:
- Set the variables using the values we noted down earlier
- Get an access token for api://AzureADTokenExchange using the managed service identity
- Use the access token from step 1 to authenticate as the app in tenant B
- Get users from tenant B
#region Step 1 - Set variables
# The client id of the user assigned identity we created
$userAssignedIdentityClientId = "ffdf511c-1c76-4107-bf29-4ab7cbfb887e"
# The client id of the app registration we created
$appRegistrationClientId = "422f2ff6-689e-490f-a930-4515d3d92f5f"
# The tenant id of tenant A
$appRegistrationTenantId = "bb73082a-b74c-4d39-aec0-41c77d6f4850"
# Tenant id of tenant B
$targetTenantId = "237098ae-0798-4cf9-a3a5-208374d2dcfd"
#endregion
#region Step 2 - Authenticate as the user assigned identity
$accessToken = Invoke-RestMethod $env:IDENTITY_ENDPOINT -Method 'POST' -Headers @{
'Metadata' = 'true'
'X-IDENTITY-HEADER' = $env:IDENTITY_HEADER
} -ContentType 'application/x-www-form-urlencoded' -Body @{
'resource' = 'api://AzureADTokenExchange'
'client_id' = $userAssignedIdentityClientId
}
if(-not $accessToken.access_token) {
throw "Failed to acquire access token"
} else {
Write-Output "Successfully acquired access token for user assigned identity"
}
#endregion
#region Step 3 - Exchange the access token from step 2 for a token in the target tenant using the app registration
$accessTokenForTenantB = Invoke-RestMethod "https://login.microsoftonline.com/$targetTenantId/oauth2/v2.0/token" -Method 'POST' -Body @{
client_id = $appRegistrationClientId
scope = 'https://graph.microsoft.com/.default'
grant_type = "client_credentials"
client_assertion_type = "urn:ietf:params:oauth:client-assertion-type:jwt-bearer"
client_assertion = $accessToken.access_token
}
if(-not $accessTokenForTenantB.access_token) {
throw "Failed to acquire access token for tenant B"
} else {
Write-Output "Successfully acquired access token for tenant B"
}
#endregion
#region Step 4 - Call the Microsoft Graph API using the token from step 3
$r = Invoke-RestMethod -Uri "https://graph.microsoft.com/v1.0/users?`$top=999" -Headers @{
Authorization = "Bearer $($accessTokenForTenantB.access_token)"
} | Select-Object -Exp Value | Measure-Object
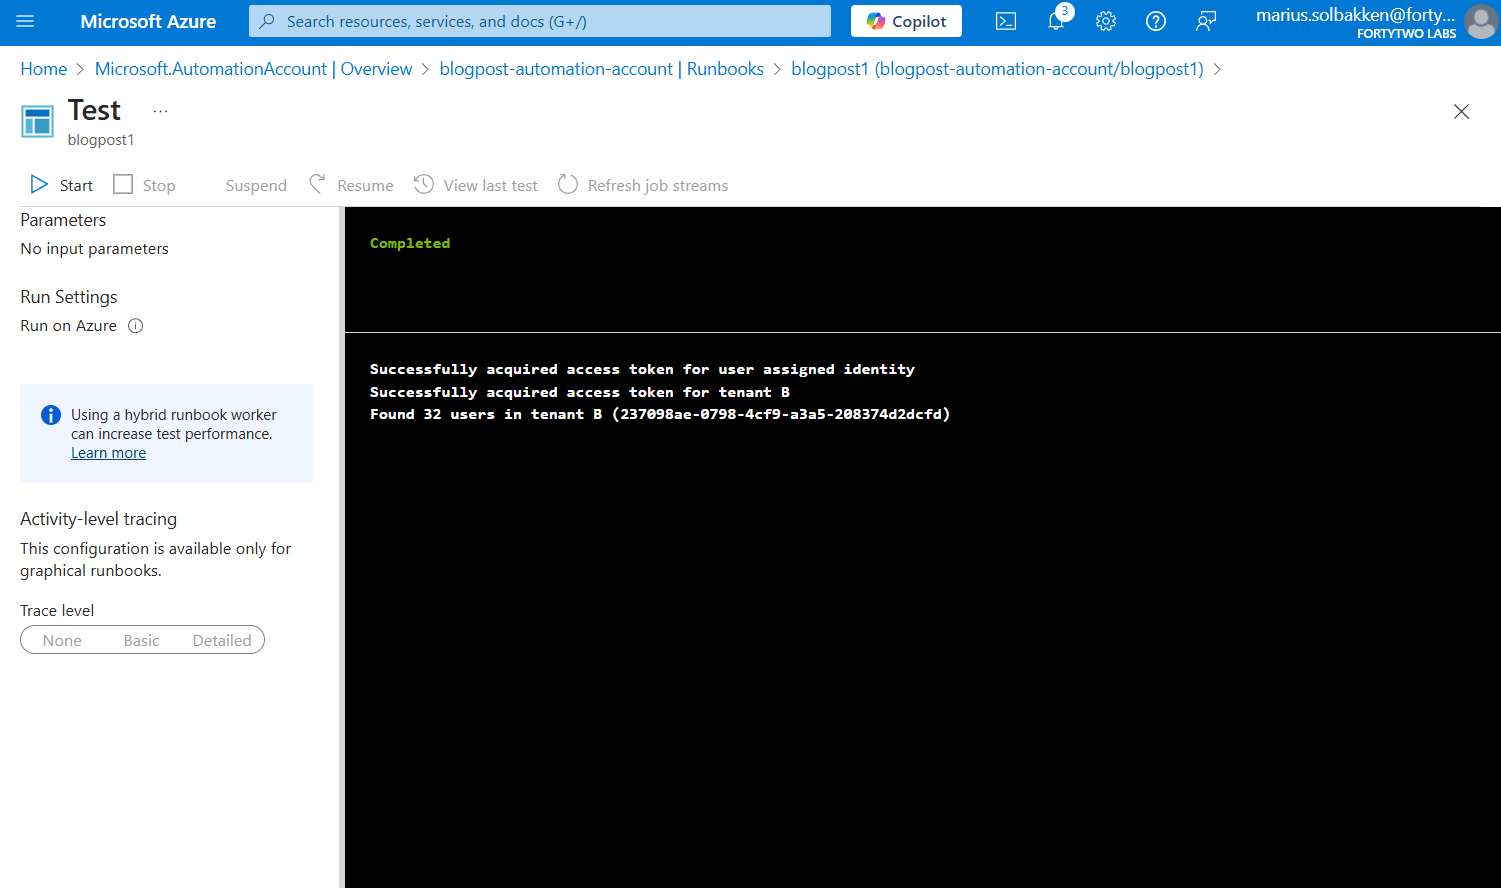
Write-Output "Found $($r.Count) users in tenant B ($targetTenantId)"
#endregion
Running the runbook should look something like the following:
If we create it down a bit more in detail, on the access token level, we can see that the access token that we receive in step 2 is issued with the subject field set to the object id of the user assigned identity, and signed by tenant A:
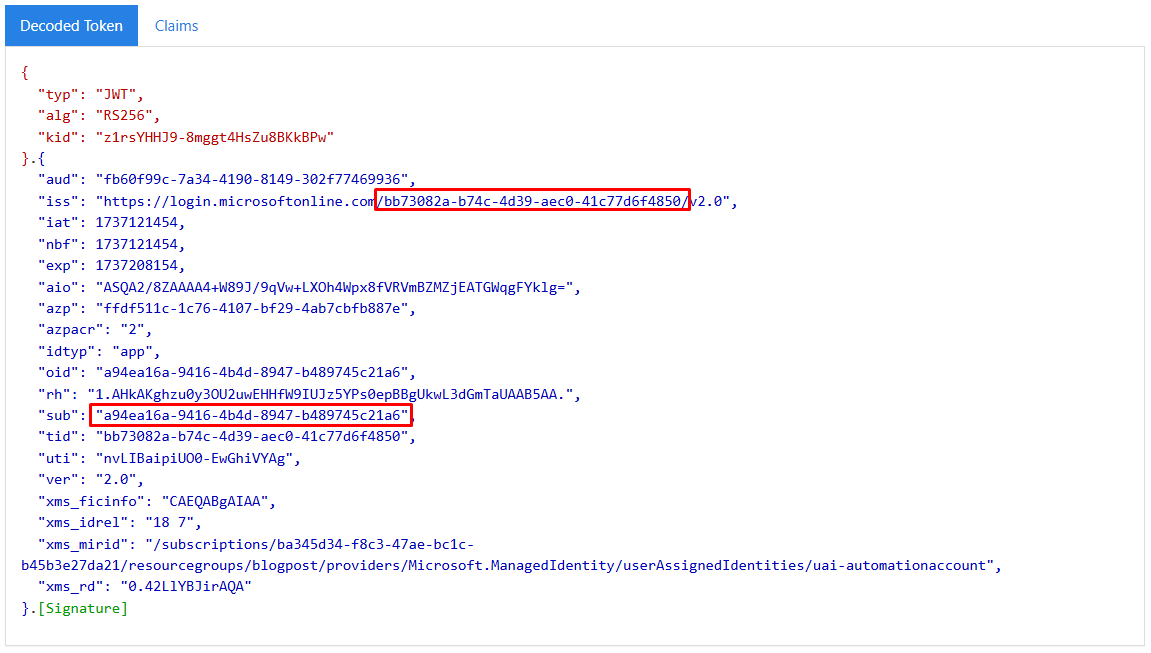
This matches the federated credential that we added to the app registration:
However, looking at the access token that we get in step 3, the issuer and roles and everything is different:

This is actually signed by tenant B, since we have the consent.
Using this approach we can now easily access resources cross tenant without any need for any secrets anywhere. Awesome!
Anyway, hope that helps someone!

Hello Marius, many thanks for your wonderful article. Do you know if the same approach would work with Azure DevOps? Regards, Liliya
Sort of yes. It works a bit differently, but yes. I’ll post a new blog post on this soon.
Would also like to register my interest for this 👀 Thanks for your insight!
Hi Lilya
I am trying to set up exact above approach get token from another tenant. Do you know what’s the value of $env:IDENTITY_ENDPOINT and $env:IDENTITY_HEADERS ? Please share
Hi Marius
I am trying to set up exact above approach get token from another tenant. Do you know what’s the value of $env:IDENTITY_ENDPOINT and $env:IDENTITY_HEADERS ? Please share
Hi Marius,
I followed the above instructions but I am getting the folllowing error while running the script.
Invoke-RestMethod: Line | 47 | $r = Invoke-RestMethod -Uri “https://graph.microsoft.com/v1.0/users?` … | ~~~~~~~~~~~~~~~~~~~~~~~~~~~~~~~~~~~~~~~~~~~~~~~~~~~~~~~~~~~~~~~~ | {“error”:{“code”:”Authorization_RequestDenied”,”message”:”Insufficient privileges to complete the operation.”,”innerError”:{“date”:”2025-05-31T06:36:11″,”request-id”:”5e4b67c0-ec39-0000-0000-1d0908a71046″,”client-request-id”:”5e4b67c0-ec39-4000-0000-1d0908a71046″}}}
Can you please help? thanks
Hi Marius.
Thank you for at great article.
Do you by any chance know if this approach will work with Consumtion Logic Apps?
Thanks.
Hi, unfortunately probably no. LogicApps does not (as far as I know) allow you to get a token for api://AzureADTokenExchange, which means that the second step (getting a token for an app using a federated credential) does not work. Whether it is consumption based or not does not matter here.
Thank you for the quick response Marius.
I was afraid this would be the answer. I have tried so many scenarios without luck 😦
My company has a lot if Consumption Logic Apps needing to access resources cross-tenant. Unfortunately, we now have to re-thing this approach.