Through this blog post I will show how to build a multi tenant Azure AD application, where your customers can control role assignments through regular Azure AD app roles that they again can manage through Azure AD Entitlement Management, Access Reviews and dynamically assigned through dynamic groups.
The point of doing this kind of implementation is that you can externalize role management to the customer’s Azure AD, so that the customer can use all the great Azure AD features that exist for governing access, rather than needing to have yet another interface (your application) for assigning roles.
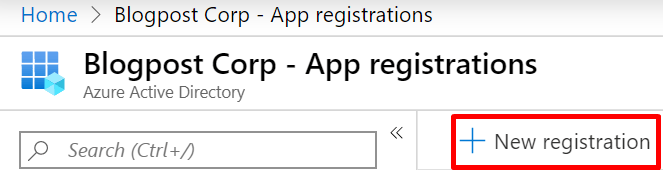
Let’s start by creating a multi tenant application in my Azure AD tenant blogpost.onmicrosoft.com, by going to “App registrations” and clicking “New application”.
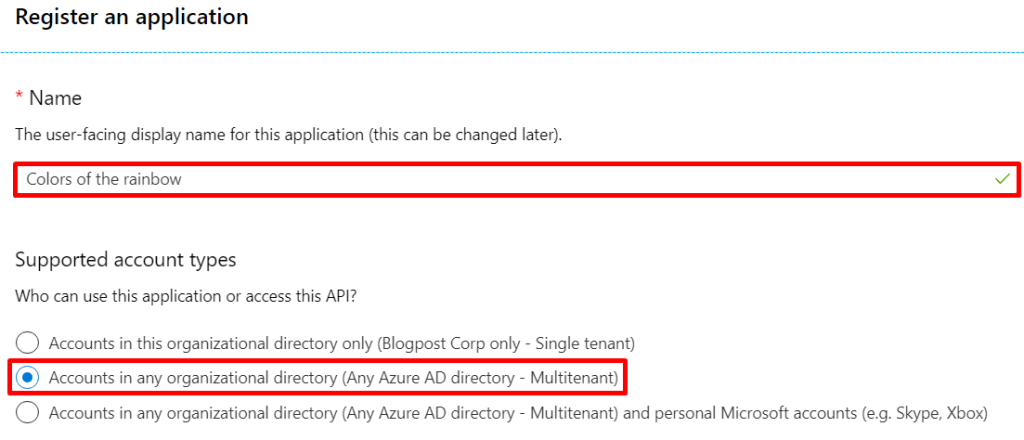
Define a name for the application and select “Accounts in any organizational directory (Any Azure AD directory – Multitenant)”. Add “https://localhost:4000” as redirect uri for now, as we have not built any application yet. When done, click “Register”.
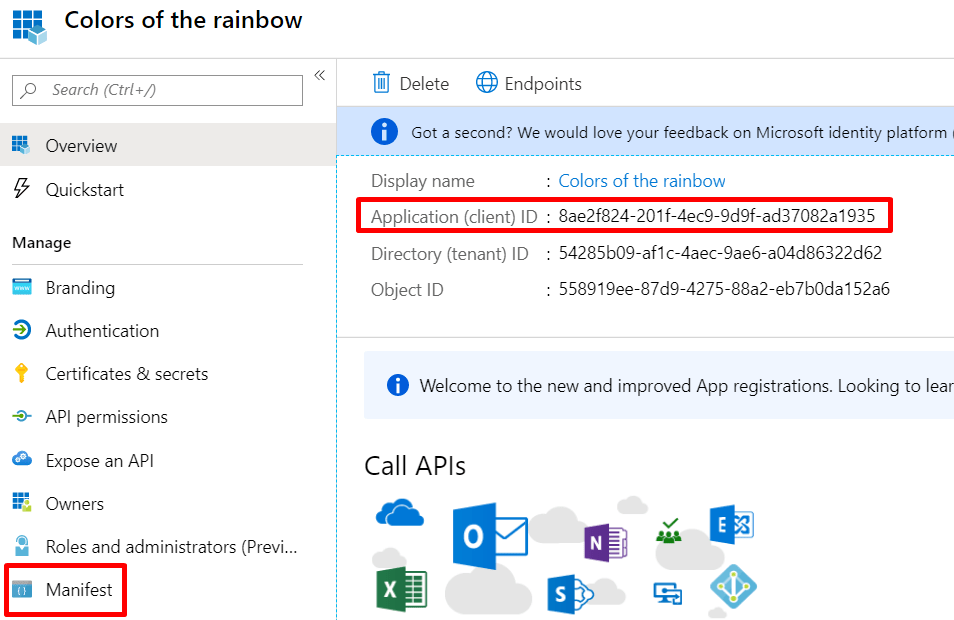
Let’s note down the application / client id 8ae2f824-201f-4ec9-9d9f-ad37082a1935. This will come into play later. Now, click “Manifest”.
You should find an empty array called “appRoles”.
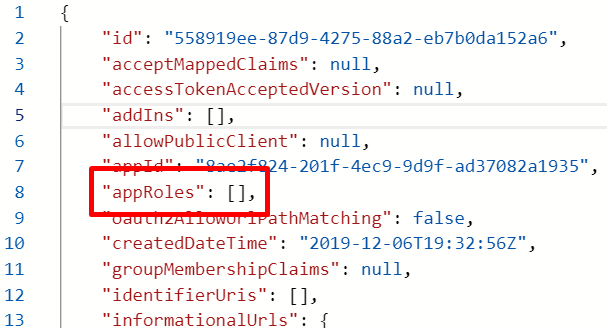
Go ahead and populate this value with the following example values:
"appRoles": [
    {
        "allowedMemberTypes": ["User"],
        "description": "Red",
        "displayName": "Red",
        "id": "d5241f39-888c-4c80-bbc3-c98da794b657",
        "isEnabled": true,
        "lang": null,
        "origin": "Application",
        "value": "red"
    },

    {
        "allowedMemberTypes": ["User"],
        "description": "Orange",
        "displayName": "Orange",
        "id": "ed110181-96e8-4e83-a16a-88cd156a4977",
        "isEnabled": true,
        "lang": null,
        "origin": "Application",
        "value": "orange"
    },

    {
        "allowedMemberTypes": ["User"],
        "description": "Yellow",
        "displayName": "Yellow",
        "id": "99b7492a-90ec-4b1e-8aca-21852c313bb2",
        "isEnabled": true,
        "lang": null,
        "origin": "Application",
        "value": "yellow"
    },

    {
        "allowedMemberTypes": ["User"],
        "description": "Green",
        "displayName": "Green",
        "id": "8b5b5bc9-001f-4c07-93ce-c16750532dd1",
        "isEnabled": true,
        "lang": null,
        "origin": "Application",
        "value": "green"
    },

    {
        "allowedMemberTypes": ["User"],
        "description": "Blue",
        "displayName": "Blue",
        "id": "b4f7c754-6dac-4136-ad3b-7abd88431668",
        "isEnabled": true,
        "lang": null,
        "origin": "Application",
        "value": "blue"
    },

    {
        "allowedMemberTypes": ["User"],
        "description": "Indigo",
        "displayName": "Indigo",
        "id": "9f4ba396-e8ba-4063-a981-63e81d9f0d6a",
        "isEnabled": true,
        "lang": null,
        "origin": "Application",
        "value": "indigo"
    },

    {
        "allowedMemberTypes": ["User"],
        "description": "Violet",
        "displayName": "Violet",
        "id": "64d20e01-3c30-4bac-9b7b-4a602368beb4",
        "isEnabled": true,
        "lang": null,
        "origin": "Application",
        "value": "violet"
    }
]
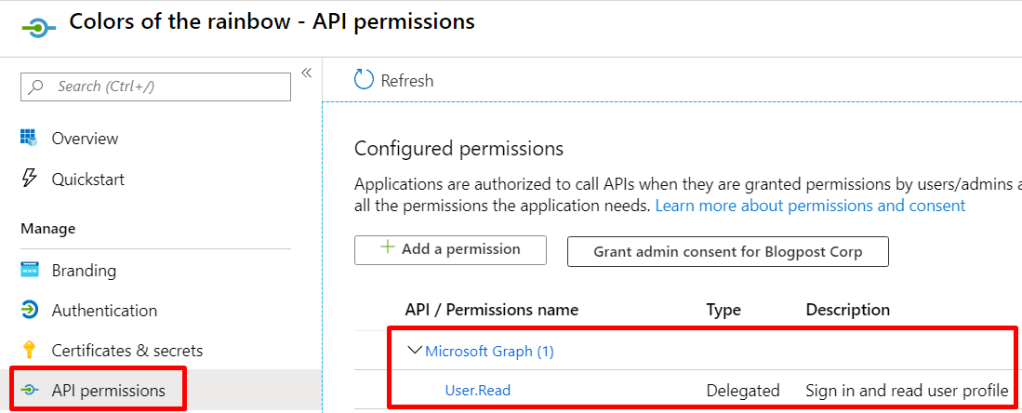
Save the manifest, and verify that the “User.read” API permission is present (should be there by default):
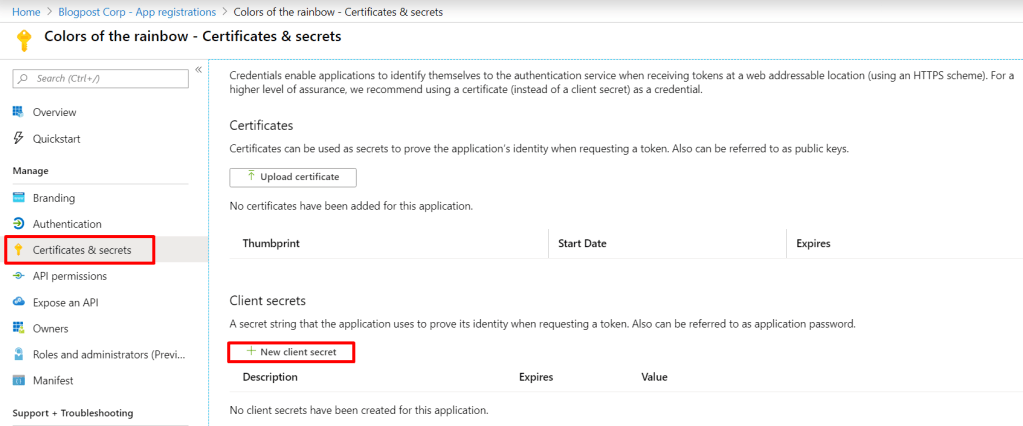
Go to “Certificates & secrets” and choose “New client secret”.
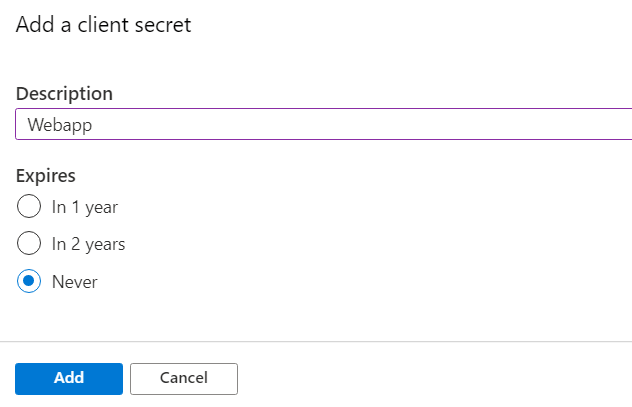
Save the generated secret in a safe location. This combined with the client id is your client credentials that will be required to exchange the code, in authorization code flow, for an ID Token.

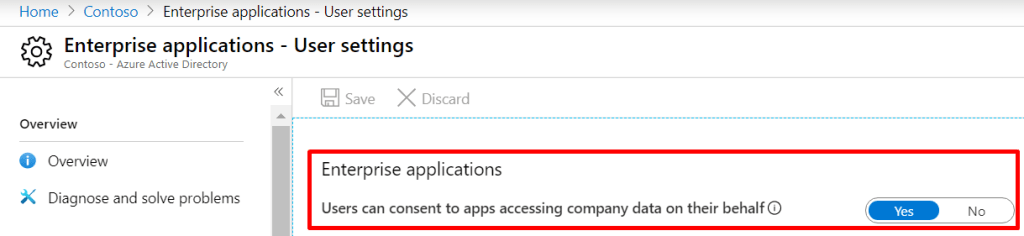
Now we actually have a fully working multi tenant application registration that we can test in a new tenant! Let’s try accessing the application as a regular user, without administrator permissions, only the following setting enabled in their Azure AD (which is enabled by default):
Use the following URL, with client_id replaced with your own client_id:
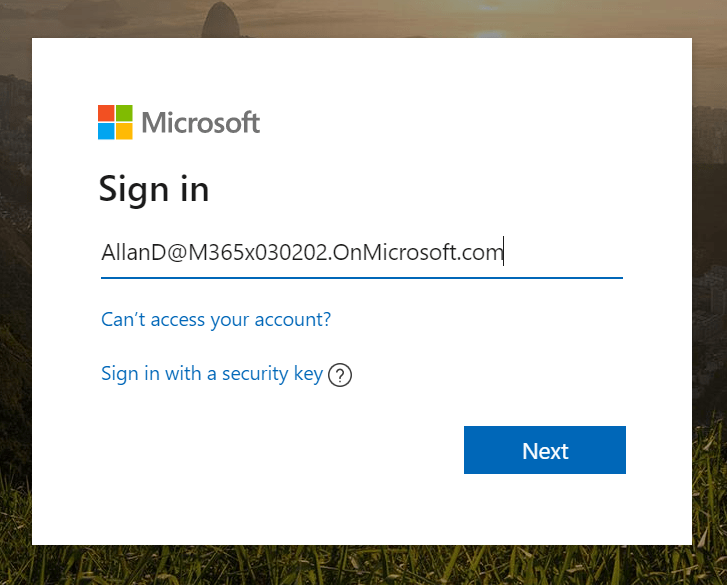
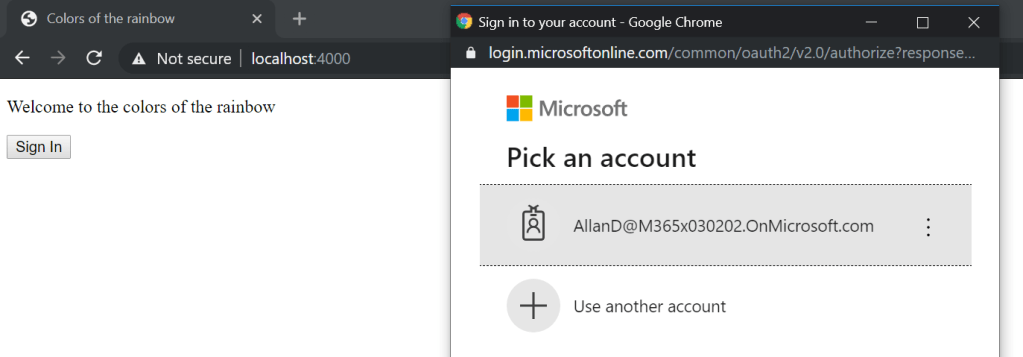
https://login.microsoftonline.com/common/oauth2/v2.0/authorize?client_id=8ae2f824-201f-4ec9-9d9f-ad37082a1935&response_type=code&redirect_uri=https%3A%2F%2Flocalhost:4000&response_mode=query&scope=https%3A%2F%2Fgraph.microsoft.com%2F.default&state=12345Here I can now sign in with any Azure AD account:
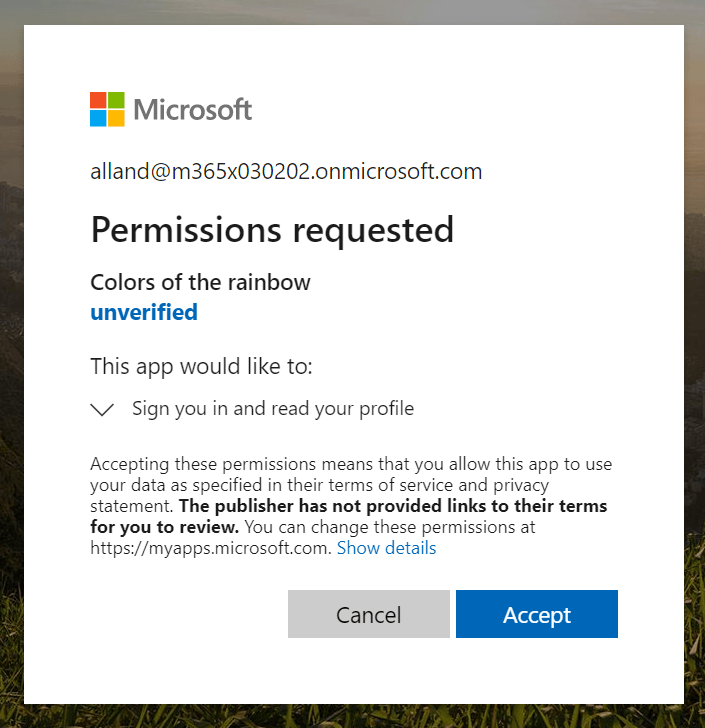
You will see that I am using an unverified tenant and have not provided my privacy URL, but other than that, you will that the user can consent to my application and sign in:
Now we will see that you’ll be redirected to localhost, with “code” in the url:

Now we can even exchange this code for an ID Token with the following PowerShell:
$secret = "Q]ht==KpnaX2U6AZ-gRc21cvJ-64qqKn"
$clientid = "8ae2f824-201f-4ec9-9d9f-ad37082a1935"
$code = "OAQABAAIAAACQN9QBRU3jT6bcBQLZNUj7kHulQx6ZjJgWD_wT8G4QV_-zZA9BjZ2oBVAXRivgePFTcFf49ayJtdfXy5tUQK1B3NL2MHsYsk50w1d57Y6NSX4QMrm4hum8foYcKiD6MU9KHcshkSG7KjXKpIfk2zs0gUr8GKiqy7bv9sKq5_aIrbot-IUSBUem3TkwU3WNGsBi1JZm6xwHvdXt3eRk5MWnsgDrexD-ggigUyMHBX9tFf2K_OnEY2DqX7s2Fu9NL-o2Uy6QKMy6xuYSakJWt2at29jh-bQYt3vi3jUFDuM7FC6ERTFo0Vr3ThCGhwYrkubu-v3eEpDVgz8hleIu_9moPpM30ExN4i-g8kaYGJpLd8KRTwH-8K5Hl_MVbFblL8ZSS5dkMU3WBY0xz4oDMNaXhakvYdL35Nw8v5Eil1jtBc8McgyIrCA_1LRMwEvQ9DnG9xZ6r8-P4wmQufmHyCohtVjrhe1KnOgyX-xKwrnX_NjZAxqkWF6KX1o60Ic0j4QV6peTTeJLY-jvL29CX93EyTDiAMzoydUQtSa4tqV4VVmjFz_NHEe0097mkfpEoyKbeTrcI5PGyEO094HGvN9-TqTGtySa6coh0ppU_vKQpK_pUgO3tPNBGfHXQClmuCQ5p6sCRSpwQdnlgJpv6QHvfHmFl_CiVyXlIJMnNn8c3yAA"

$tokenUrl = "https://login.microsoftonline.com/common/oauth2/token"
$tokenRequestBody = "grant_type=authorization_code&client_id=$clientid&code=$code&redirect_uri=https://localhost:4000&client_secret=$secret"
$token = Invoke-RestMethod -Method Post -Body $tokenRequestBody -Uri $tokenUrl
start "https://jwt.ms/#id_token=$($token.id_token)"
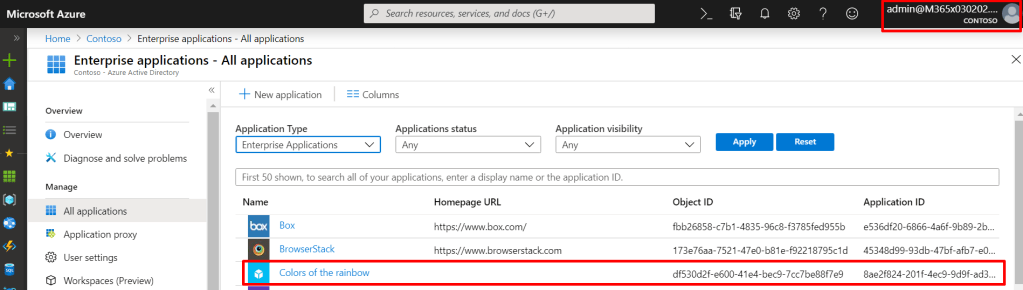
Ok, so now a random user from a random tenant has been able to access the application (virtually at least). Now, in the tenant where this “AllanD” person signed in, administrators we will now find an “Enterprise application”:
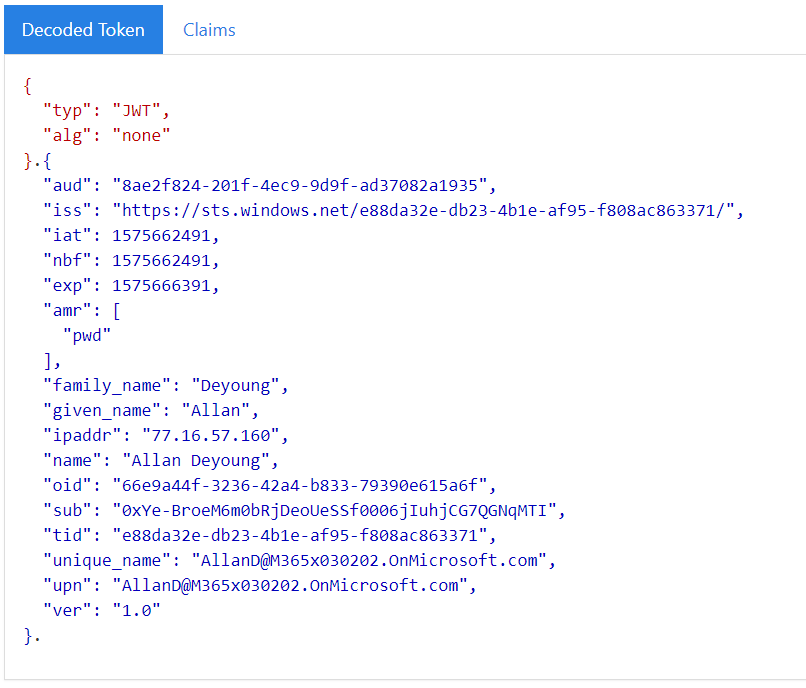
In the id token that I showed you above, you will see no roles defined. Only basic user information. But have a look here, on the user assignment page of the enterprise app that appeared in the tenant of AllanD:

But, try doing “Add user” now, and you will find the application roles we defined earlier!
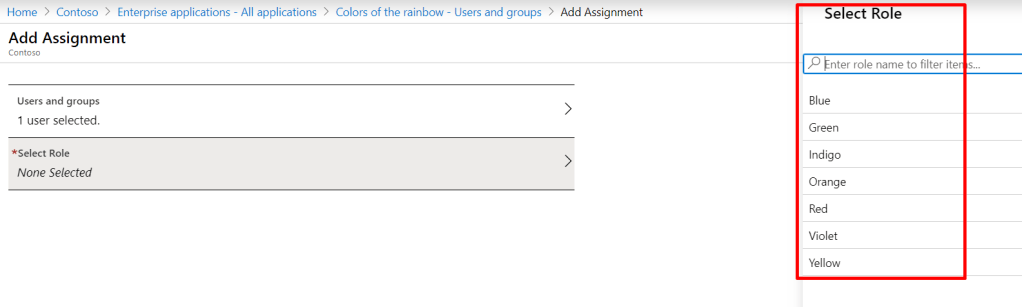
Now we can actually assign multiple roles to users and group. Example below with AllanD assigned multiple roles:
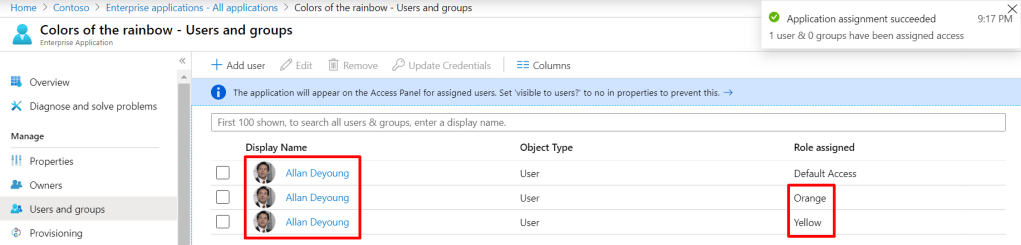
Remember, these role assignments can be dynamically assigned through dynamic groups, requested by the user through Azure AD Entitlement Management and reviewed using access reviews!
And now, if AllanD signs in again, and we exchange the code for an id token:

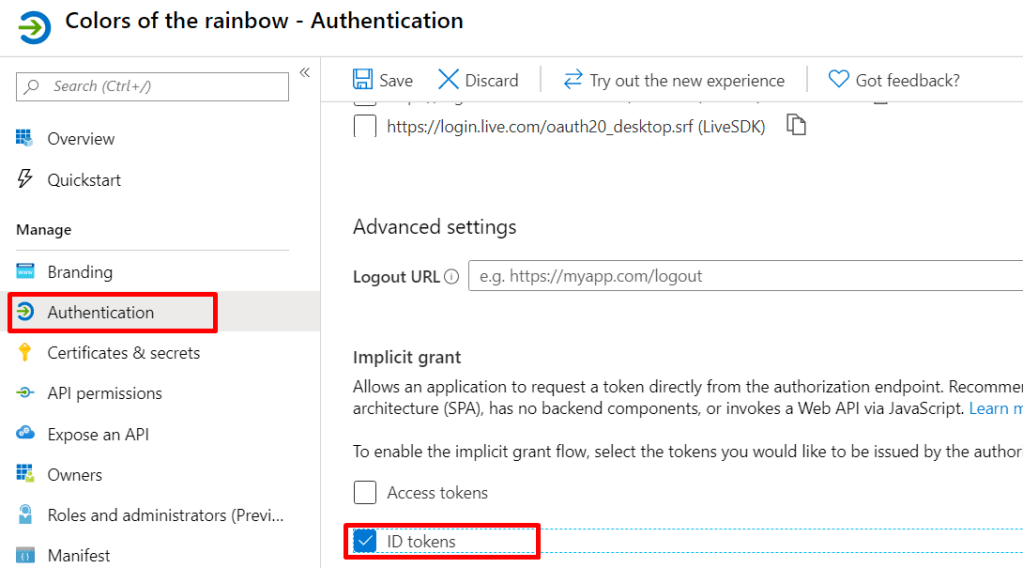
Now, for simplicity’s sake, let’s enable implicit flow for our application, and creating a hyper simple single page app (SPA) using javascript.
Go to the application registration in the tenant where the app is registered, and enable implicit grant – id token:
Now, create a folder on your computer c:\localhost\ and save an the following to index.html. Replace the client id with your own client ID:
<!DOCTYPE html>
<html>
<head>
    <title>Colors of the rainbow</title>
    <script src="https://code.jquery.com/jquery-3.4.1.js"></script>
    <script src="https://cdnjs.cloudflare.com/ajax/libs/bluebird/3.3.4/bluebird.min.js"></script>
    <script type="text/javascript" src="https://alcdn.msauth.net/lib/1.1.3/js/msal.js" integrity="sha384-m/3NDUcz4krpIIiHgpeO0O8uxSghb+lfBTngquAo2Zuy2fEF+YgFeP08PWFo5FiJ" crossorigin="anonymous"></script>
    <script type="text/javascript">
        if(typeof Msal === 'undefined')document.write(unescape("%3Cscript src='https://alcdn.msftauth.net/lib/1.1.3/js/msal.js' type='text/javascript' integrity='sha384-m/3NDUcz4krpIIiHgpeO0O8uxSghb+lfBTngquAo2Zuy2fEF+YgFeP08PWFo5FiJ' crossorigin='anonymous'%3E%3C/script%3E"));
    </script>
</head>

<body>
    <div class="container">
        <div class="leftContainer">
            <p id="WelcomeMessage">Welcome to the colors of the rainbow</p>
            <button id="SignIn" onclick="signIn()">Sign In</button>
        </div>
        <div class="rightContainer" id="content">
        </div>
    </div>
    <script>
    // initialize MSAL
    const msalConfig = {
        auth: {
            clientId: "8ae2f824-201f-4ec9-9d9f-ad37082a1935",
            // clientId: "245e9392-c666-4d51-8f8a-bfd9e55b2456",
            authority: "https://login.microsoftonline.com/common",
            validateAuthority: true
        },
        cache: {
            cacheLocation: "localStorage",
            storeAuthStateInCookie: false
        }
    };
    const loginRequest = {
        scopes: ["User.Read"]
    }
    const tokenRequest = {
        scopes: ["Mail.Read"]
    };
    // instantiate MSAL
    const myMSALObj = new Msal.UserAgentApplication(msalConfig);
    // register callback for redirect usecases
    myMSALObj.handleRedirectCallback(authRedirectCallBack);
    // signin and acquire a token silently with POPUP flow. Fall back in case of failure with silent acquisition to popup
    function signIn() {
        //myMSALObj.loginPopup(loginRequest).then(function (loginResponse) {
        myMSALObj.loginRedirect(loginRequest).then(function (loginResponse) {
            //Login Success
            console.log(loginResponse);
            showWelcomeMessage();
        }).catch(function (error) {
            console.log(error);
        });
    }
    // Call to the resource acquiring a token to a specific scope set
    function acquireTokenPopupAndCallMSGraph(endpoint, request) {
        //Call acquireTokenSilent (iframe) to obtain a token for Microsoft Graph
        myMSALObj.acquireTokenSilent(request).then(function (tokenResponse) {
            console.log("acquireTokenSilent scopes: ", tokenResponse.scopes);
            callMSGraph(endpoint, tokenResponse.accessToken, graphAPICallback);
        }).catch(function (error) {
            console.log(error);
            // Call acquireTokenPopup (popup window) in case of acquireTokenSilent failure due to consent or interaction required ONLY
            if (requiresInteraction(error.errorCode)) {
                myMSALObj.acquireTokenPopup(request).then(function (tokenResponse) {
                    callMSGraph(endpoint, tokenResponse.accessToken, graphAPICallback);
                }).catch(function (error) {
                    console.log(error);
                });
            }
        });
    }
    // Call Graph to fetch data
    function callMSGraph(theUrl, accessToken, callback) {
        var xmlHttp = new XMLHttpRequest();
        xmlHttp.onreadystatechange = function () {
            if (this.readyState == 4 && this.status == 200)
                callback(JSON.parse(this.responseText));
        }
        xmlHttp.open("GET", theUrl, true); // true for asynchronous
        xmlHttp.setRequestHeader('Authorization', 'Bearer ' + accessToken);
        xmlHttp.send();
    }
    function graphAPICallback(data) {
        document.getElementById("json").innerHTML = JSON.stringify(data, null, 2);
    }
    function showWelcomeMessage() {
        var divWelcome = document.getElementById('WelcomeMessage');
        divWelcome.innerHTML = 'Welcome ' + myMSALObj.getAccount().userName + " to the colors of the rainbow!";
        var loginbutton = document.getElementById('SignIn');
        loginbutton.innerHTML = 'Sign Out';
        loginbutton.setAttribute('onclick', 'signOut();');
        displayColors();
    }
    // signout
    function signOut() {
        myMSALObj.logout();
    }

    function displayColors() {
        document.getElementById("content").innerHTML = "<br>"
        if(!$.isArray(myMSALObj.account.idToken.roles)){
            document.getElementById("content").innerHTML += "No roles defined in ID token";
        }
        if($.inArray("red", myMSALObj.account.idToken.roles) != -1) {
            document.getElementById("content").innerHTML += "<div style=\"display: block; height: 10px; width: 200px; background-color: red;\"></div>";
        }
        if($.inArray("orange", myMSALObj.account.idToken.roles) != -1) {
            document.getElementById("content").innerHTML += "<div style=\"display: block; height: 10px; width: 200px; background-color: orange;\"></div>";
        }
        if($.inArray("yellow", myMSALObj.account.idToken.roles) != -1) {
            document.getElementById("content").innerHTML += "<div style=\"display: block; height: 10px; width: 200px; background-color: yellow;\"></div>";
        }
        if($.inArray("green", myMSALObj.account.idToken.roles) != -1) {
            document.getElementById("content").innerHTML += "<div style=\"display: block; height: 10px; width: 200px; background-color: green;\"></div>";
        }
        if($.inArray("blue", myMSALObj.account.idToken.roles) != -1) {
            document.getElementById("content").innerHTML += "<div style=\"display: block; height: 10px; width: 200px; background-color: blue;\"></div>";
        }
        if($.inArray("indigo", myMSALObj.account.idToken.roles) != -1) {
            document.getElementById("content").innerHTML += "<div style=\"display: block; height: 10px; width: 200px; background-color: indigo;\"></div>";
        }
        if($.inArray("violet", myMSALObj.account.idToken.roles) != -1) {
            document.getElementById("content").innerHTML += "<div style=\"display: block; height: 10px; width: 200px; background-color: violet;\"></div>";
        }
    }

   // This function can be removed if you do not need to support IE
   function acquireTokenRedirectAndCallMSGraph(endpoint, request) {
        //Call acquireTokenSilent (iframe) to obtain a token for Microsoft Graph
        myMSALObj.acquireTokenSilent(request).then(function (tokenResponse) {
            callMSGraph(endpoint, tokenResponse.accessToken, graphAPICallback);
        }).catch(function (error) {
            console.log("error is: "+ error);
            console.log("stack:" + error.stack);
            //Call acquireTokenRedirect in case of acquireToken Failure
            if (requiresInteraction(error.errorCode)) {
                myMSALObj.acquireTokenRedirect(request);
            }
        });
    }
    // redirect call back
    function authRedirectCallBack(error, response) {
        if (error) {
            console.log(error);
        } else {
            if (response.tokenType === "id_token") {
                showWelcomeMessage();
                // acquireTokenRedirectAndCallMSGraph(graphConfig.graphMeEndpoint, loginRequest);
            } else if (response.tokenType === "access_token") {
                // callMSGraph(graphConfig.graphMeEndpoint, response.accessToken, graphAPICallback);
            } else {
                console.log("token type is:" + response.tokenType);
            }
        }
    }
    // utils to handle standard error set that would need user interaction
    function requiresInteraction(errorMessage) {
        if (!errorMessage || !errorMessage.length) {
            return false;
        }
        console.log("requiresinteraction is:" + errorMessage );
        return errorMessage.indexOf("consent_required") !== -1 ||
            errorMessage.indexOf("interaction_required") !== -1 ||
            errorMessage.indexOf("login_required") !== -1 ;
    }
    // Browser check variables
    const ua = window.navigator.userAgent;
    const msie = ua.indexOf('MSIE ');
    const msie11 = ua.indexOf('Trident/');
    const msedge = ua.indexOf('Edge/');
    const isIE = msie > 0 || msie11 > 0;
    const isEdge = msedge > 0;
    //If you support IE, our recommendation is that you sign-in using Redirect APIs
    //If you as a developer are testing using Edge InPrivate mode, please add "isEdge" to the if check
    if (!isIE) {
        if (myMSALObj.getAccount()) {// avoid duplicate code execution on page load in case of iframe and popup window.
            showWelcomeMessage();
            acquireTokenPopupAndCallMSGraph(graphConfig.graphMeEndpoint, loginRequest);
        }
    }
    else {
        document.getElementById("SignIn").onclick = function () {
            myMSALObj.loginRedirect(loginRequest);
        };
        if (myMSALObj.getAccount() && !myMSALObj.isCallback(window.location.hash)) {// avoid duplicate code execution on page load in case of iframe and popup window.
            showWelcomeMessage();
            acquireTokenRedirectAndCallMSGraph(graphConfig.graphMeEndpoint, loginRequest);
        }
    }
</script>
</body>
</html>
Find a way to run a HTTP server on localhost (examples here). I use Node.js like this in cmd:
# Only needed once:
cd \localhost
npm install http-server -g
openssl req -newkey rsa:2048 -new -nodes -x509 -days 3650 -keyout key.pem -out cert.pem

# Now you can simply run this:
http-server -S -p 4000
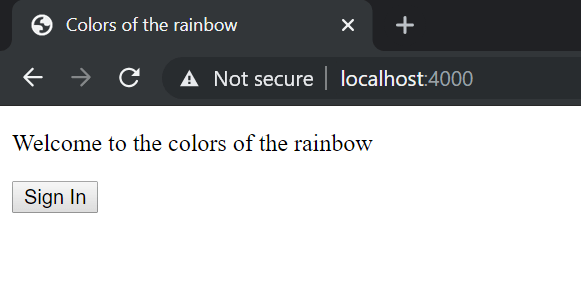
Now you actually have an application running on localhost:
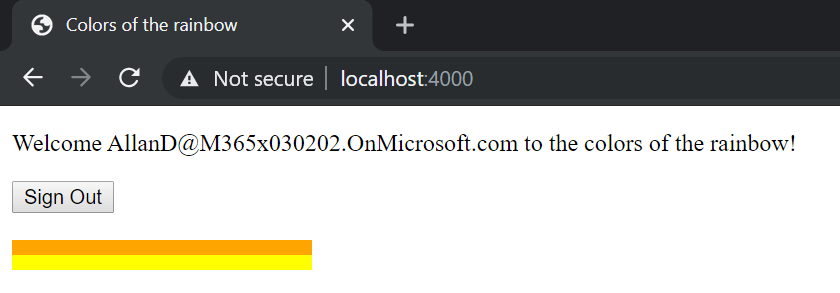
I actually published the same application to https://colorsoftherainbow.azurewebsites.net, where you can try it out. Try adding it to your tenant and assigning app roles to users as I did for AllanD above. It’s not dangerous, I promise, and you can simply delete the enterprise app when you’re done.

The title says multi-tenant app, but there’s a problem, roles can be assigned only to one tenant. Other tenants can’t assign roles to the users. The app won’t be able to get roles from other tenants 😦
No no, you are wrong. Let’s say I build a service that accepts two roles, user and superuser, where my customers can decide which of their users get which roles. What I can do is to:
1 – Register a multi-tenant app in my tenant, meaning the manifest with the user and superuser roles is in MY tenant
2 – Tell my customers to consent to this app in their tenants either through user triggered consent or admin consent. Since we are assigning roles, admin consent makes most sense here. This will cause a service principal (or Enterprise Application in the Azure portal) to be created in the customer tenant, but no app registration (since I am controlling the manifest on my tenant).
3 – The customer can now assign roles in their own tenant, even though the app is registered in MY tenant.
Then, let’s say we are adding more roles and decommissioning the superuser role, I can simply edit the manifest in MY tenant by adding more roles and disabling the superuser role, and this will affect which roles can be assigned in the customer tenants aswell 🙂
Are you sure that the modification you are doing in your app registration regarding the roles (adding disabling roles) is also updating the roles on the other tenants enterprise application?
Yes
Hey Marius
I know you wrote this blog a few years back, but there still doesn’t seem to be much documentation on the subject. Hoping you’ll be able to assist.
Currently I have two applications in a single AAD tenant. One application services our blazor client, it has delegated user_impersonation to another azure application servicing a webapi project. This is functioning as expected, but I recently learned about the great benefits of creating an another Business to Customer Tenant, with this I’d like to move our Blazor Client into that tenant, but I’m not clear how to setup the user_impersonation as it isnt a typical role as you described in your blog. Do you have any pointers or perhaps another one of your blog posts to point me to? Thanks!
“oauth2AllowIdTokenImplicitFlow”: true,
“oauth2AllowImplicitFlow”: true,
“oauth2Permissions”: [
{
“adminConsentDescription”: “Allow the application to access the webapi service on behalf of the signed-in user.”,
“adminConsentDisplayName”: “Access web api service”,
“id”: “1d74855e-8351-42ad-984e-74a2f85bb38f”,
“isEnabled”: true,
“lang”: null,
“origin”: “Application”,
“type”: “User”,
“userConsentDescription”: “Allow the application to access to the web api service on your behalf.”,
“userConsentDisplayName”: “Access web api service”,
“value”: “user_impersonation”
}
],
Hi!
Using an Azure AD B2C should work just fine in your scenario, but you will only get this working if you move both your blazor app and your webapi to B2C, not just the frontend. The reason is that there is no way for your web api to authenticate the provided access token using a regular Azure AD, when the access token is signed by your Azure AD B2C tenant. I have many customers using B2C, and it works great, given that B2C is actually your use case. If it is more a “B2B, but with self service signup”, then I would recommend looking at external identities with sign-up flows rather than B2C.
“user_impersonation” is a quite common role name used when you essentially just identify your user from your frontend to your backend, while not actually “oursourcing” authorization to Azure AD. Essentially the role could be called anything, it is just common practice to call it user_impersonation.
Is it possible to customize the startup.cs so that it will load the setting from database
Is it possible to customize the startup.cs so that it can load the required settings from database. On button click it should read the required settings from database based on some condition and load the startup
I guess, however keep in mind the example code is client side, using implicit flow, so you’ll need a database that is possible to query publicly. The provided code is mostly for demo purposes, and I would suggest looking into frameworks like Blazor for building sites.
I am using an ASP.NET application, is it possible to do by creating a middle ware component?