I have been building a system for generating a set of predefined access packages per customer for my current employer, a CSP, and figured I could document a few of the things I think works when using LogicApps combined with the Microsoft Graph.
Getting the Access Token – Client credential grant
First problem you will almost always face, is actually getting the access token in order to access the Graph. In general, there are two methods that works fine, depending on your scenario. The first option, is a client credential grant, where essentially you have an application, and you sign in as that application.
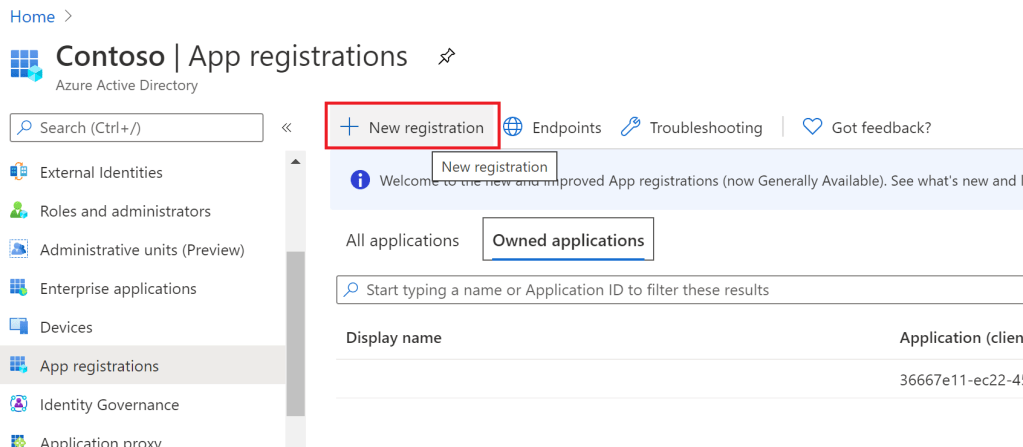
First, create an application through the Azure Portal, using the app registrations experience, with the “New registration” button:
Just give it any name, and click register. Now, in order to assign permissions, go to the “API permissions” left menu item, click “Add a permission” and select “Microsoft Graph”:

Choose “Application Permissions”, as we are working as the application.

Click the “Grant admin consent” button, and make sure you have these green check marks:

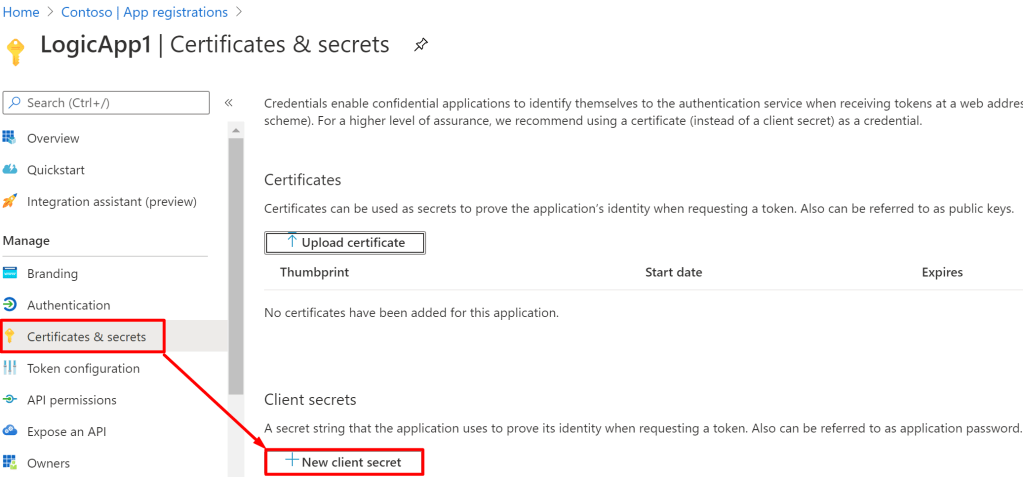
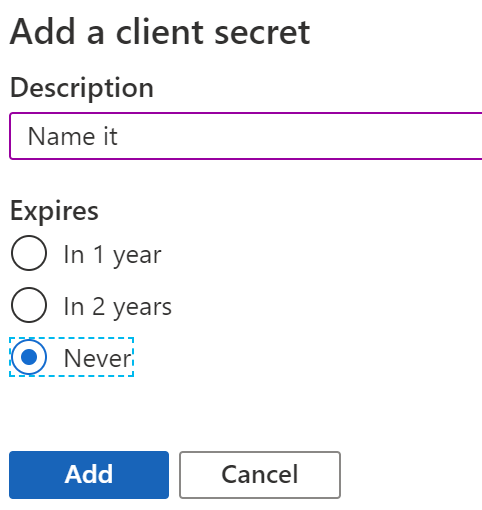
Next, go to certificates and secrets, and click “New client secret”.
Name it and store the value somewhere. You’ll use it soon.
On the “Overview” page, also store the client id. These are the two things we will need in our LogicApp.

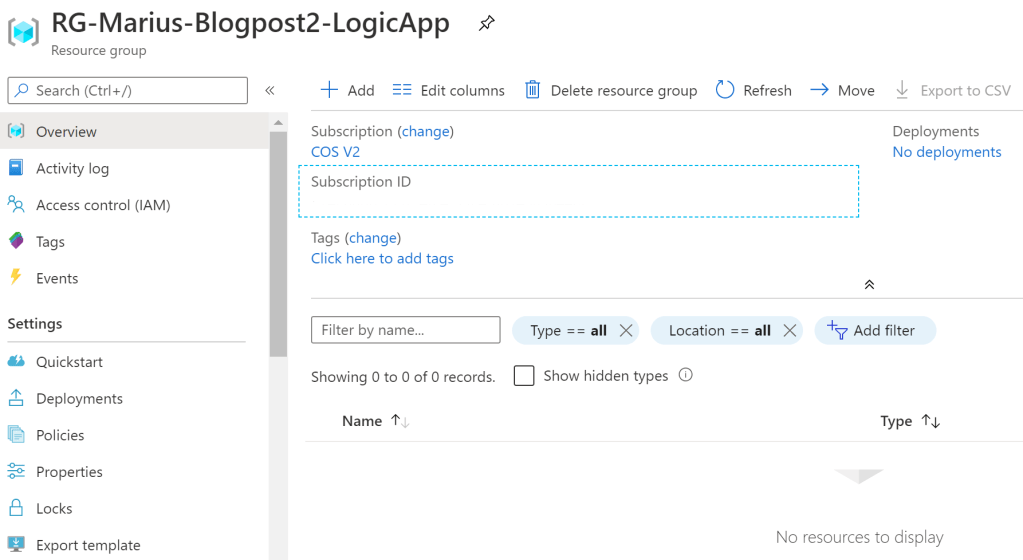
Let’s go ahead and start with an empty resource group in Azure, and an empty LogicApp in this resource group:
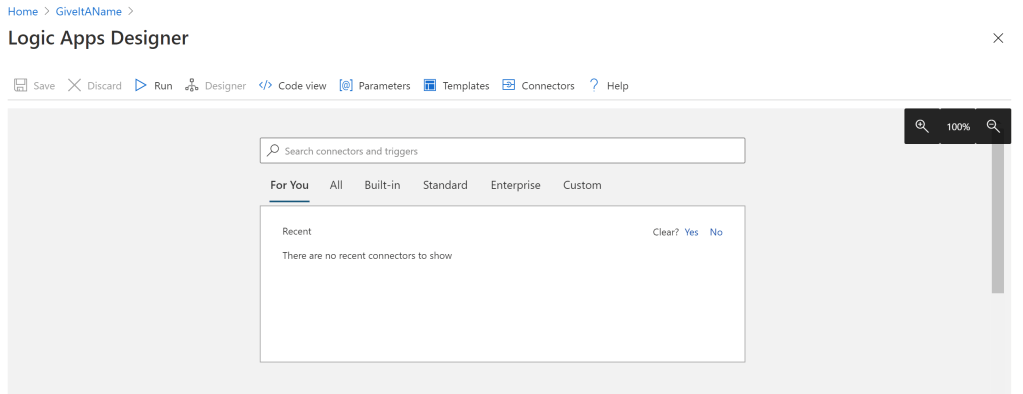
The first thing I want to recommend you do, is to exit the Logic Apps designer, and enable system assigned managed identity for your Logic App. This makes it possible to access a KeyVault without thinking about a single thing, fully secure.

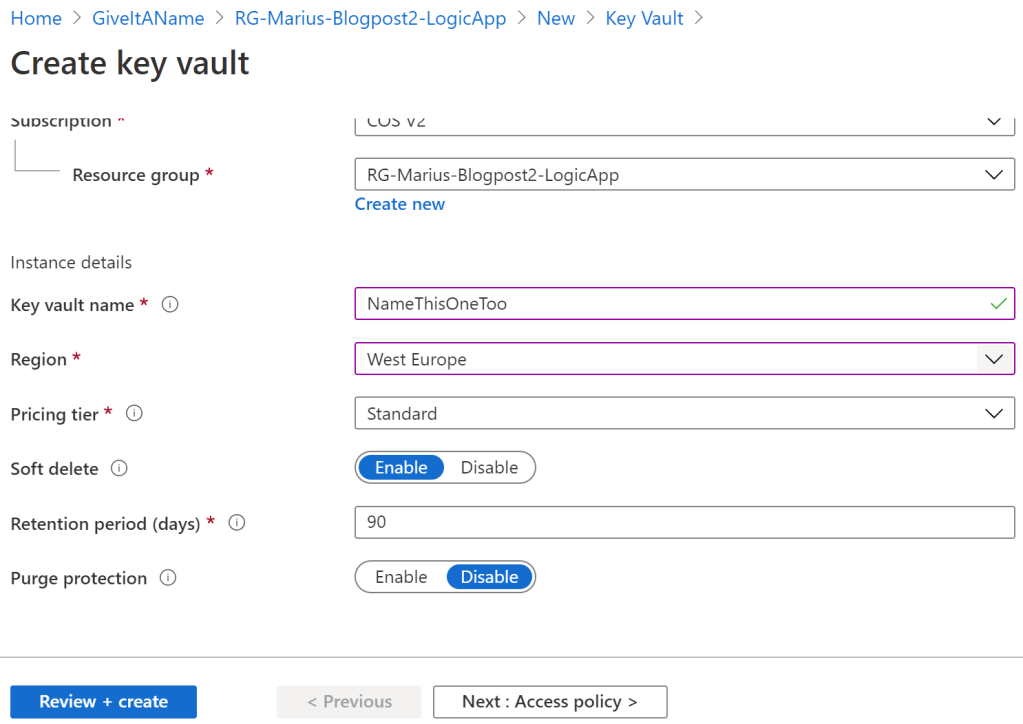
Now, in the same resource group (actually, this does not matter, same tenant is enough for managed identities), create a KeyVault:
Now, find “Access policies” in your keyvault, and click “+ Add Access Policy”.
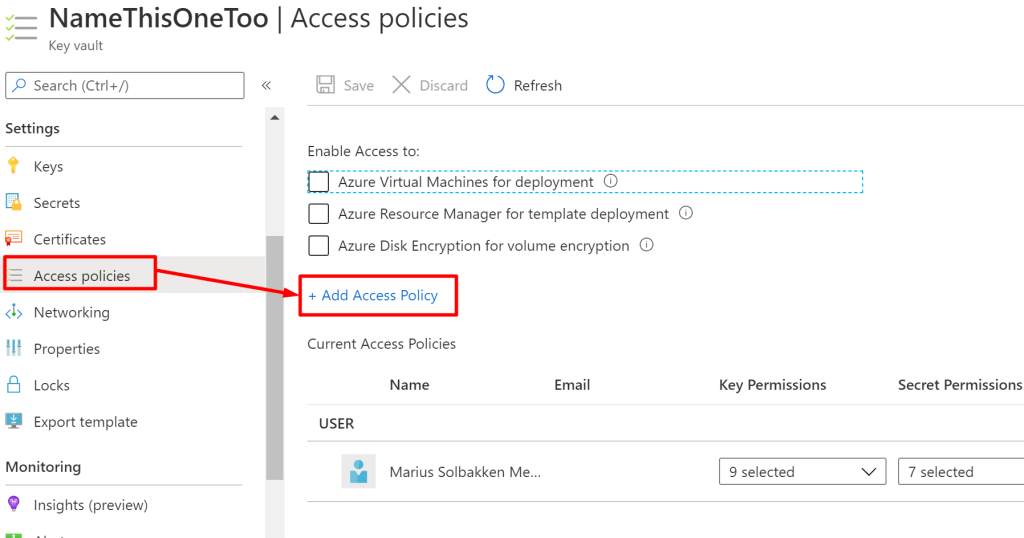
Grant “Secret Management” to the managed identity (search for the displayname of your Logic App):

Remember to click SAVE after this operation, not “just add”. Done this a million times.

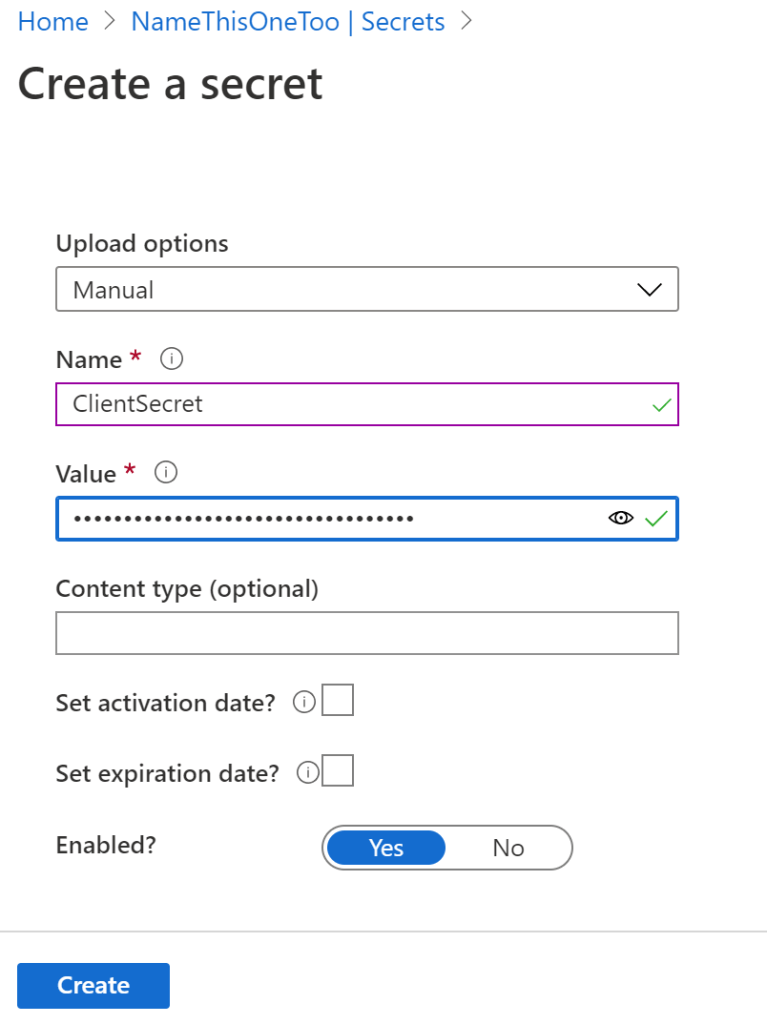
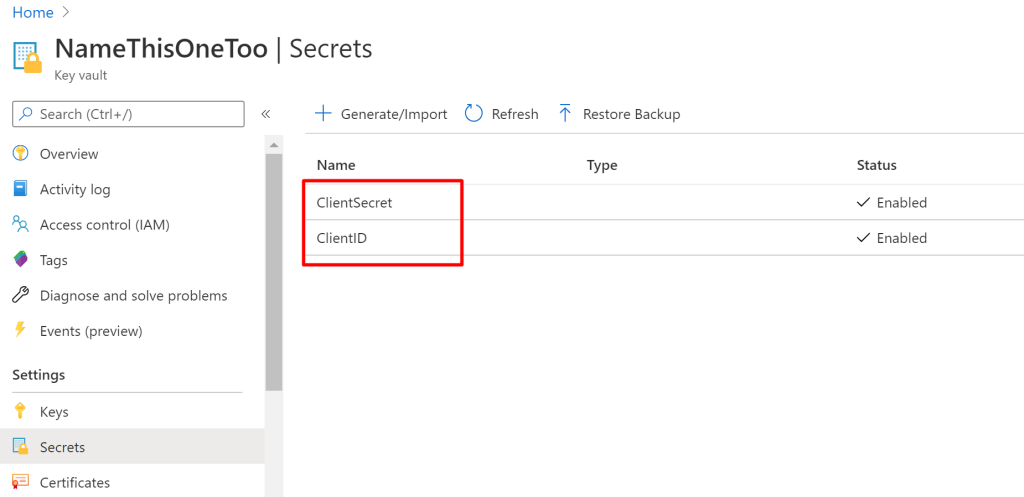
Import two secrets – ClientID and ClientSecret – into your system by clicking “Secrets” in the left menu, and “Generate/Import” on the top:
EDIT: Actually – Add the TenantID aswell. It is needed later. 🙂
NOW, we are ready to continue with our LogicApp.
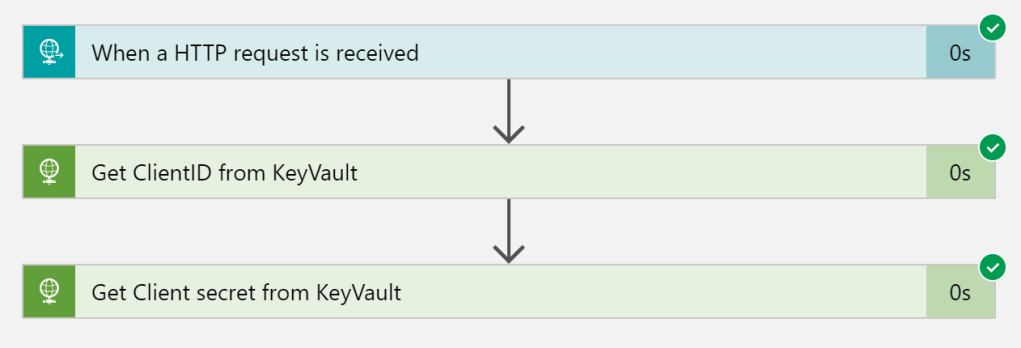
Start with a blank LogicApp, and add an HTTP trigger (you can use any trigger, this is just an example). Secondly, choose HTTP, as we need to use the KeyVault REST API (thanks):

For paste-ability, audience is https://vault.azure.net, the “api-version” query string is 2016-10-01 and the url of the client id is https://namethisonetoo.vault.azure.net/secrets/clientid, where you of course must change namethisonetoo to your own key vault.
Add a similar step for your clientsecret. Using the “Run” method, you should hopefully get something like this:
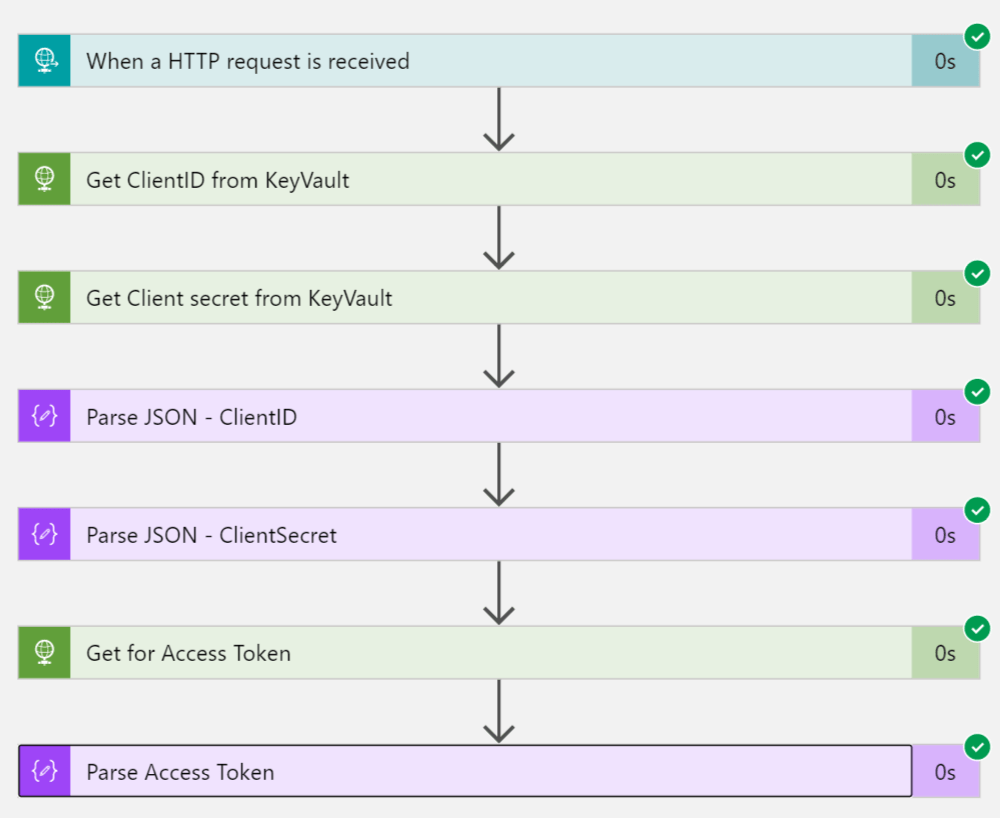
Now we need to process these as JSONs, and exchange the clientid and client secret for an Access Token. First, Parse JSON:

This is the schema I use:
{
    "properties": {
        "value": {
            "type": "string"
        }
    },
    "type": "object"
}
Then, you can use a POST HTTP method in order to get the access token:

The url is https://login.microsoftonline.com/2a545de4-cfbf-46a7-b6f2-057d4fb30a38/oauth2/v2.0/token, where the GUID is the TenantID, which we of course should have stored in KeyVault (Go do that, I just forgot…), the Content-Type of application/x-www-form-urlencoded is required for Azure AD to understand what you are sending, and the body is the following:
client_id=@{body('Parse_JSON_-_ClientID')?['value']}&scope=https://graph.microsoft.com/.default&client_secret=@{body('Parse_JSON_-_ClientSecret')?['value']}&grant_type=client_credentials
Add one more Parse JSON step:

This is the schema:
{
    "properties": {
        "access_token": {
            "type": "string"
        },
        "expires_in": {
            "type": "integer"
        },
        "ext_expires_in": {
            "type": "integer"
        },
        "token_type": {
            "type": "string"
        }
    },
    "type": "object"
}
Run the whole thing, and you should get something like this:
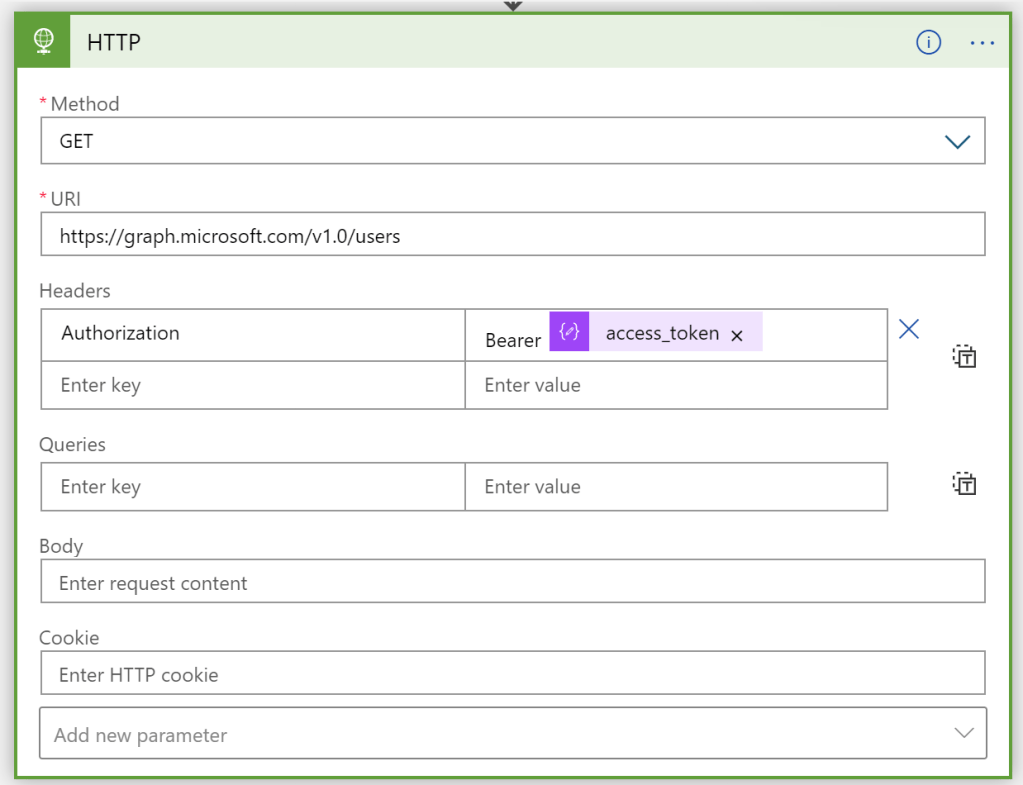
Now, you can go ahead and use any graph call like this:
Getting the Access Token – As a user?
You can easily do this. Follow the same technique as above, just adjust the following:
- Grant “Delegated permissions” rather the “Application permissions”
- Store ClientID, Username, Password and TenantID in KeyVault (You don’t need the client secret)
- On the application registration, check the “Treat as public client” checkbox under authentication
- Get access token using the following url:
grant_type=password&client_id=@{body('ClientID')?['value']}&username=@{body('Username')?['value']}&scope=user.read.all%20EntitlementManagement.ReadWrite.All%20Application.ReadWrite.All%20Group.ReadWrite.All&password=@{body('Password')?['value']}
