I am often asked to come up with solutions for populating different types of applications with user data. One fairly common thing is to require Entra ID users to be populated in a database of some sort, and while we could very easily PowerShell our way through that, reading from the Graph and send SQL queries, we want an out of the box solution. This exists, and is called ECMA Connector Host.
And what does ECMA stand for? ECMA stands for Extensible Connectivity Management Agent and stems from the world of Microsoft Identity Manager (MIM). Using the Connector Host, Entra ID has a feature to actually run MIM connectors, without requiring the full MIM installation.
Let’s dive into configuring this!
Installing the cloud sync agent
The first thing we need to do is to configure a new cloud sync agent and installing it on a server. This agent is responsible for connecting out from your virtual machine to Entra ID, waiting for tasks such as create user object. This can be installed on the SQL server itself, or a separate server. For many environments, installing the agent on the SQL server itself makes a lot of sense, in order to maintain separation between services, while in other scenarios it is probably best to install it on a separate dedicated server for provisioning agent purposes.
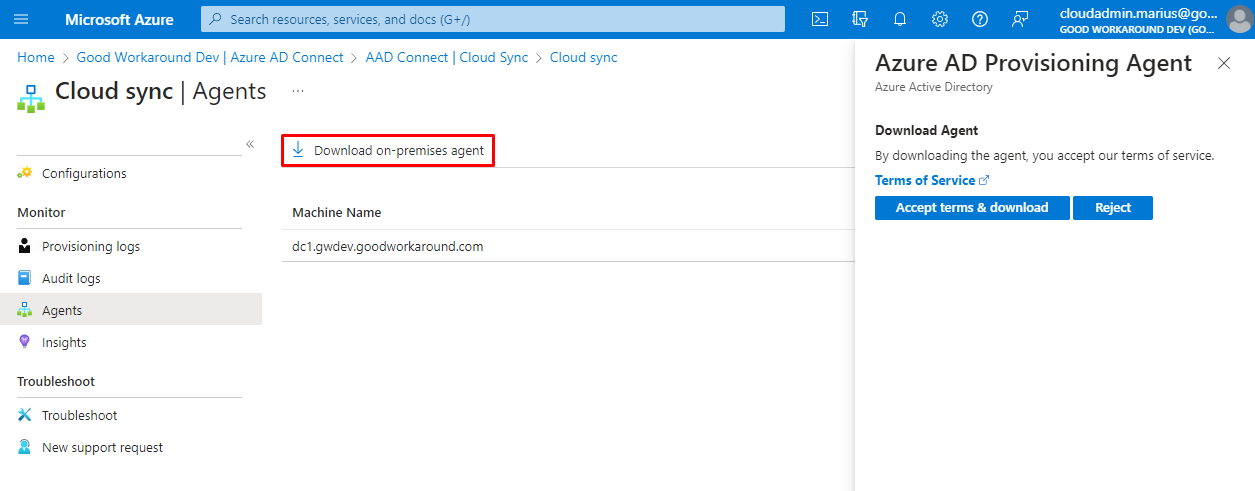
After installing the agent, the configuration wizard starts. This is where we choose to enable the extension On-premises application provisioning:

You will be asked to authenticate as a Global Administrator account, before confirming installation:

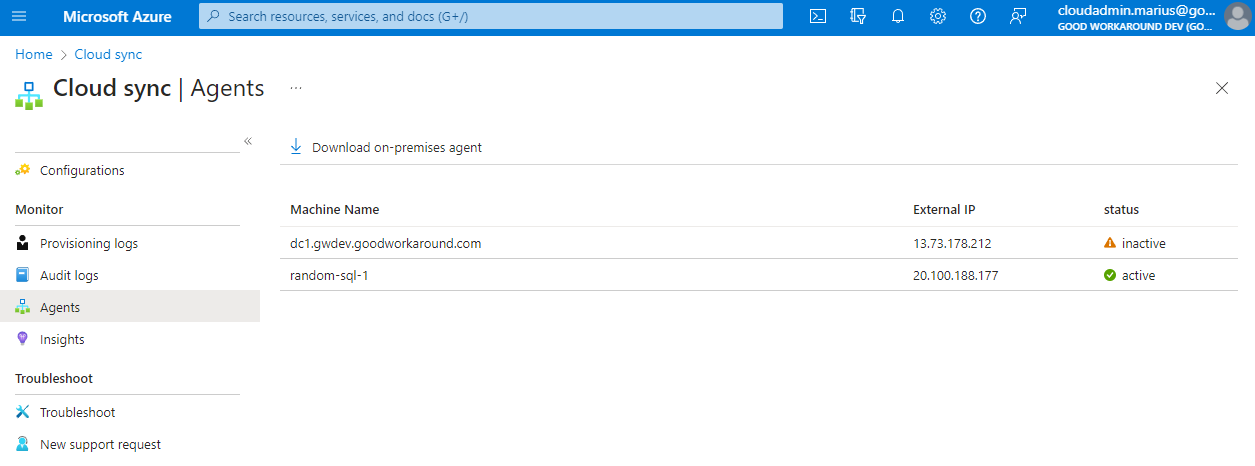
After configuring, you should see the cloud sync agent coming online:
Preparing your database
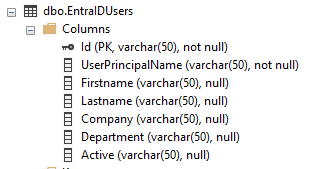
This step will vary greatly with the service you are populating. Some times you might be working with a database view directly in production, or in some sort of separate staging table. In this example, we have a separate table for our Entra ID user accounts named EntraIDUsers, with the following schema:
SET ANSI_NULLS ON
GO
SET QUOTED_IDENTIFIER ON
GO

CREATE TABLE [EntraIDUsers](

	[Id] [VARCHAR](50) NOT NULL,

    [UserPrincipalName] [VARCHAR](50) NOT NULL,

    [Firstname] [VARCHAR](50) NULL,

    [Lastname] [VARCHAR](50) NULL,

    [Company] [VARCHAR](50) NULL,

    [Department] [VARCHAR](50) NULL,

    [Active] [VARCHAR](50) NULL

	PRIMARY KEY CLUSTERED
	(
		[Id] ASC
	) WITH (PAD_INDEX = OFF, STATISTICS_NORECOMPUTE = OFF, IGNORE_DUP_KEY = OFF, ALLOW_ROW_LOCKS = ON, ALLOW_PAGE_LOCKS = ON, OPTIMIZE_FOR_SEQUENTIAL_KEY = OFF) ON [PRIMARY]
	) ON [PRIMARY]
GO
Attribute mapping / unique id
Let us plan attribute mapping. Since we have Id as the primary key in the table, this of course both needs to be unique, and should be used as the join criteria between SQL and Entra ID. This could be either object id, employee id or some other value, but remember that if you change the value, this will cause a delete and a new insert into the database, not an update. This means that email or user principal name is probably not the way to go here.
Here is my attribute mapping, with the italics being joining criteria.
| Entra ID Attribute (Graph attribute) | SQL Attribute |
|---|---|
| objectId | Id |
| userPrincipalName | UserPrincipalName |
| givenName | Firstname |
| surname | Lastname |
| companyName | Company |
| department | Department |
| accountEnabled | Active |
Connecting to your database
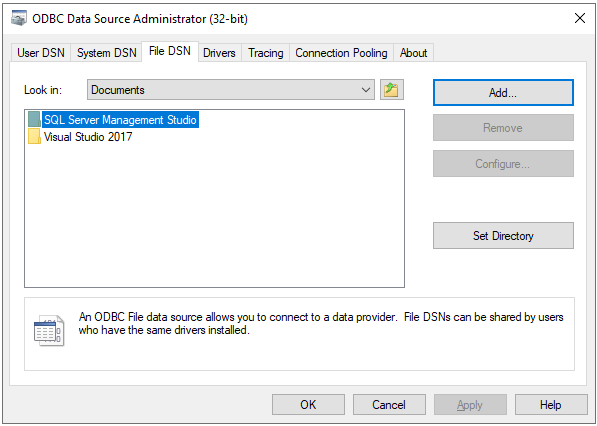
As we will be using the Generic SQL Management Agent, we need to create a Data Source Name (DSN) file in order to connect to SQL. Let’s do that:
Note: If you are running the ECMA Connector Host on another computer than the SQL server, you might need to install the required ODBC driver.
Start by opening ODBC Data Source Administrator, choose the File DSN tab and click Add…
I am working with Microsoft SQL Server, so I’m going to select SQL Server Native Client 11.0. This can easily be other SQL servers, such as MySQL or PostgreSQL.

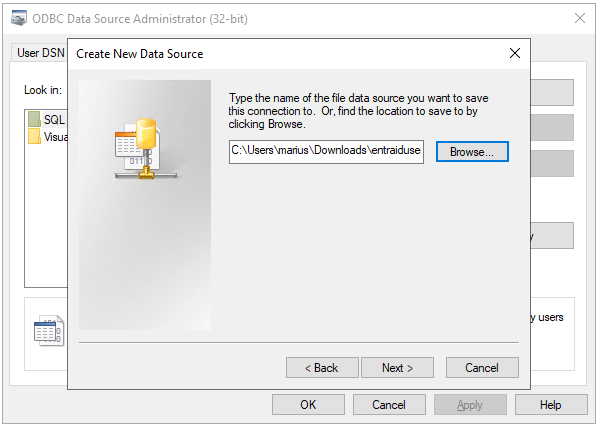
Choose a file name and click Next:
Enter the name of the SQL server you want to connect to
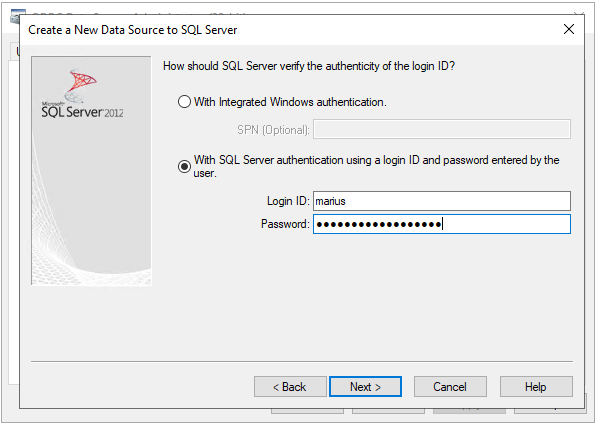
Choose how to authenticate to the server. I will be using SQL Server authentication, but you can easily use windows integrated authentication, with the agent’s group managed service account.
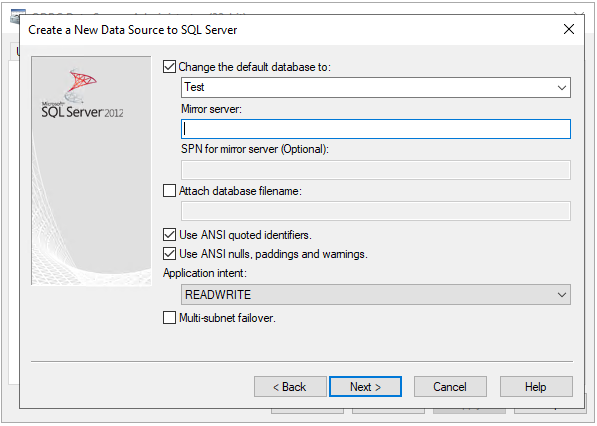
Choose database and some settings:
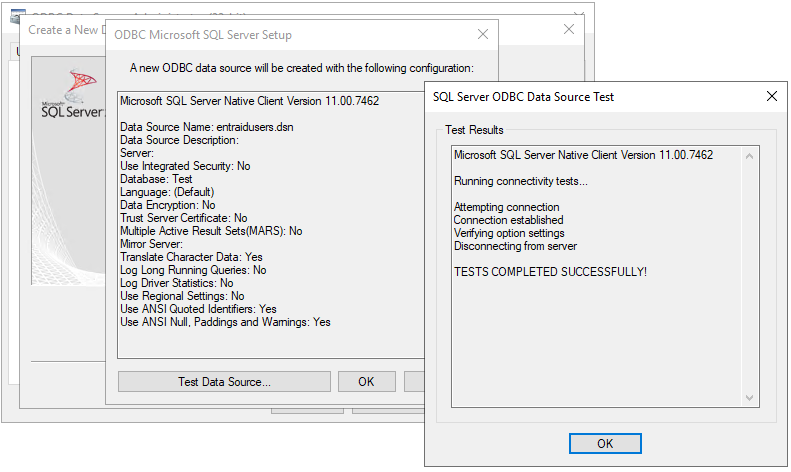
And we can now test that the data source is indeed working as intended:
Creating a Generic SQL MA Connector
Now that we have a table up and running in a database, and the DSN is created, we are ready to create our Generic SQL MA connector in our Connector Host.
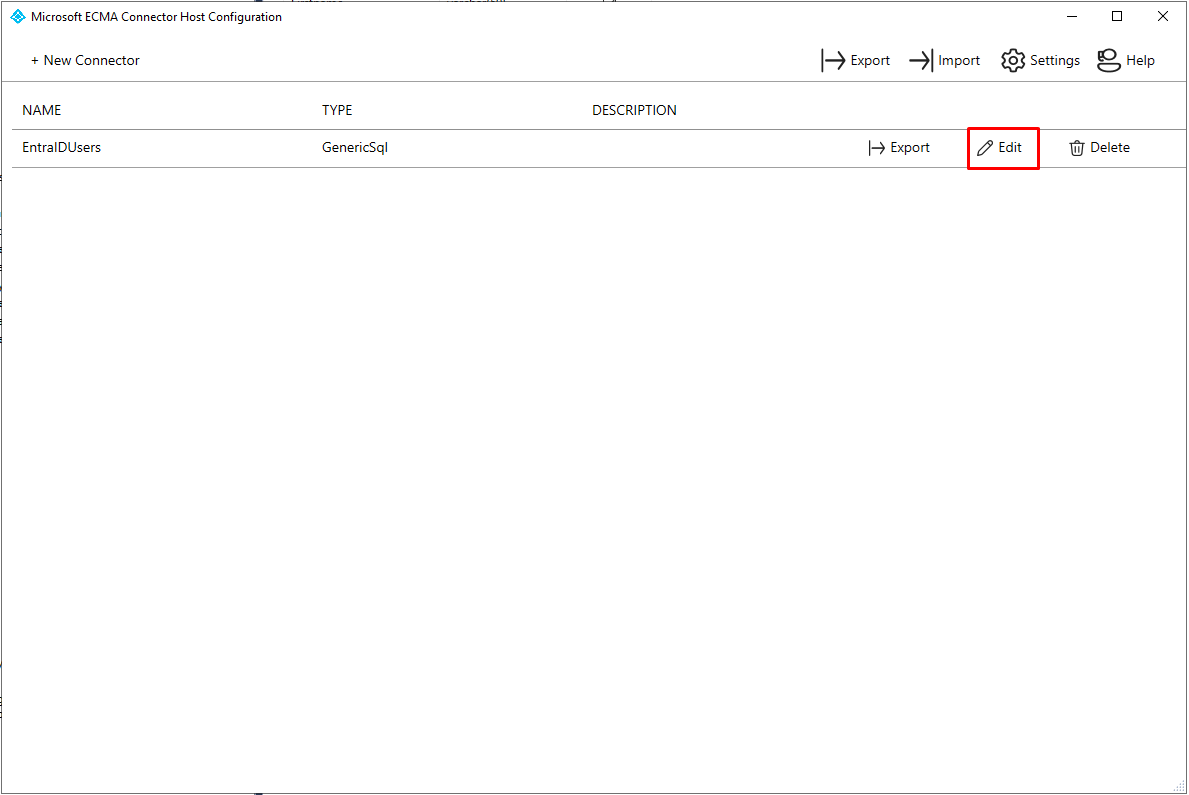
On the server you installed the agent, start Microsoft ECMA Connector Host Configuration:
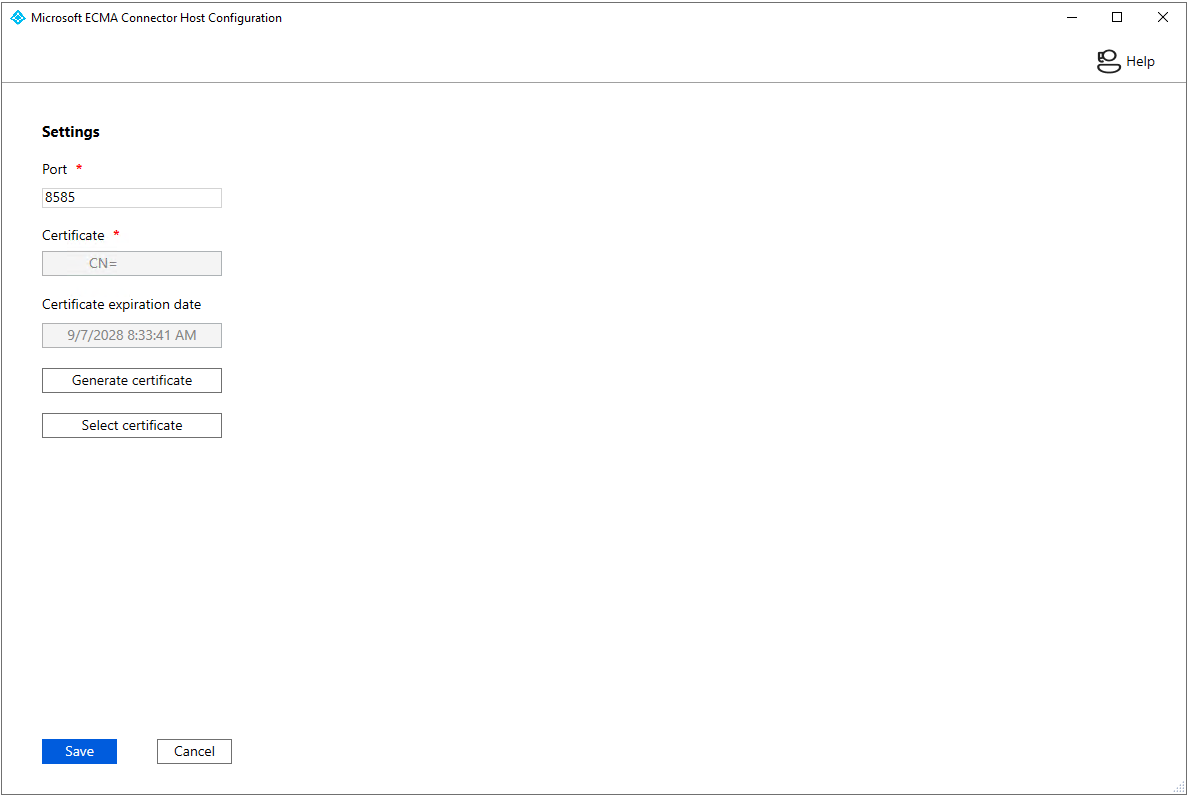
If this is the first time you are starting the host configuration wizard, you will be asked to generate a certificate. This is for securing communication between Entra ID and the agent:
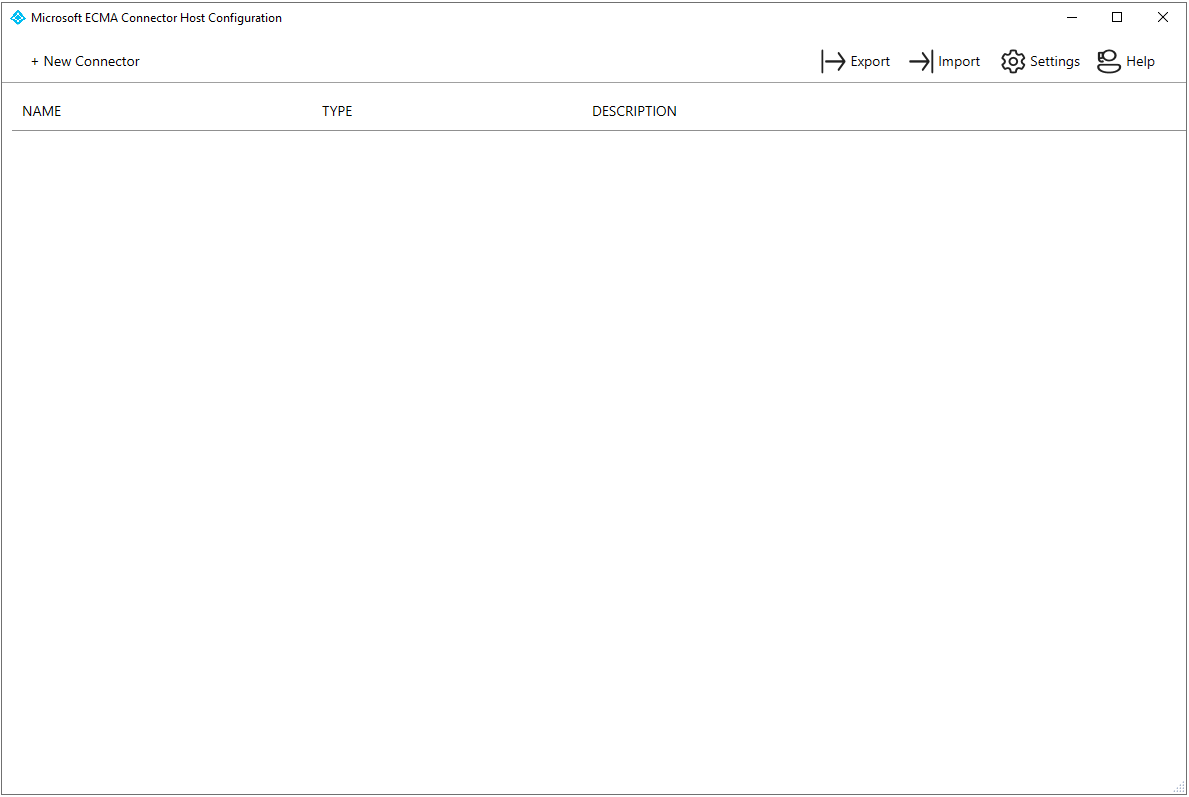
After generating the certificate, we should be landing on a quite empty window, where we have the +New Connector button available. Click it:
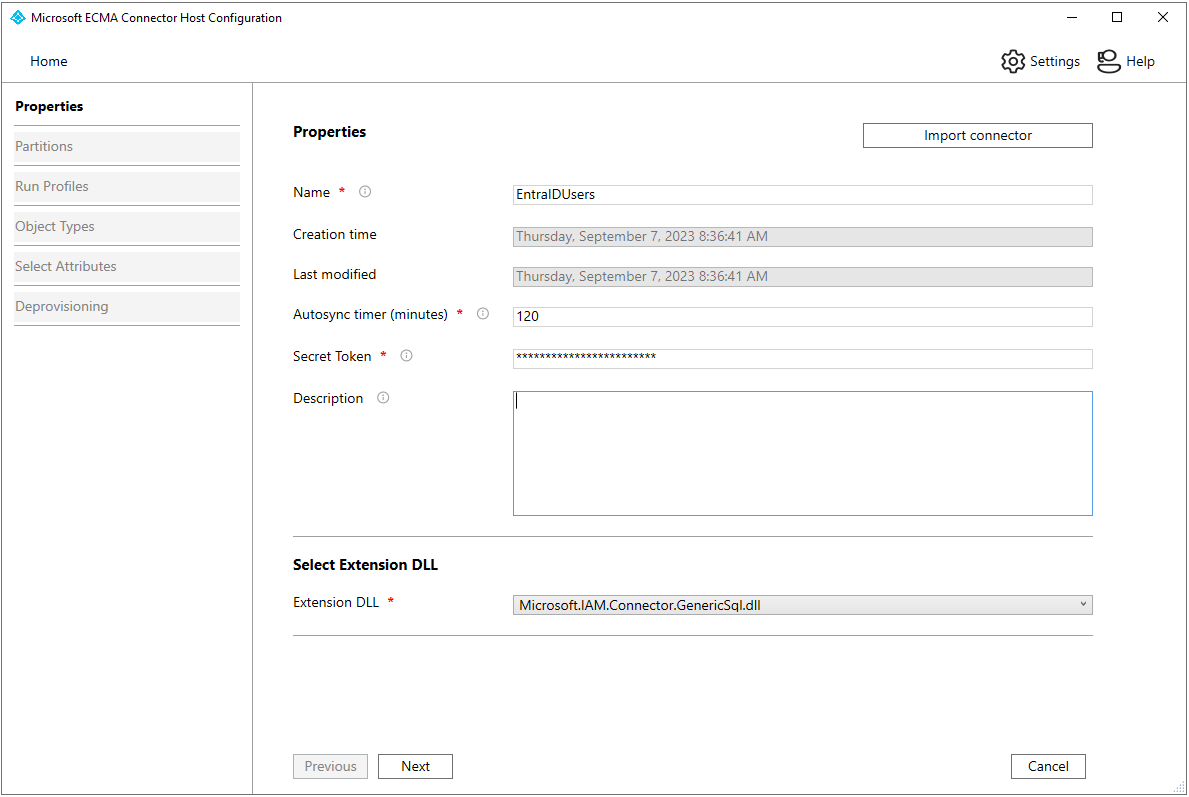
Here we’ll name our connector EntraIDUsers, but we should name this something relevant for the service, such as Datawarehouse Employee Info. Set autosync timer to 120 and secret token to a random value of 12 characters or more, which you will need when configuring Entra ID. And then we select the GenericSql dll.
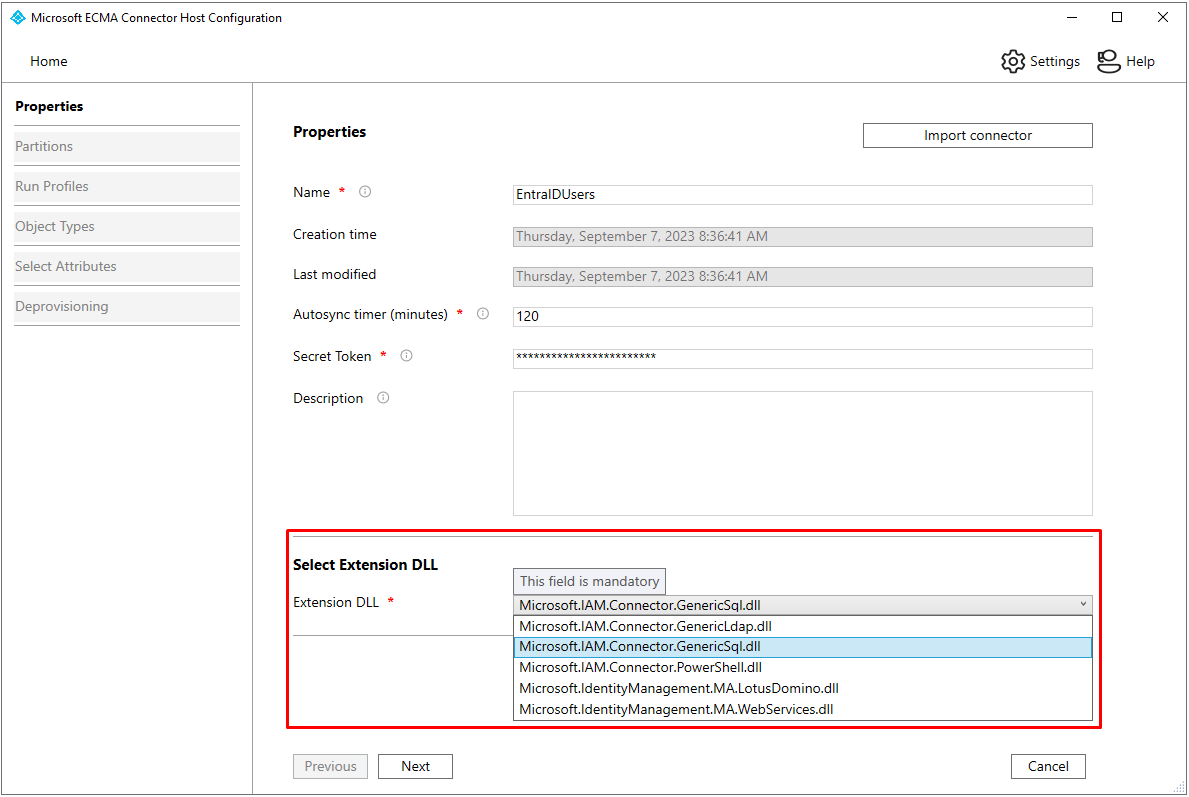
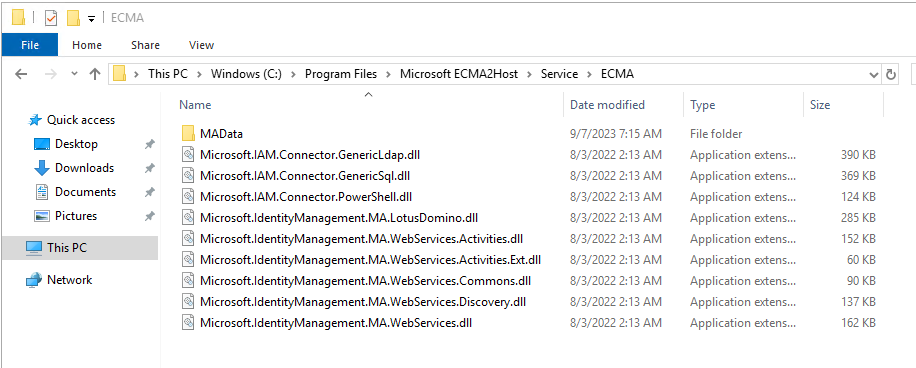
Just a note on the extension dll; there are 5 default installed dlls. These are all located in the C:\Program Files\Microsoft ECMA2Host\Service\ECMA folder, and you should easily be able to add your own ECMA based connectors here.
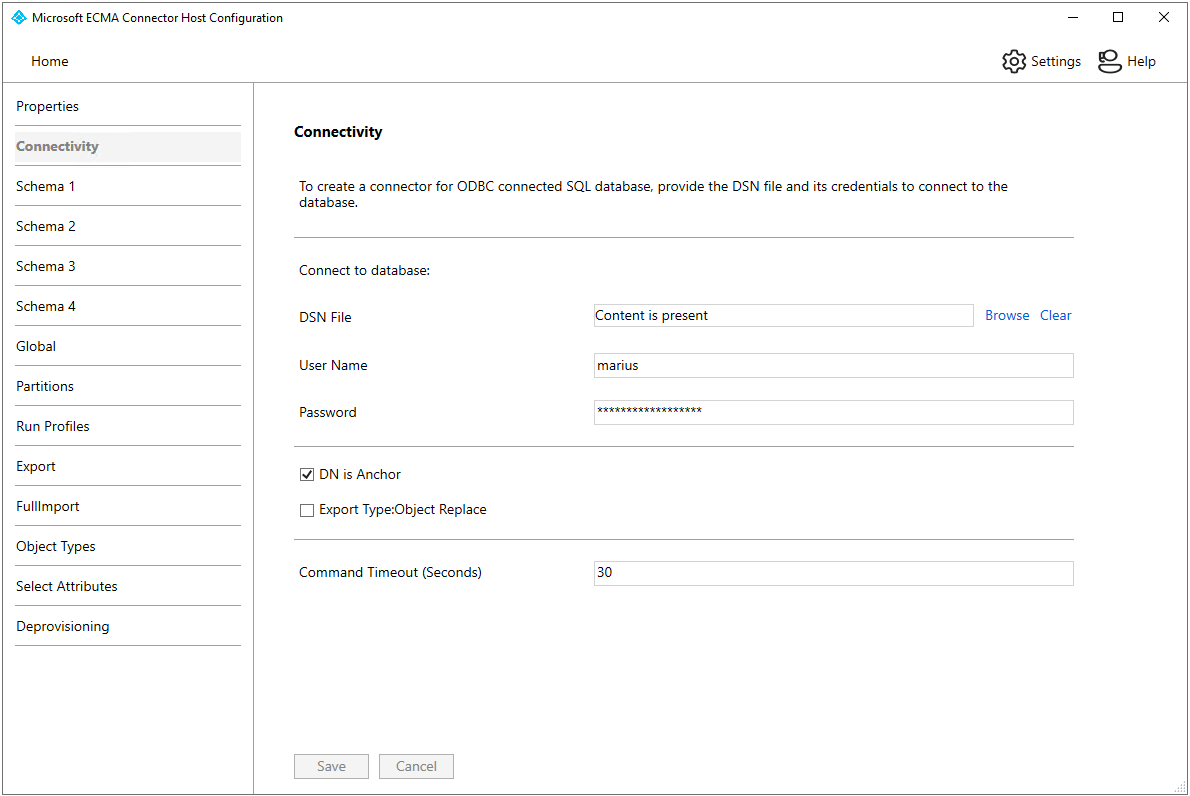
Anyway, clicking Next loads what anyone with experience using the MIM Generic SQL MA will see is the New Management Agent wizard in MIM… First we need to configure Connectivity. You need to find the DSN you created, optionally adding user name and password (Did not test this, but I believe it should be able to use the gMSA if you leave the fields empty). Click Next when done.
Now, schema detection and using the Generic SQL MA is a big, big topic, which I will not cover here. We simply say Fixed Value and provide the text User in the fixed value list. This will cause the connector to only handle a single object type named User. We could have way more advanced stuff here, but let’s keep it simple.

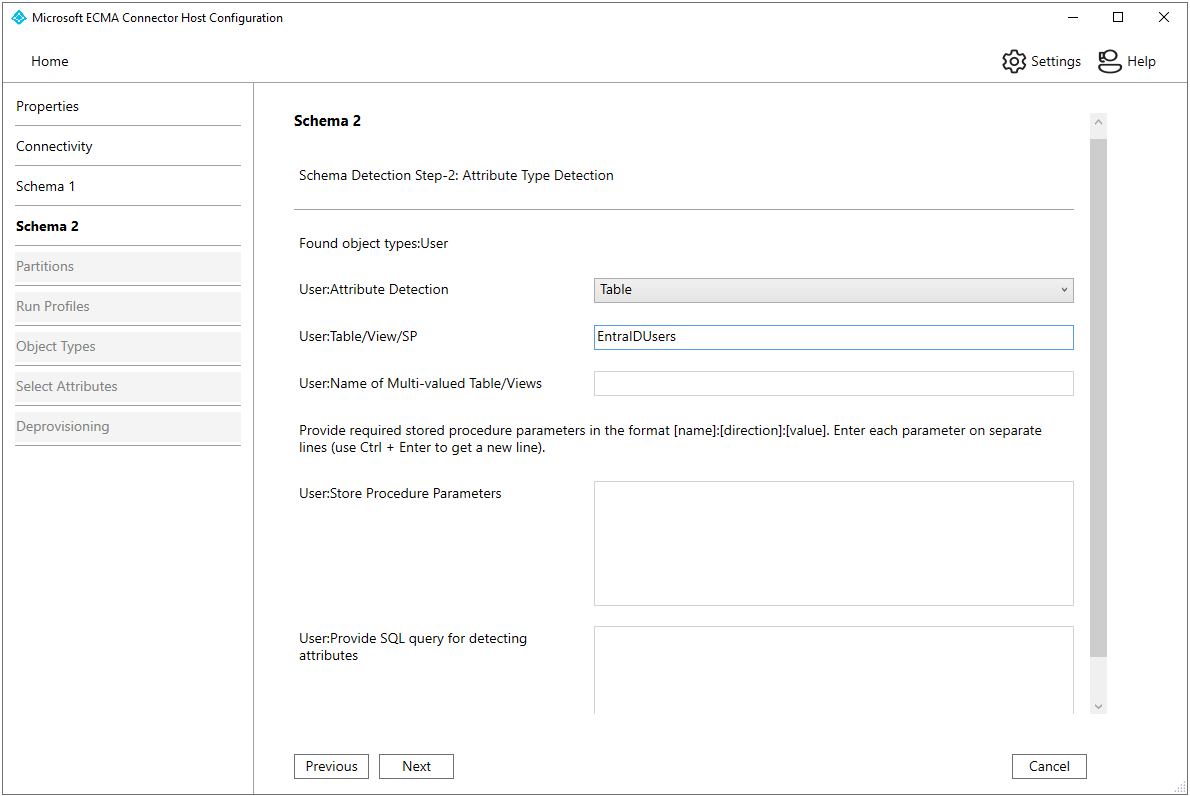
Same as above, we simply tell the wizard to use our EntraIDUsers table for attribute detection for the User object type. This means that it will look at the different column we created earlier, nothing more.
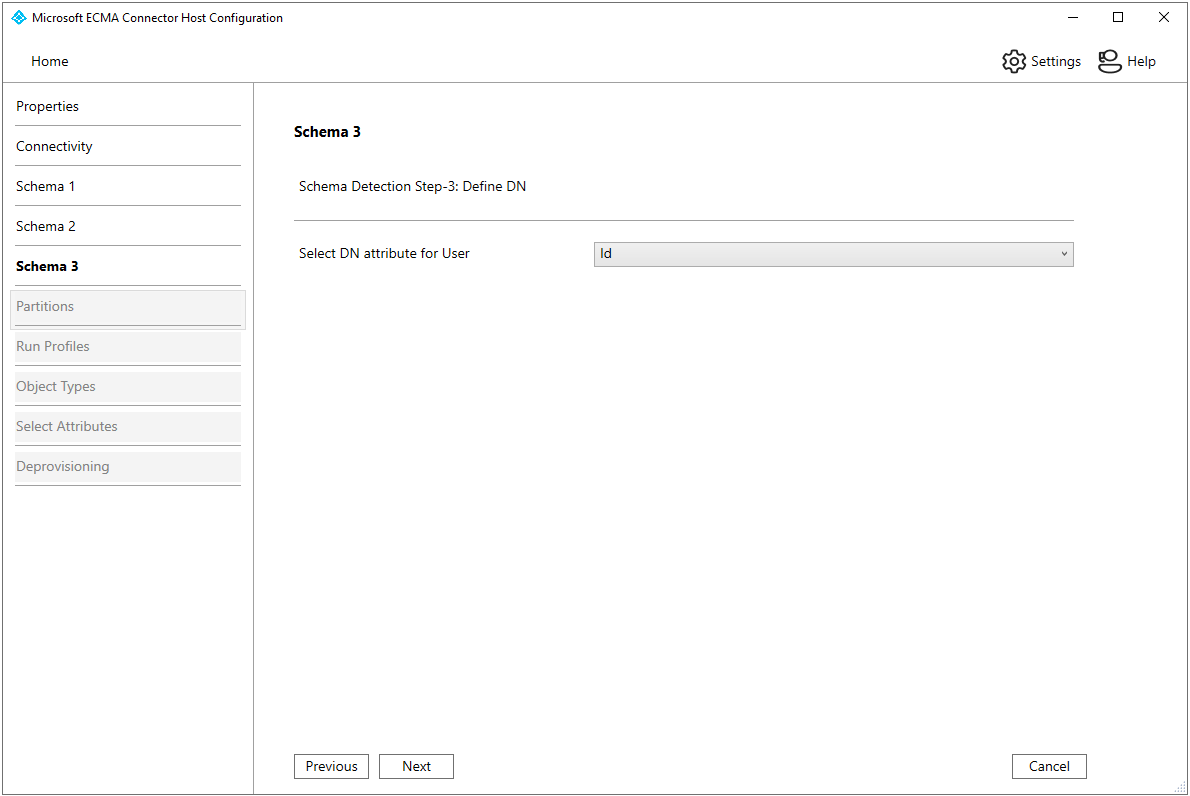
MIM Connectors often us DN naming style for objects, and the Genric SQL MA is no exception. Simply choose your identifying property and click Next.
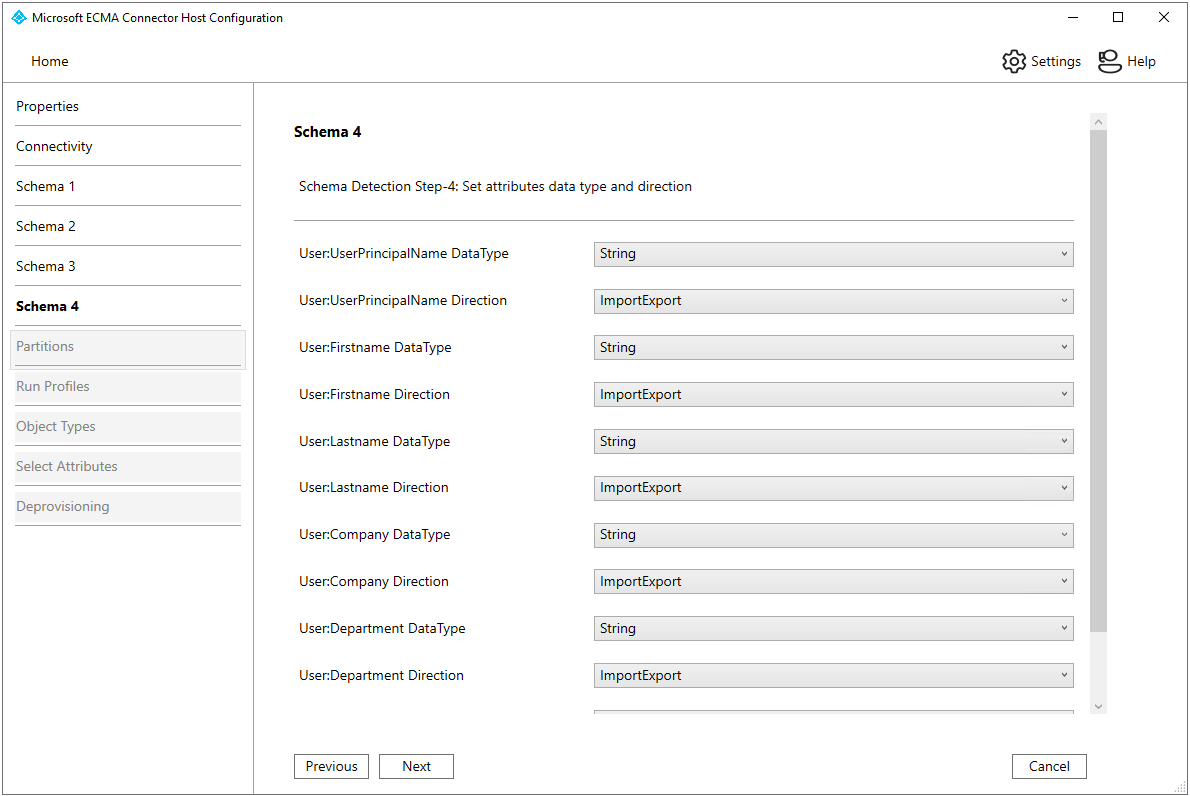
For the last schema related page, we should see all of our attributes detected, and we just leave everything default. For our table, all data types are string and direction is ImportExport.
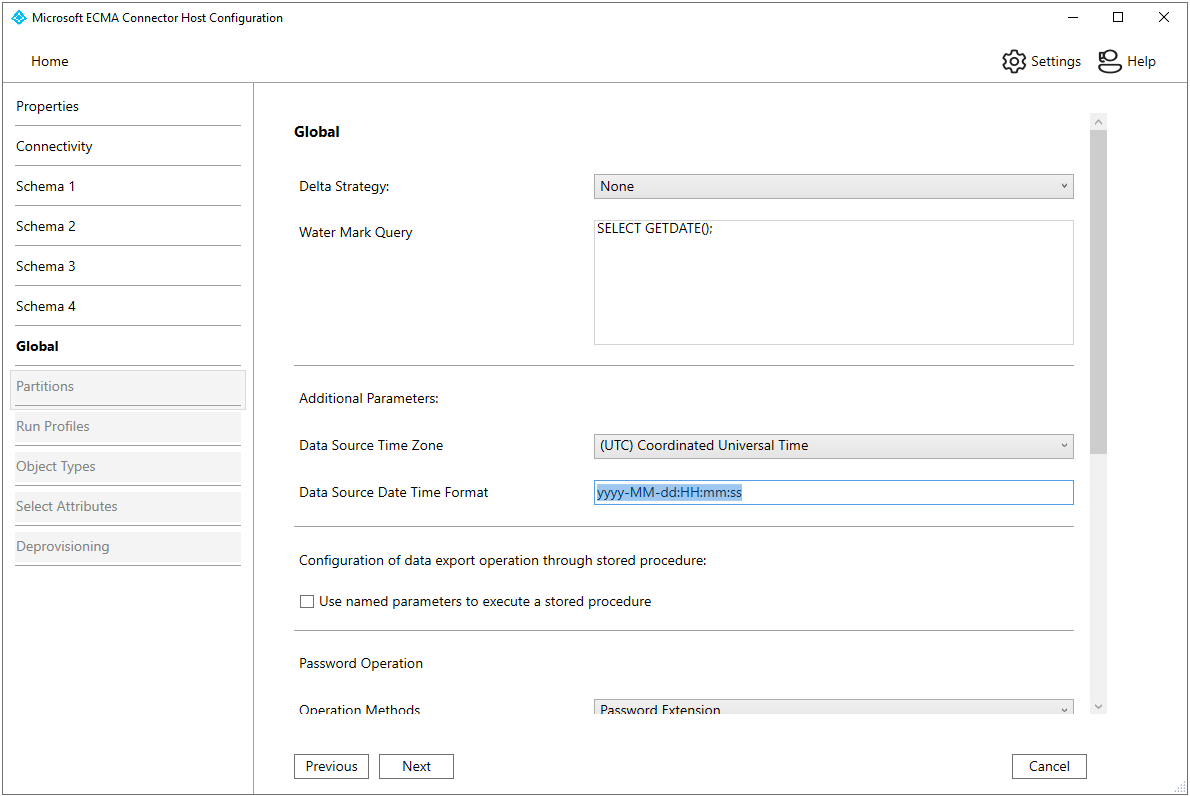
On the Global settings page, complete the data source date time format with something like yyyy-MM-dd:HH:mm:ss and continue.
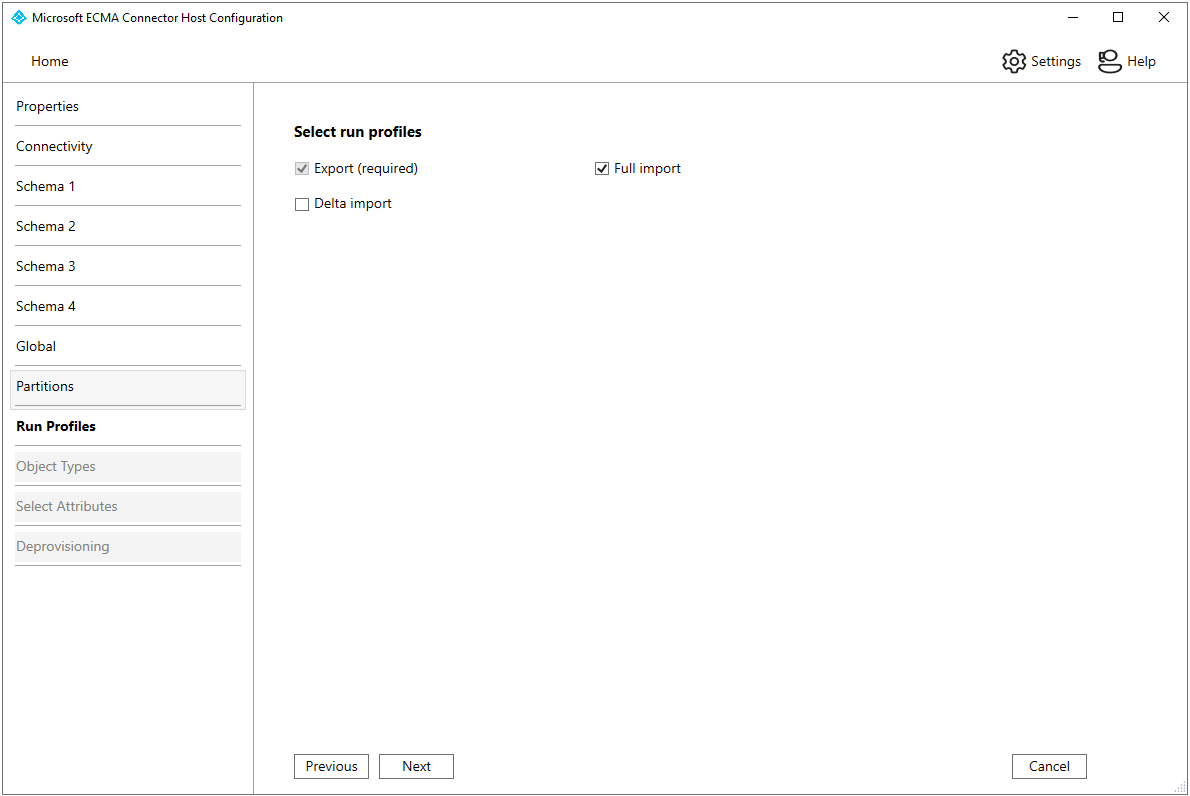
We will be working with a fairly limited amount of users (Less than 10k), so a full import is more than good enough. It is possible to configure delta imports quite easily, but that requires an additional column or change tracking feature. What we could add is a column in SQL LastUpdated and having a separate view for our Delta import run profile, whcih will be configured later.
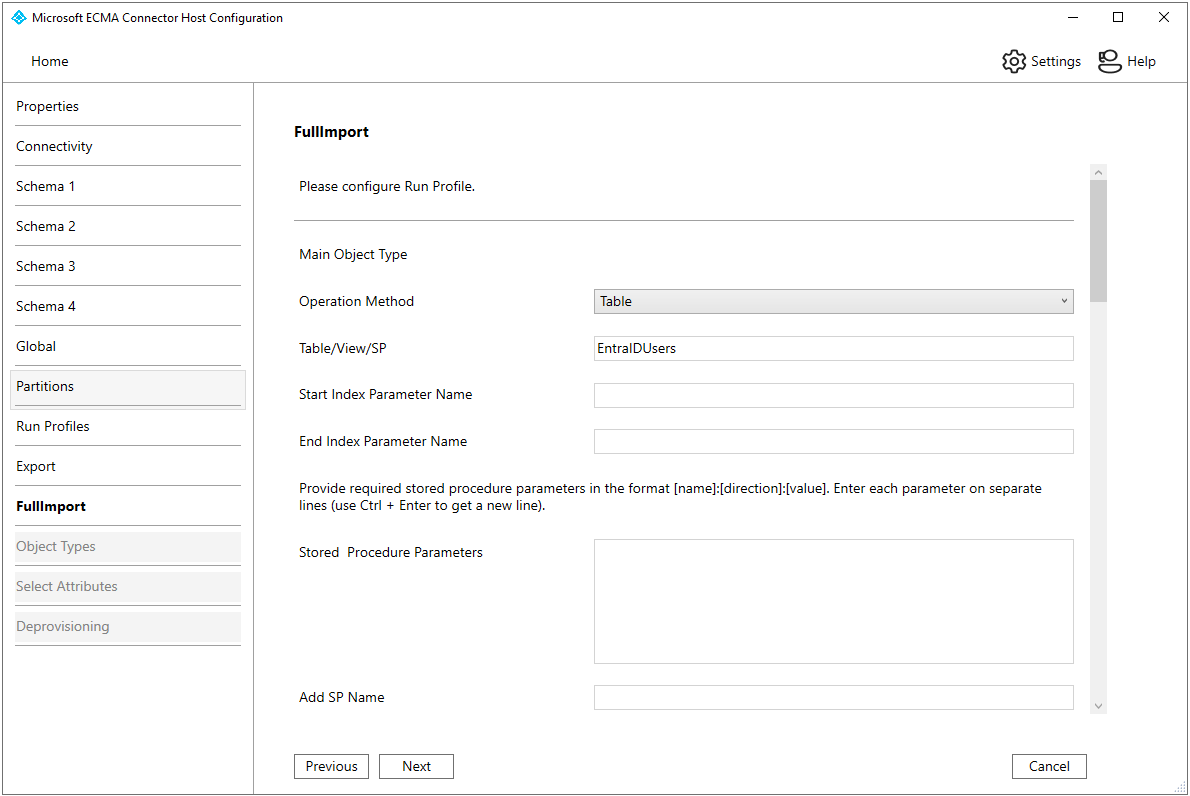
MIM has a notion of run profiles, and the Generic SQL MA has a gazillion options. We will simply work with our EntraIDUsers table directly, but you could easily export through stored procedures, views and stuff too.
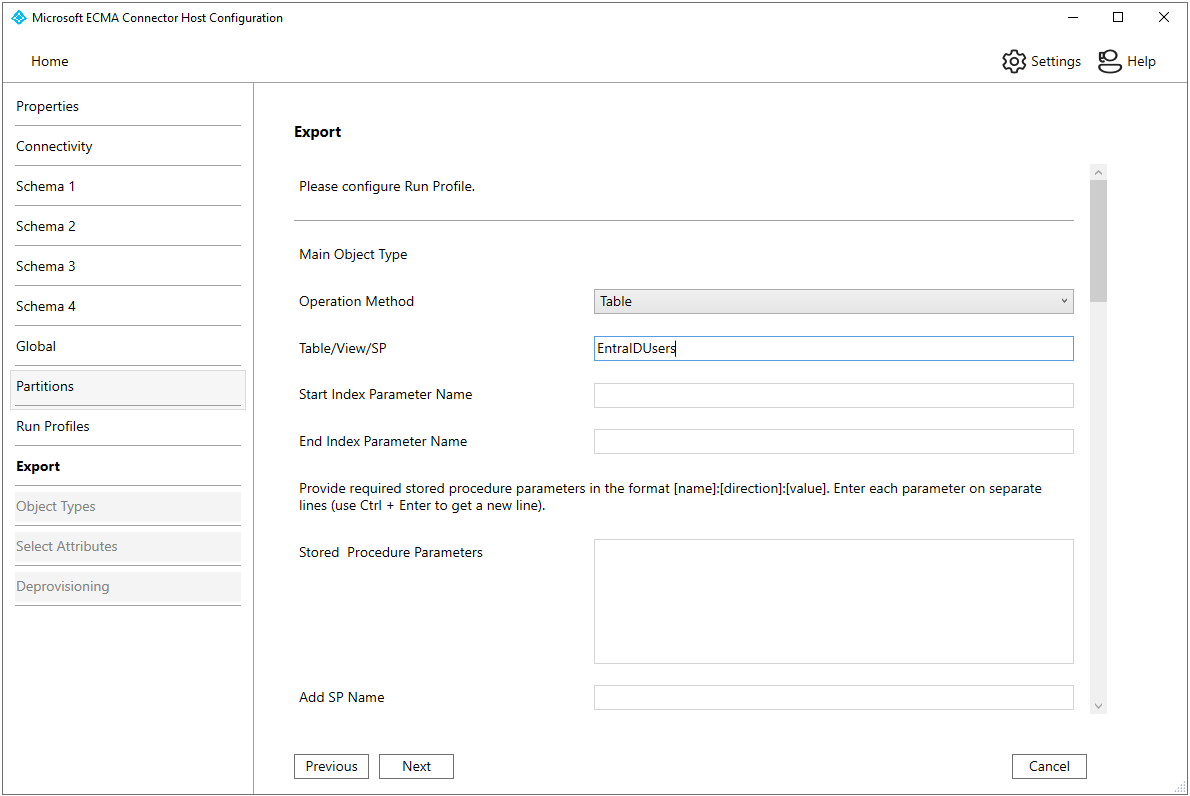
Same for the FullImport run profile. We will simply work with our table EntraIDUsers directly. If adding DeltaImport, we will get another one of these for that delta run profile, where we could configure a view or a SQL query that only returns users modified last 24 hours or similar. This would greatly speed up exports from Entra ID, but here we will have few users and want low complexity.
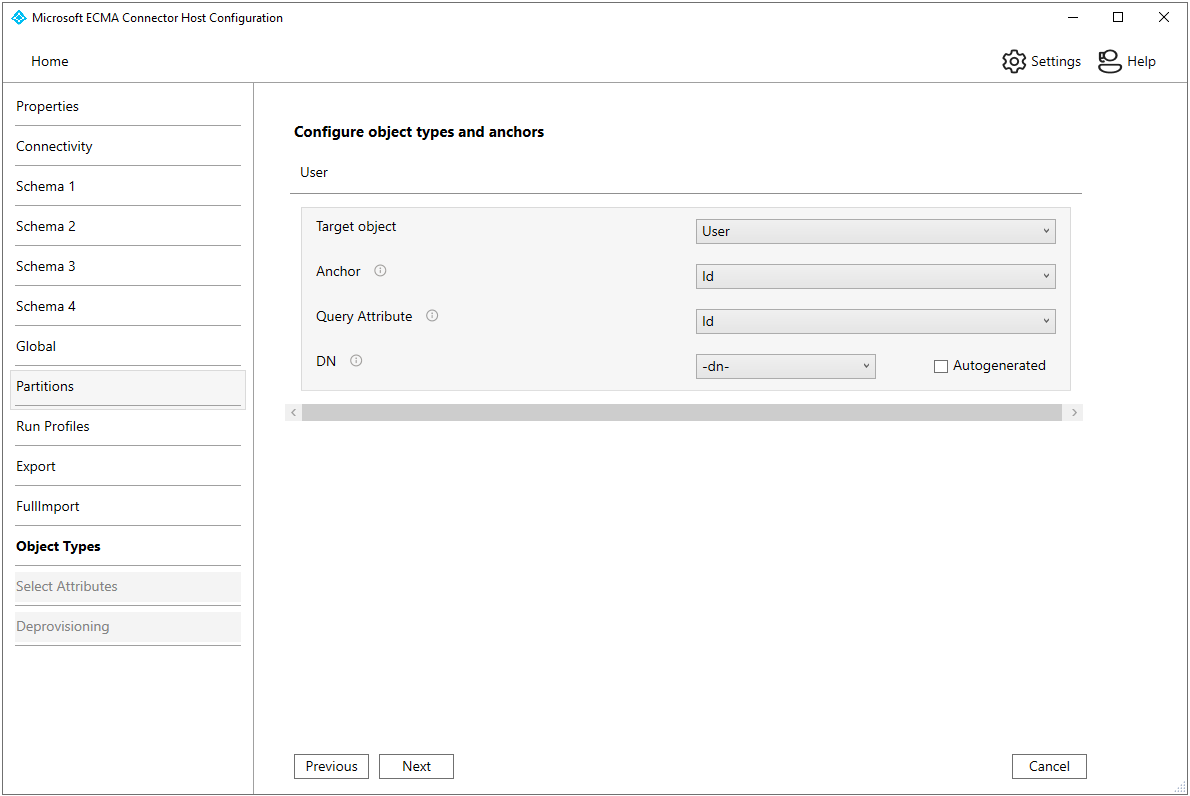
Configure the User object type with anchor and query attribute being the same as the identifying attribute.
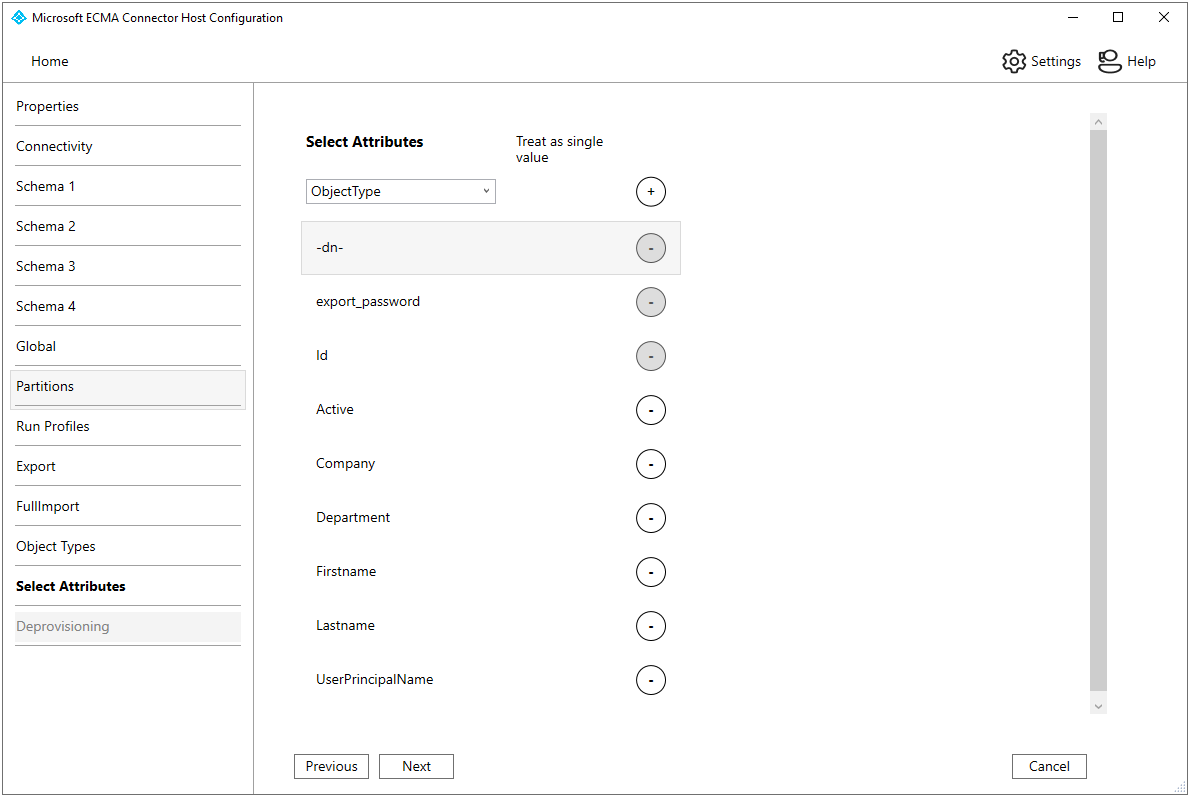
Just select all attributes:
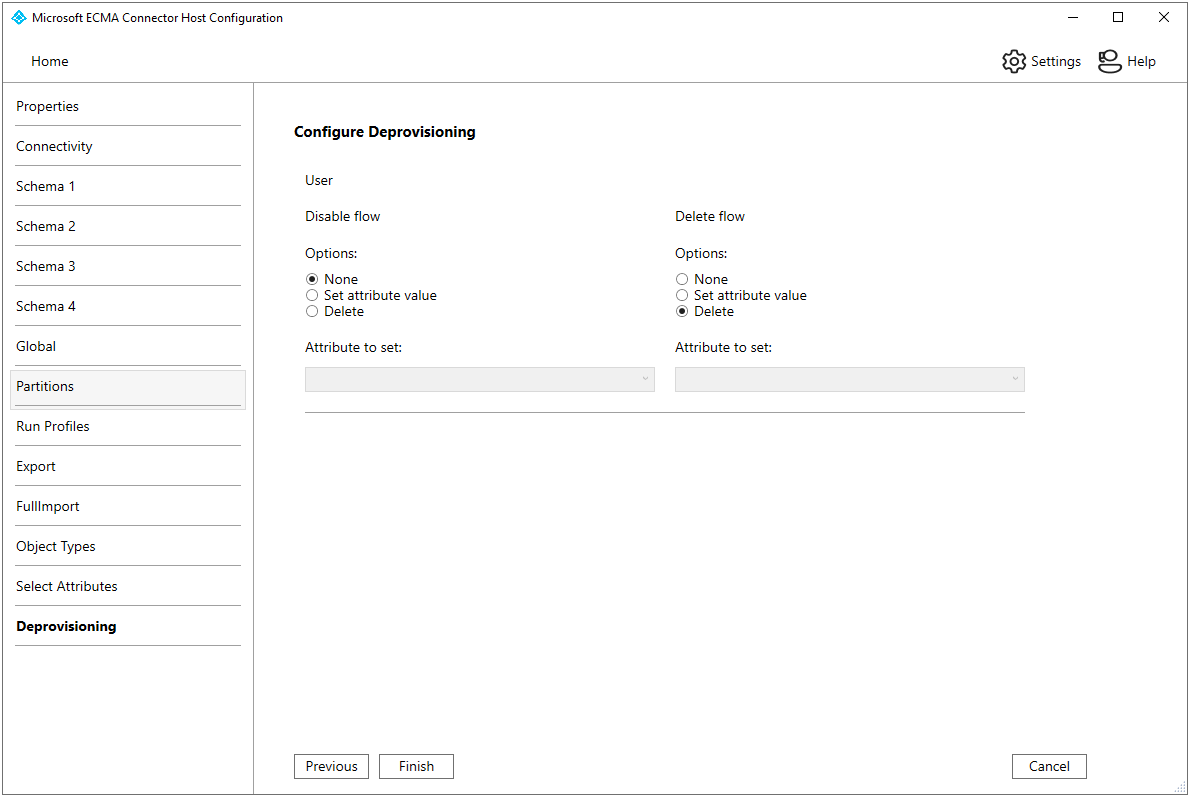
Delete the row when delete flow is run.. Many many steps, but finally Finish.
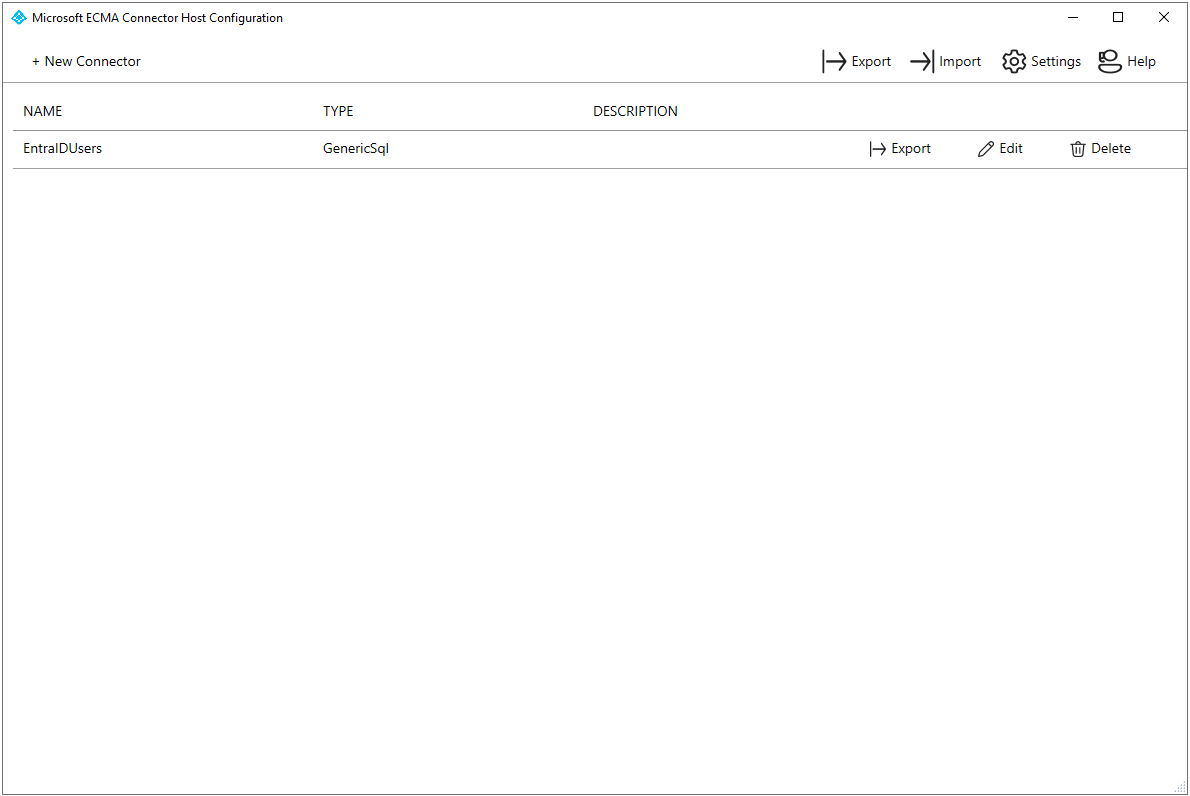
We can now see our new connector on our list:
Setting up Entra ID outbound provisioning
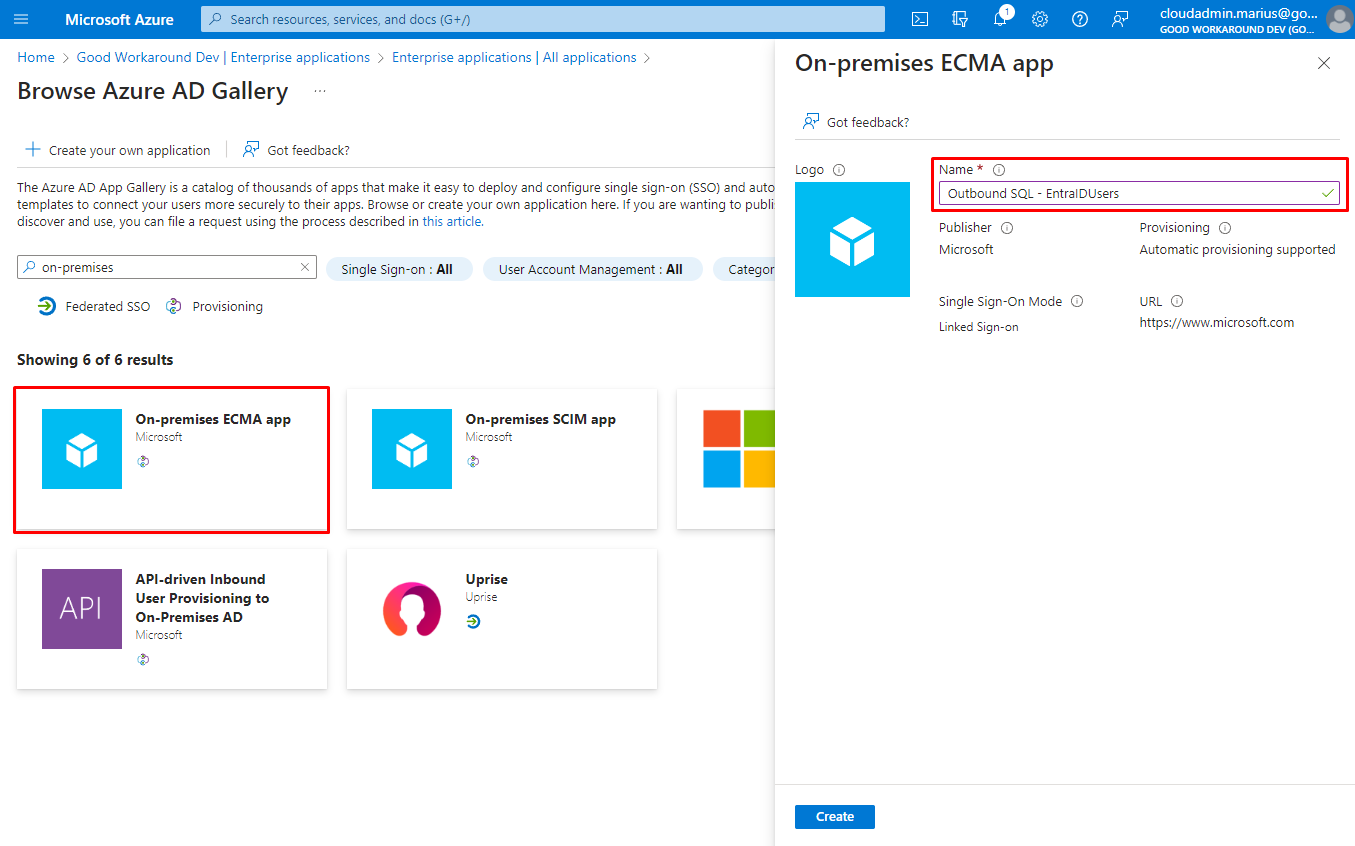
FINALLY, we are ready to configure the Entra ID side of things!We start by creating an instance of the On-premises ECMA app app template from the gallery:
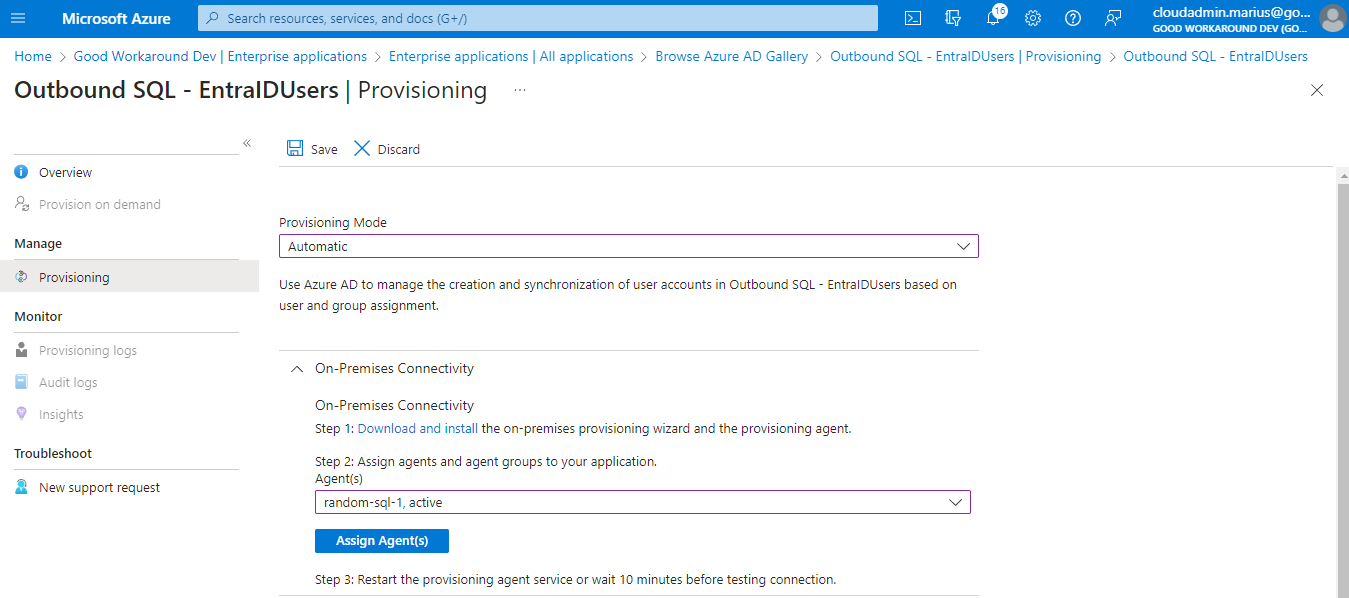
On the created enterprise app, we can now configure provisioning. Start by changing Provisioning Mode to Automatic, choose your agent and click Assign Agent(s).
Now, wait a little bit, and restart the Microsoft Azure AD Connect Provisioning Agent windows service. After this, you can input the below values, with secret token being the same value as when configuring the connector. Please note that the url is on the format https://localhost:8585/ecma2host_{CONNECTORNAME}/scim
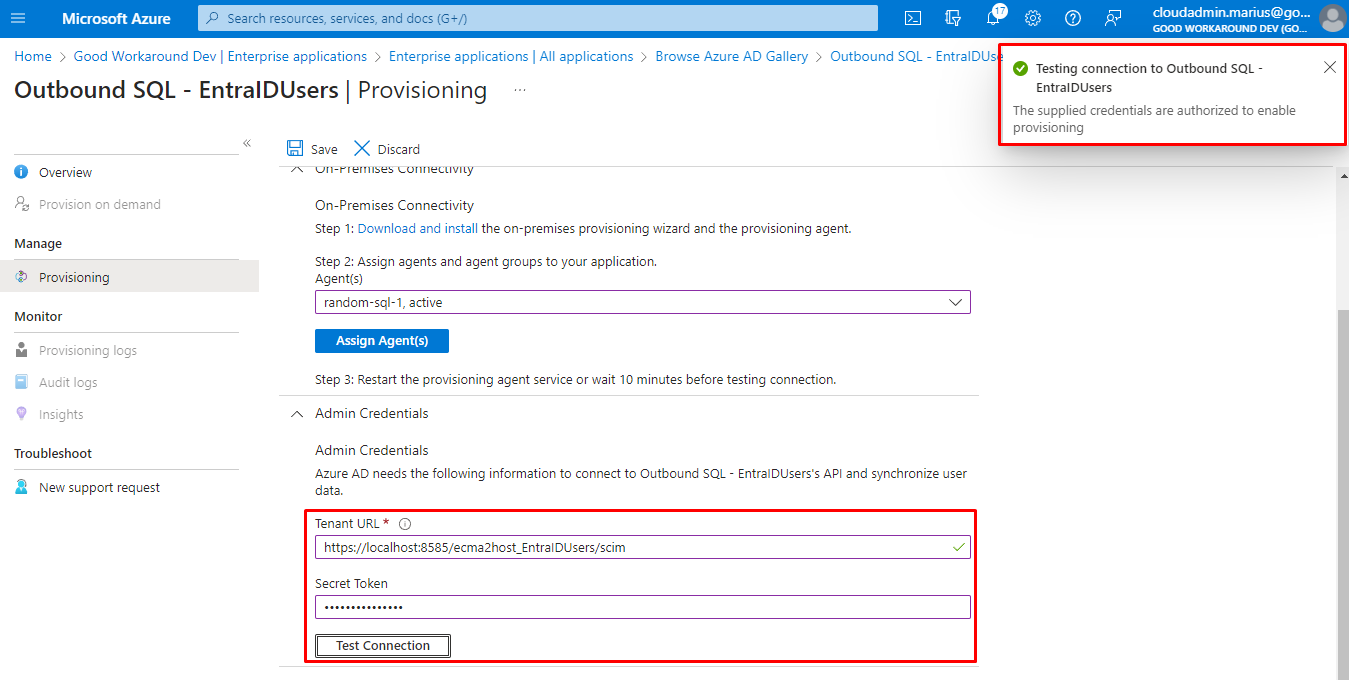
After configuring and Test Connection succeed, Save.
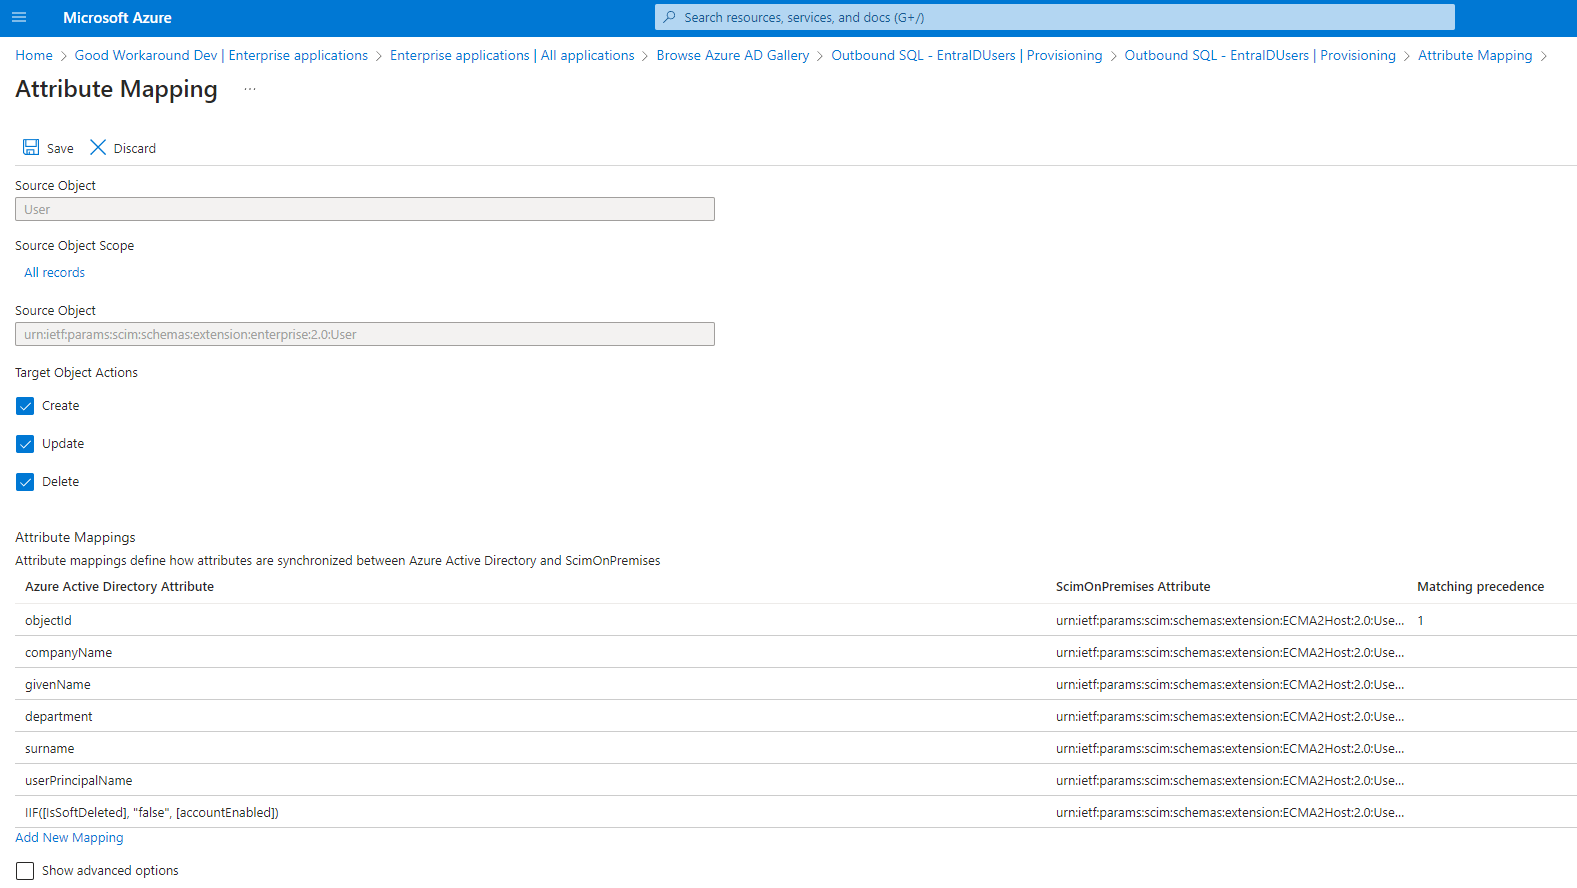
Attribute mapping implementation
We have already planned our attribute map, so we are now ready to implement it:

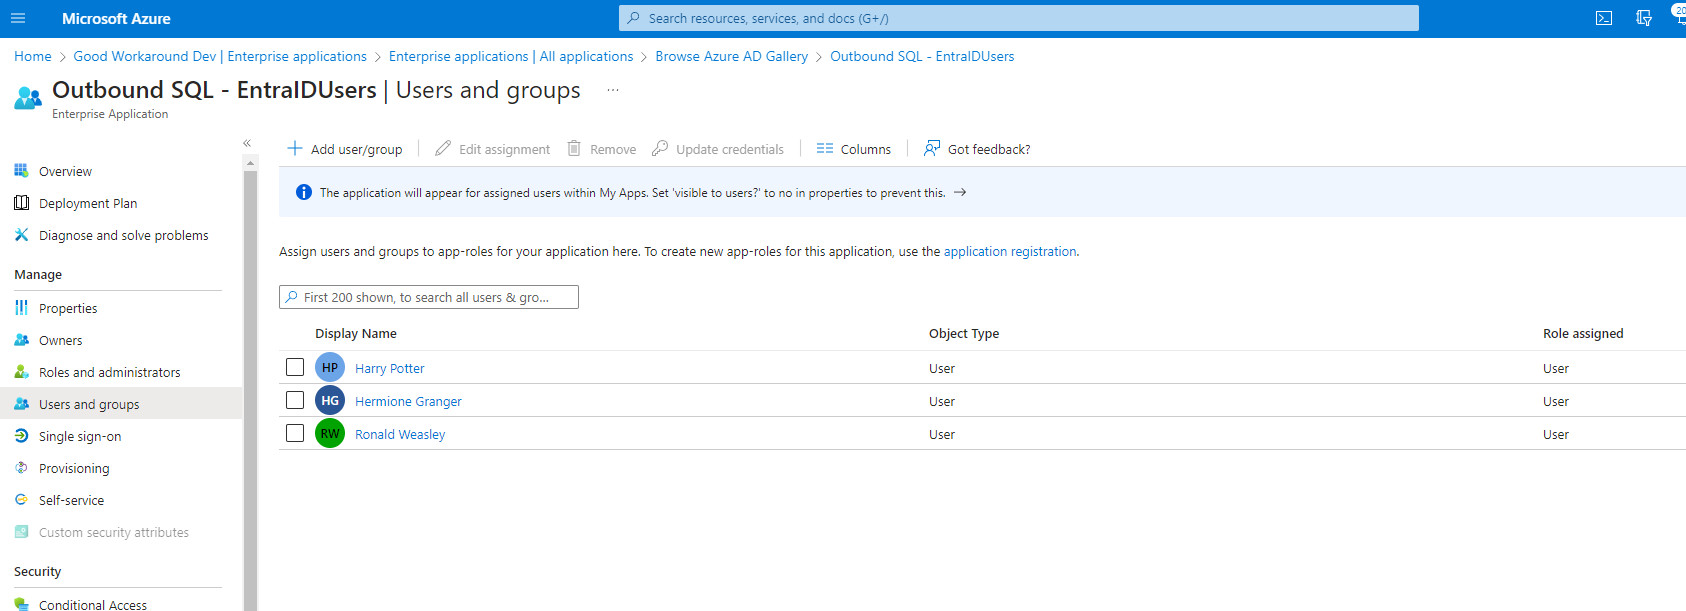
Testing provisioning
Now that all provisioning have been configured, we can finally test provisioning. First we assign three users to our app:
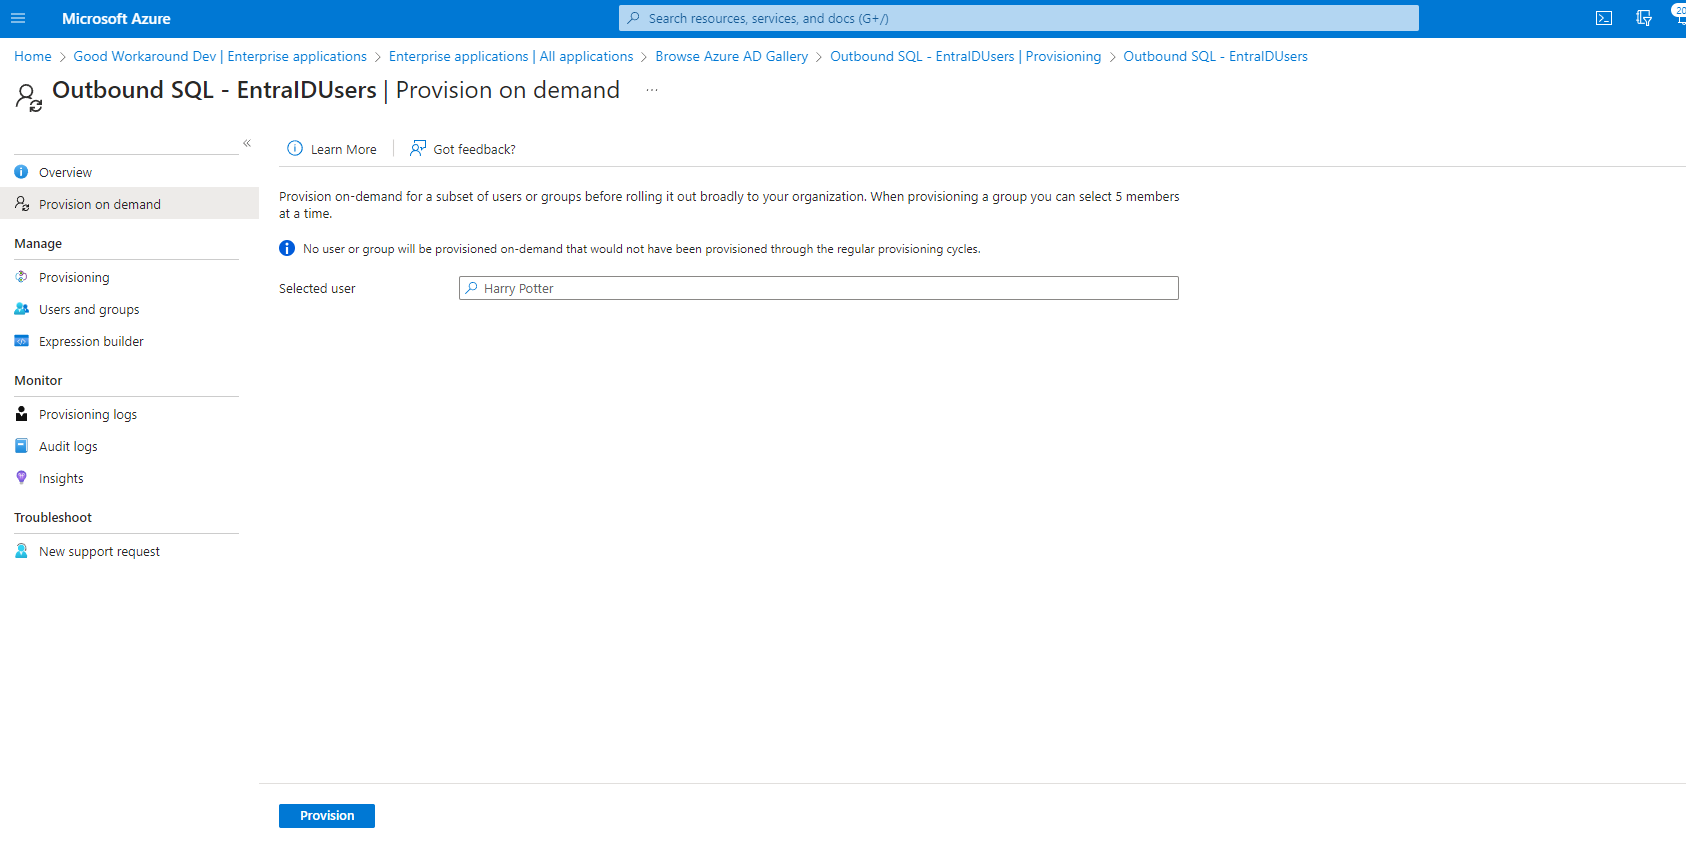
Back on the provisioning page, we can use the Provision on demand feature to test a single user:
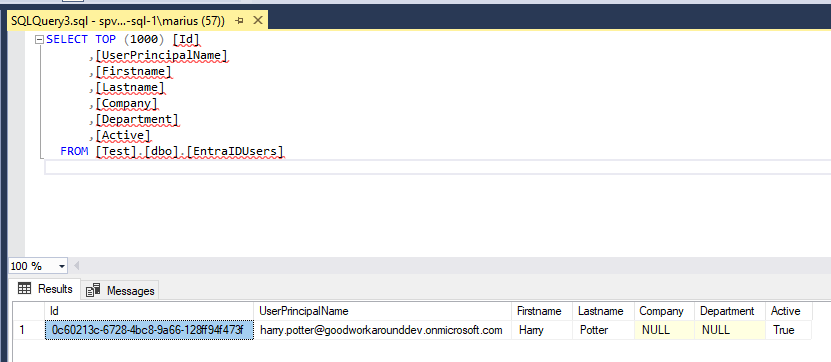
And from the result, we can see that our user should be successfully provisioned:
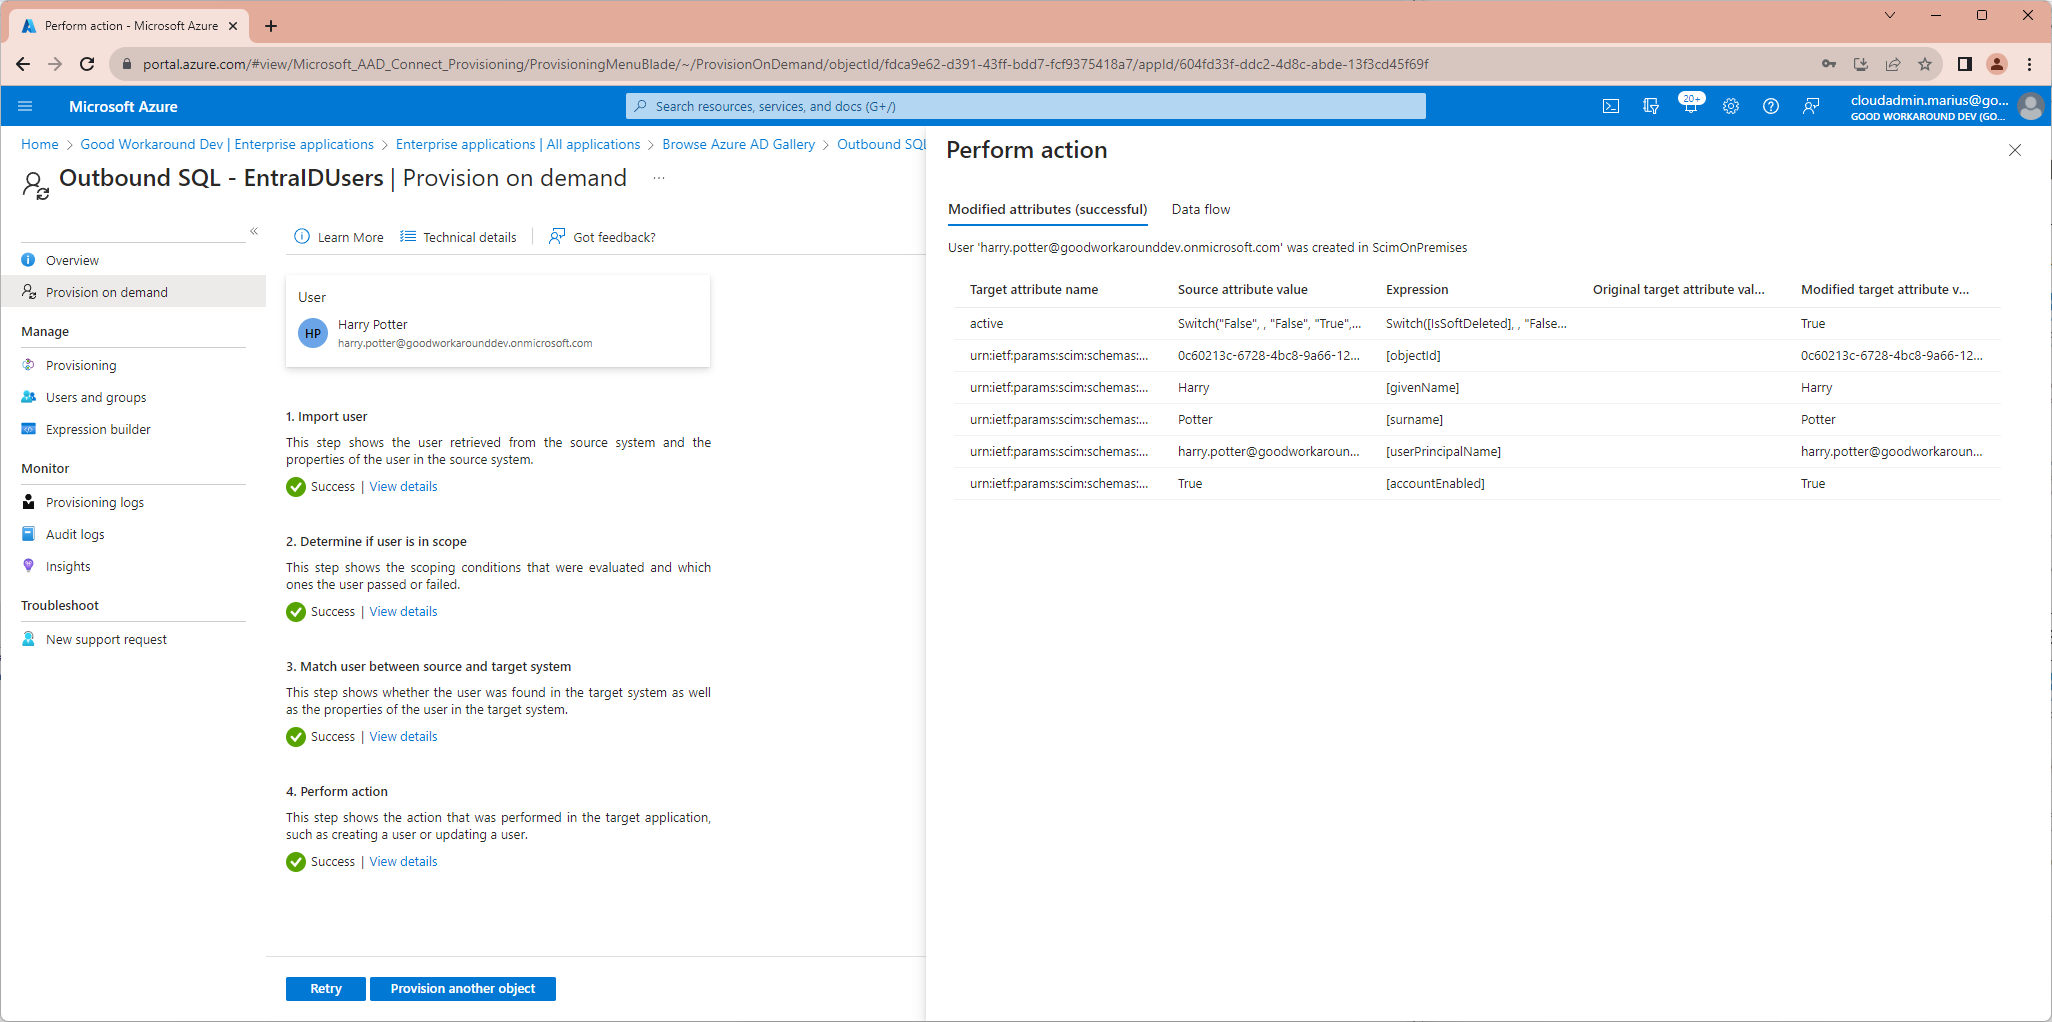
And indeed, the user has appeared in the database:
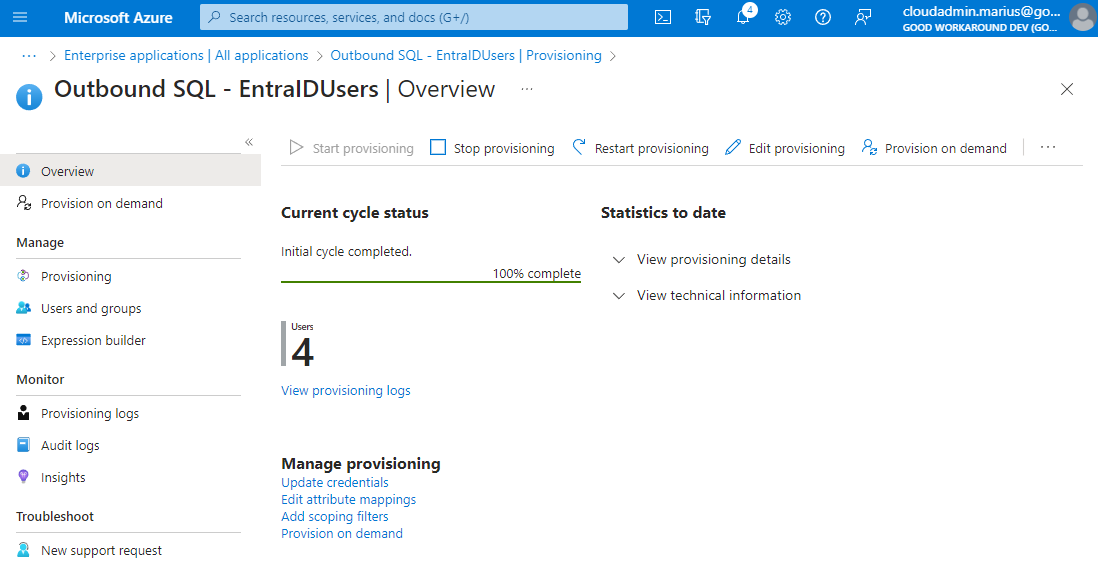
Now we can simply click Start provisioning and wait a few minutes:
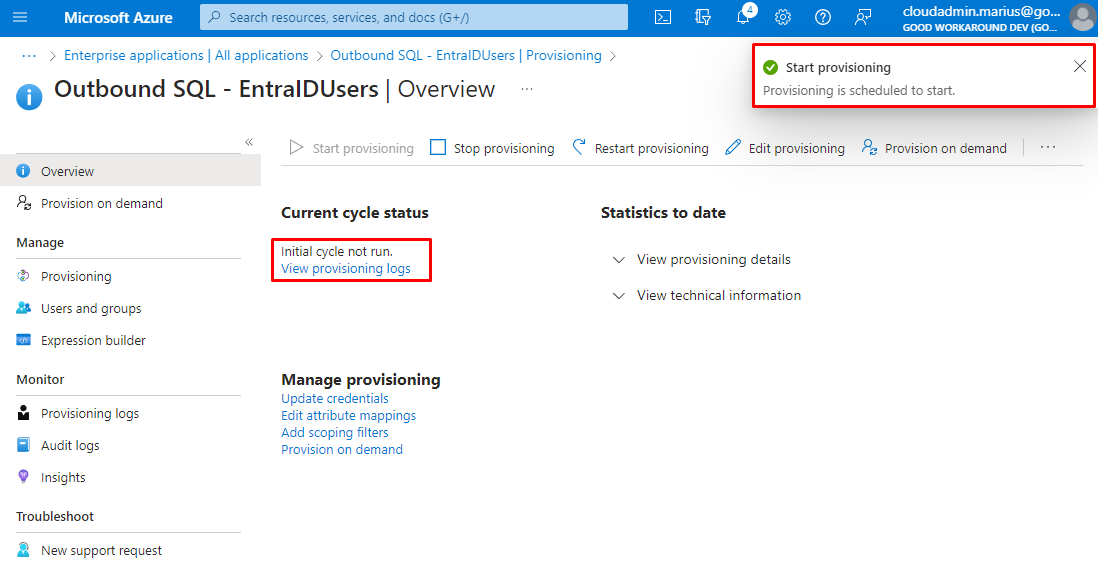
Literally 12 seconds later:

Now let us see what happens to a user when unassigned from the application:
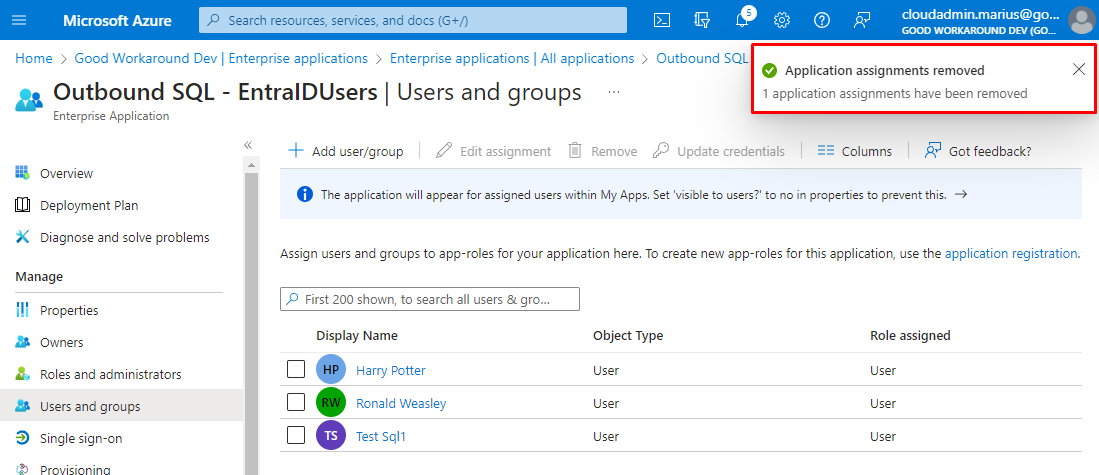
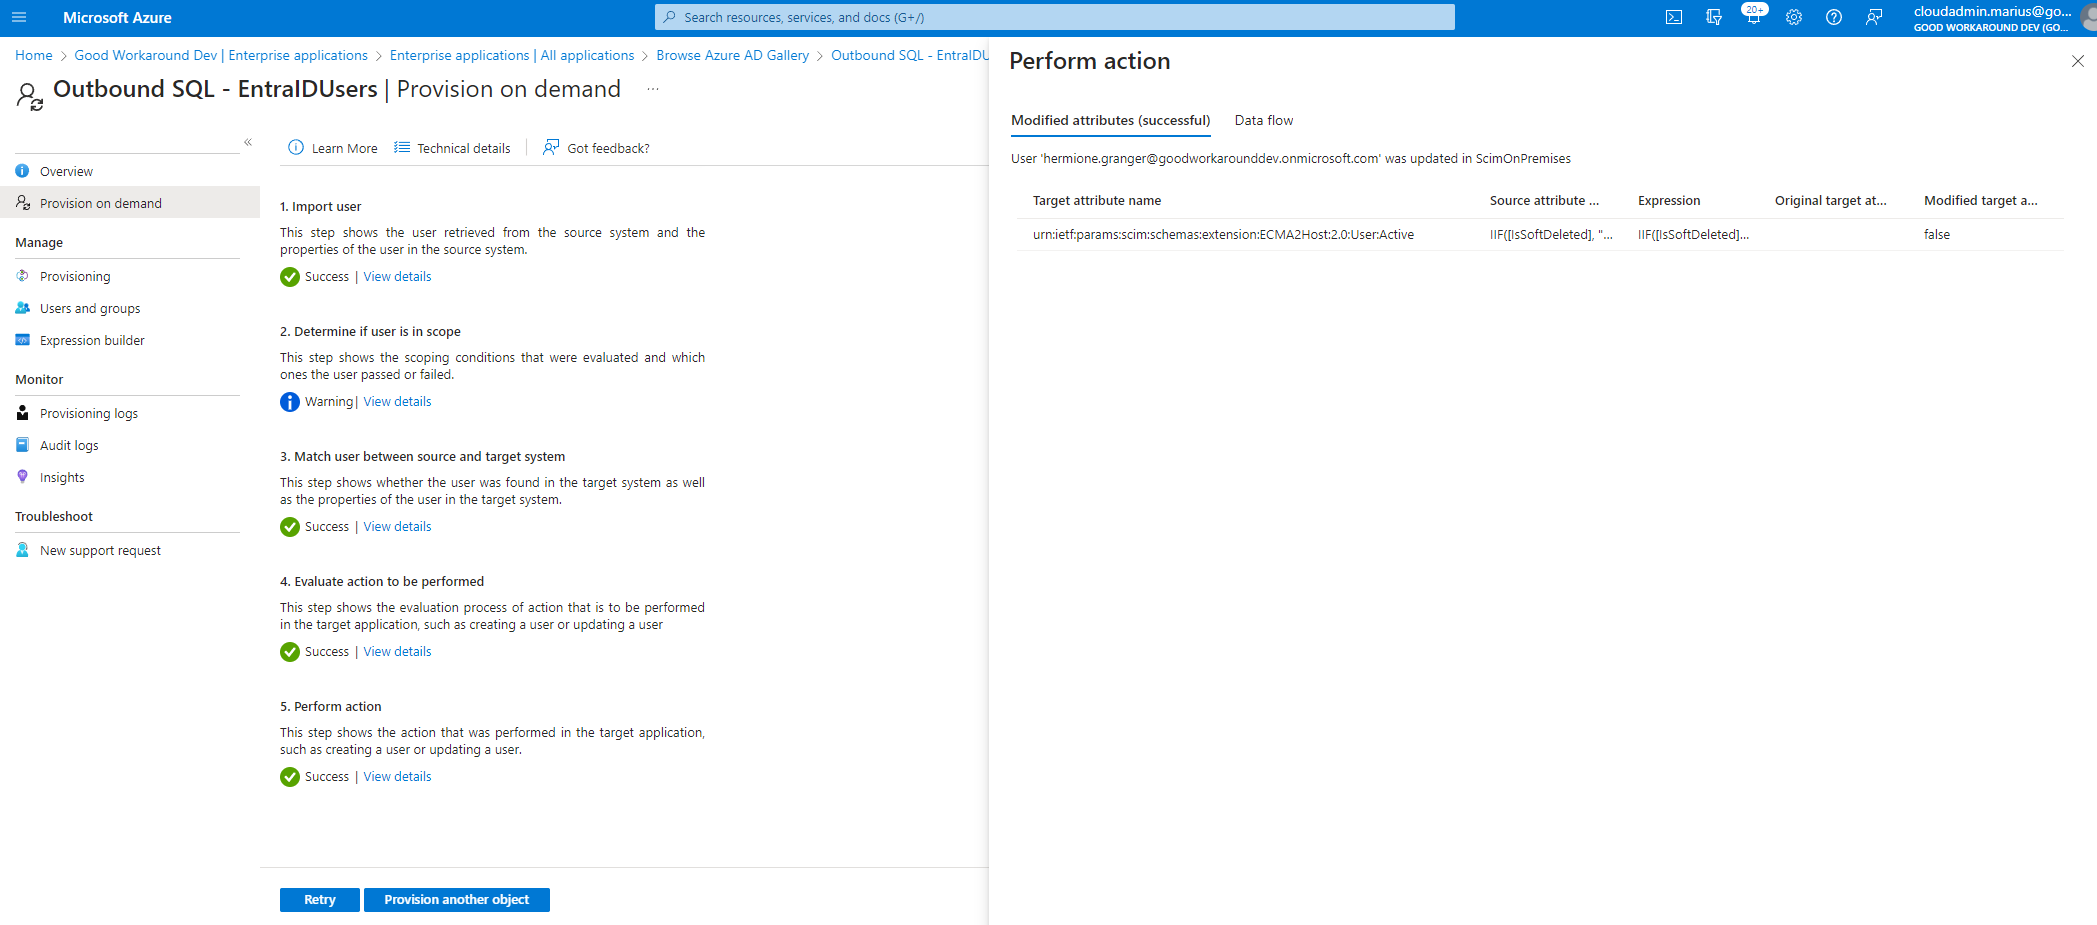
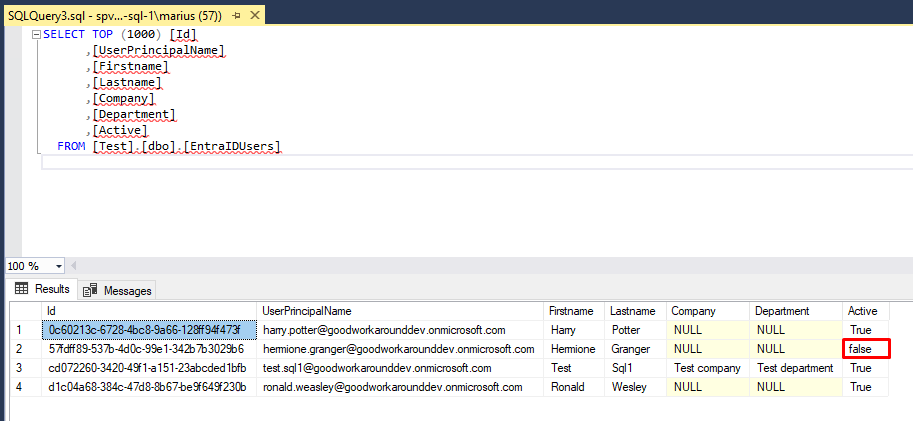
As you can see, the Active flag is set to false, but the row is not deleted. I actually have not found any way of getting Entra ID to delete the row, but you can achieve this with a database trigger:
CREATE TRIGGER DeleteRowOnFalse
ON EntraIDUsers
AFTER UPDATE
AS
BEGIN
    IF UPDATE(Active)
    BEGIN
        DELETE FROM EntraIDUsers
        WHERE Active = 'false' AND EXISTS (
            SELECT 1
            FROM deleted
            WHERE EntraIDUsers.Id = deleted.Id
        );
    END
END;
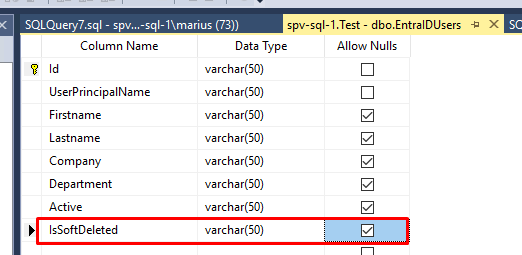
Actually, let’s add another column for soft deleted status:
Working with deletes
First we add our IsSoftDeleted column to our table:
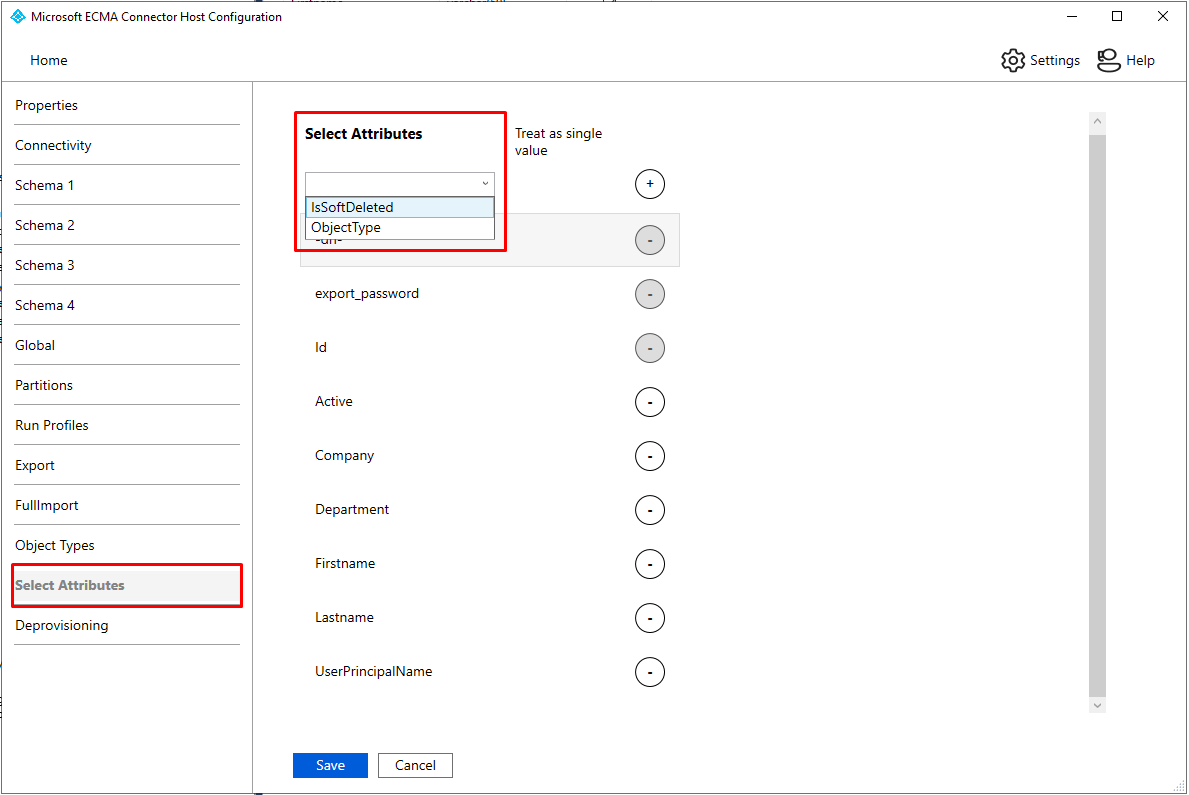
Next we need to edit our ECMA Connector Host to include the attribute:
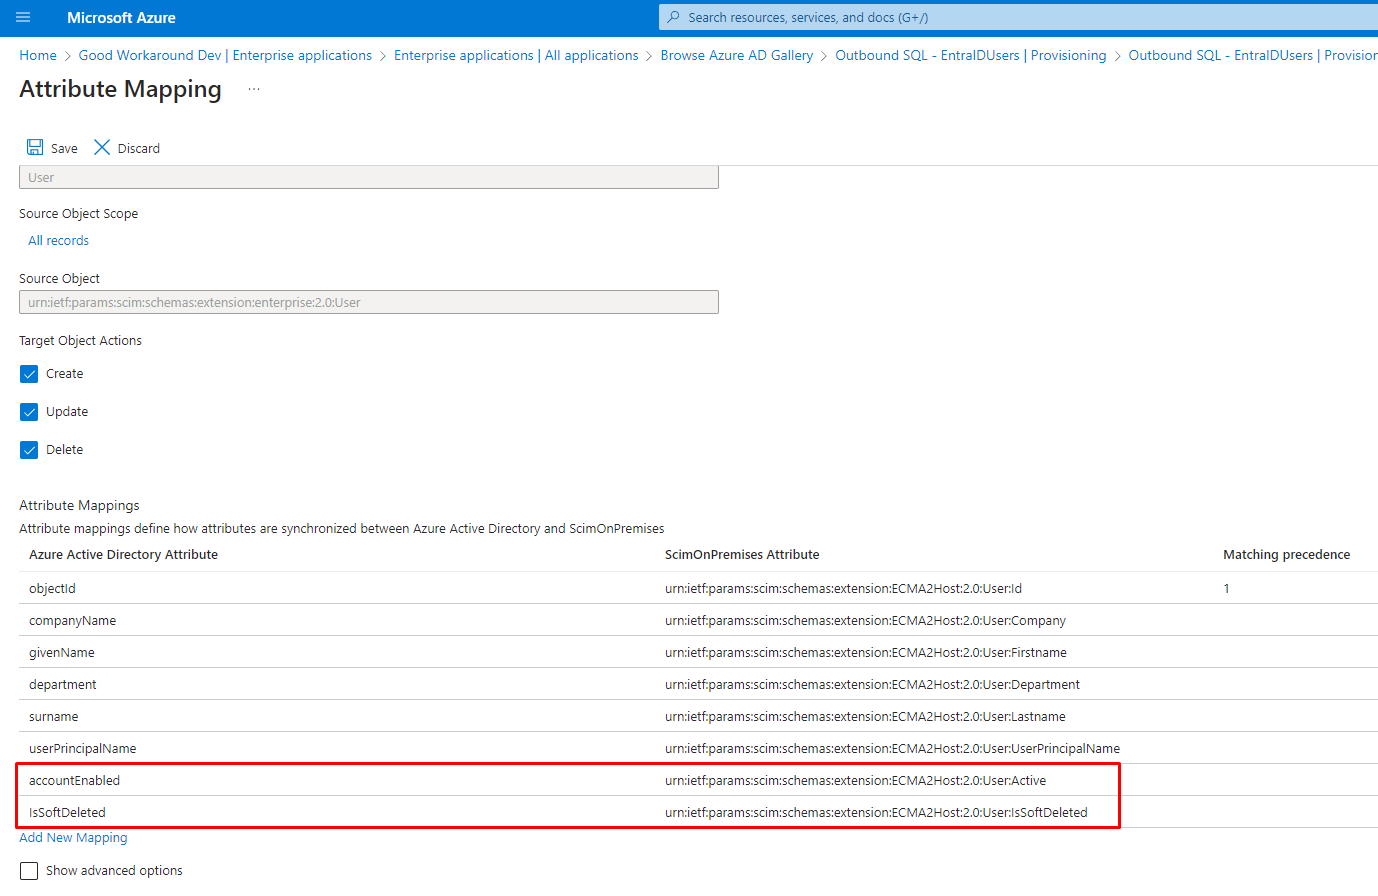
Now we change our attribute mapping a bit:
And then we create our database trigger:
CREATE TRIGGER DeleteSoftDeleted
ON EntraIDUsers
AFTER UPDATE
AS
BEGIN
    IF UPDATE(Active)
    BEGIN
        DELETE FROM EntraIDUsers
        WHERE IsSoftDeleted = 'True' AND EXISTS (
            SELECT 1
            FROM deleted
            WHERE EntraIDUsers.Id = deleted.Id
        );
    END
END;
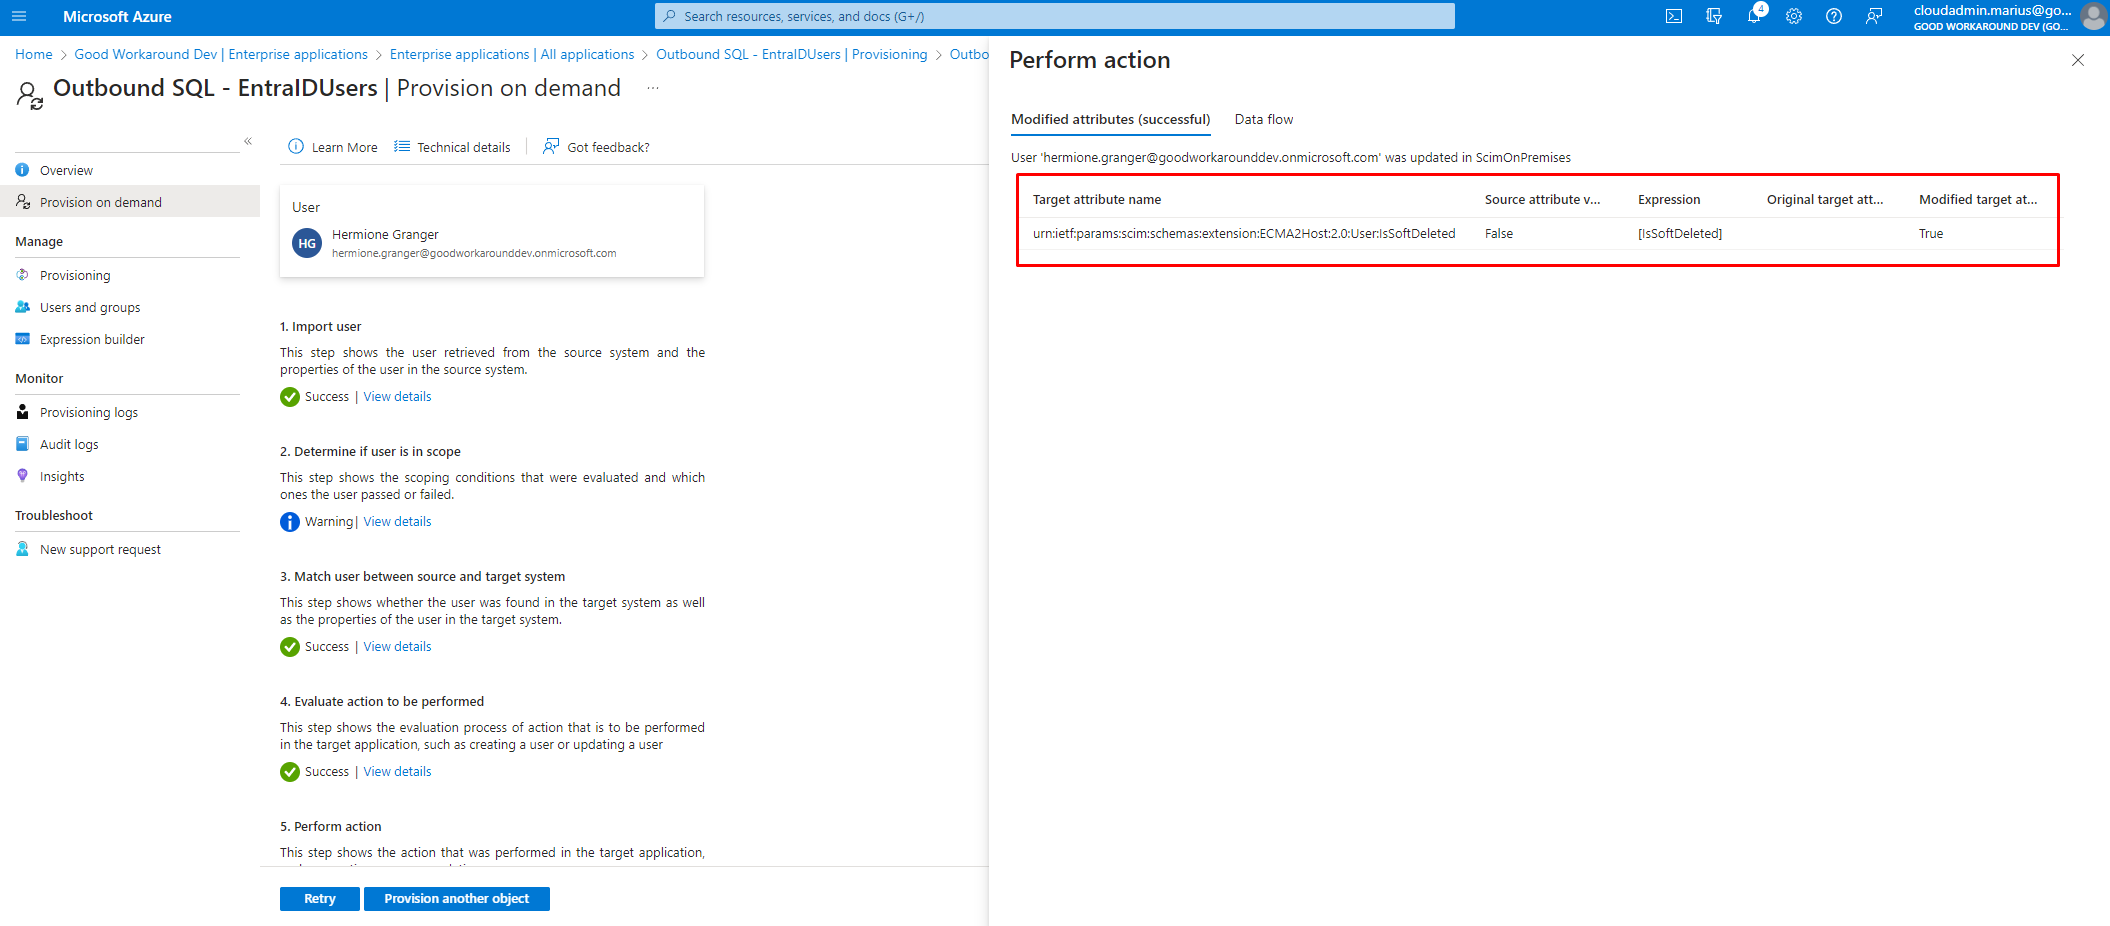
We can now see IsSoftDeleted being flowed as “False” for a single user that I triggered provisioning on demand for:

And then when the user is unassigned, the IsSoftDeleted attribute is set to “True”:
The user is removed from the database:

In summary
Using ECMA based connectors can be a very useful approach for populating data into certain systems, such as SQL databases and LDAP catalogs. The main positive is that you do not need to patch and update anything, and that you do not need to handle scripts and credentials for reading Entra ID.
It is very useful to have some MIM experience when using these types of connectors, but following guides like this should be fairly easy for most people. Also, it is very simple to test in separate SQL servers, on separate agents and separate enterprise apps, so – go ahead and test it out!
