Well, it’s been three years since my last post, and now I will try to start posting again. I will do a mini series on Azure AD governance features, and how to achieve a full “Identity Governance and Administration” (IGA) solution using Azure AD.
The end goal will be to handle entitlements inside Office 365 as well as third party applications. This post will focus on 3rd party apps, and will lay the foundation for handling these entitlements with the Azure AD Entitlement Management feature, as well as actually populating these entitlements inside the app using SCIM, Claims or other means, all of which will be covered in later posts.
Let’s go ahead and create a, for now, dummy application registration by creating a new Enterprise Application.

Choose “Non-gallery application” to get the features we want. I will get back to the differences here in a later post.
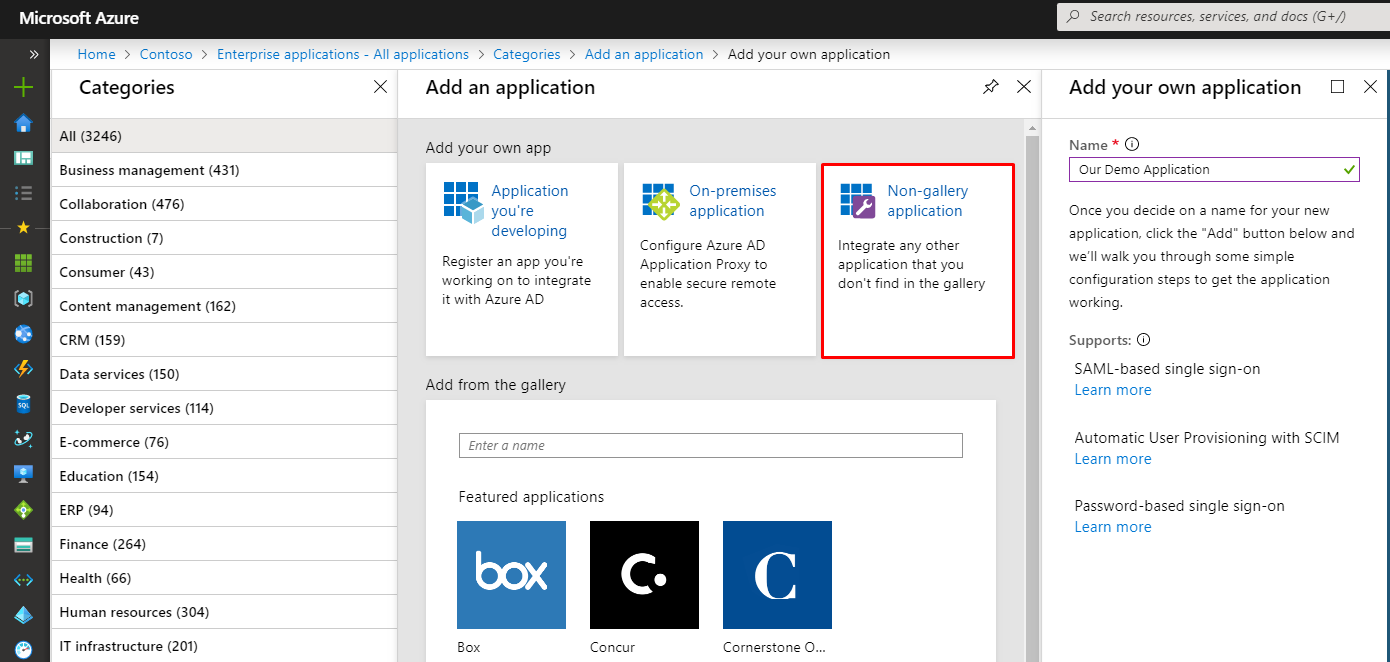
Application successfully created, let’s go.

What you will currently find when trying to assign users and groups to your applications, is that there is only one role “User” available.
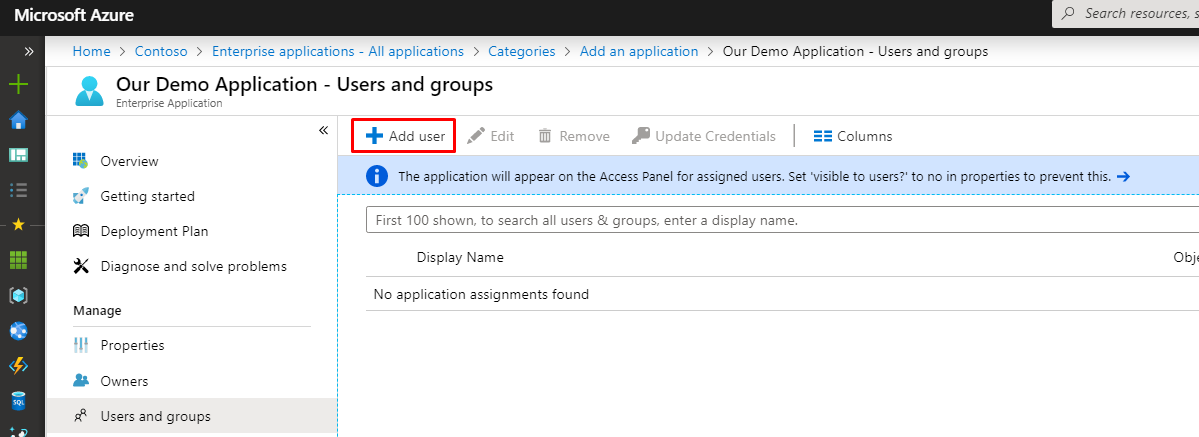

This of course makes sense when only controlling access to the application itself, but not for us; we want to control roles in the application as well.
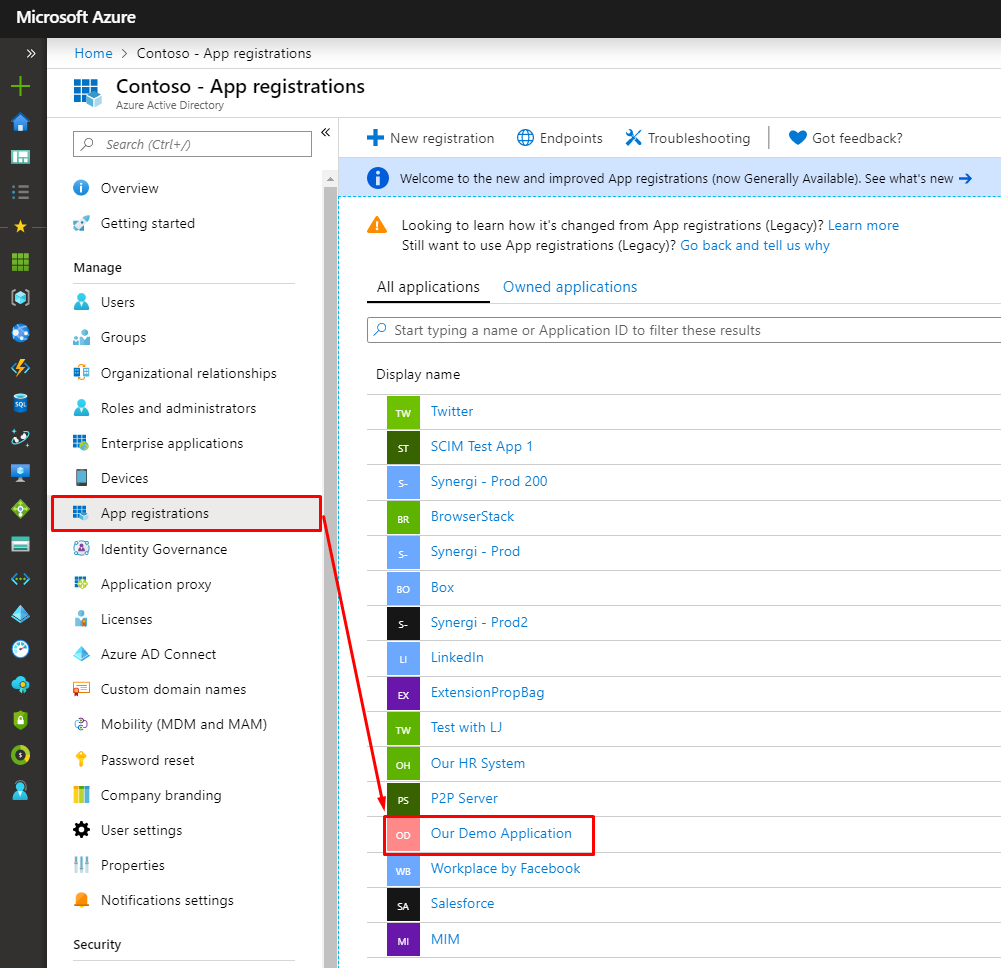
In order to do that we need to add more roles to the application. Go to “App registrations“
Locate the Manifest and you will find “appRoles” in the json file.
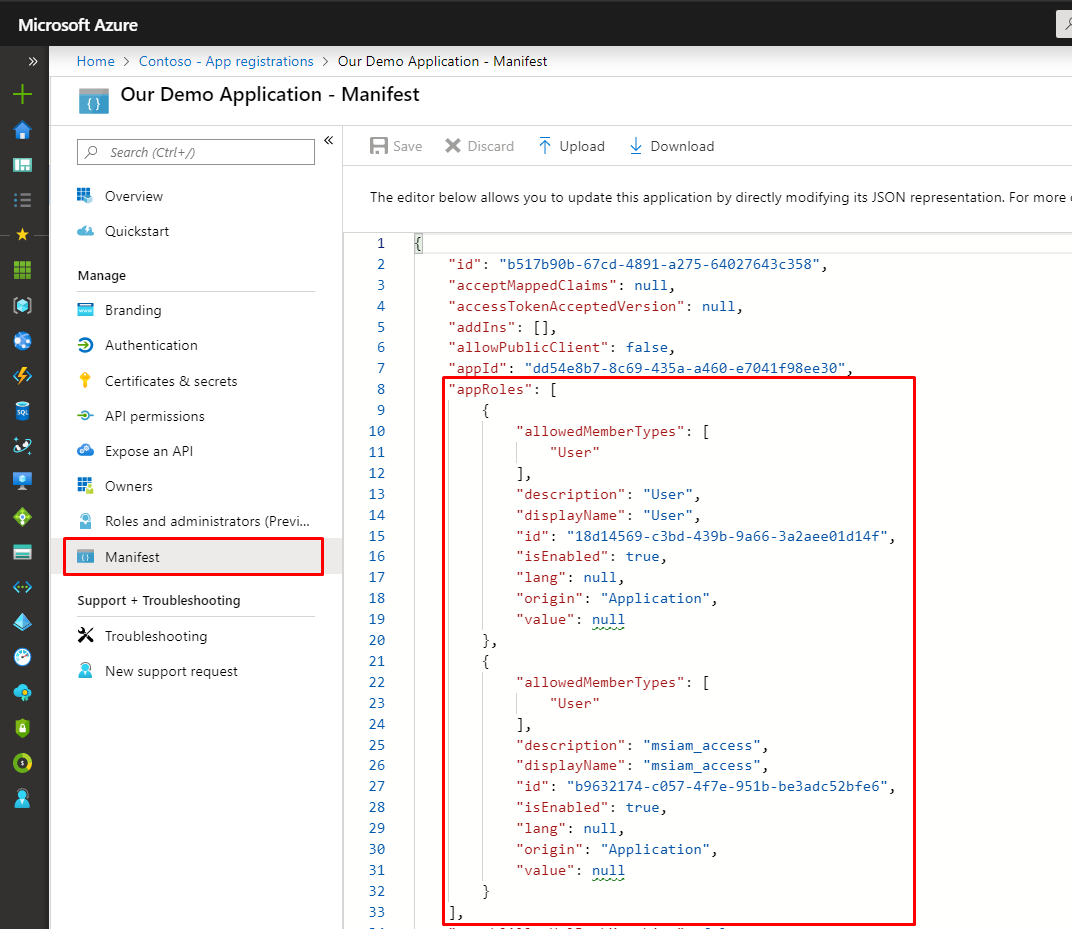
You can actually have more than 1000 different appRoles for a single application. First, disable the two roles that Azure AD provided for us and save.

Now, add some custom roles. Here are my examples:
"appRoles": [
    {
        "allowedMemberTypes": [
            "User"
        ],
        "description": "Manager",
        "displayName": "Manager",
        "id": "25864c8d-637b-4ce1-8283-e3c3678669ce",
        "isEnabled": true,
        "lang": null,
        "origin": "Application",
        "value": "Manager"
    },
    {
        "allowedMemberTypes": [
            "User"
        ],
        "description": "Frontline",
        "displayName": "Frontline",
        "id": "e580e3b7-1e4e-4c15-b820-256d36f60e68",
        "isEnabled": true,
        "lang": null,
        "origin": "Application",
        "value": "Frontline"
    },
    {
        "allowedMemberTypes": [
            "User"
        ],
        "description": "Administrator",
        "displayName": "Administrator",
        "id": "62f71d53-5152-48fb-9e0e-be121f4fd736",
        "isEnabled": true,
        "lang": null,
        "origin": "Application",
        "value": "Administrator"
    },
    {
        "allowedMemberTypes": [
            "User"
        ],
        "description": "Superuser",
        "displayName": "Superuser",
        "id": "1c55497a-32ec-4f17-a33e-a7157deb8d72",
        "isEnabled": true,
        "lang": null,
        "origin": "Application",
        "value": "Superuser"
    }
]
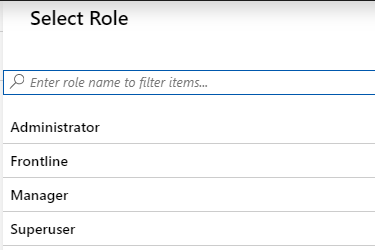
Save the manifest and wait for a few minutes. Now we are ready to assign users and groups our new custom roles.
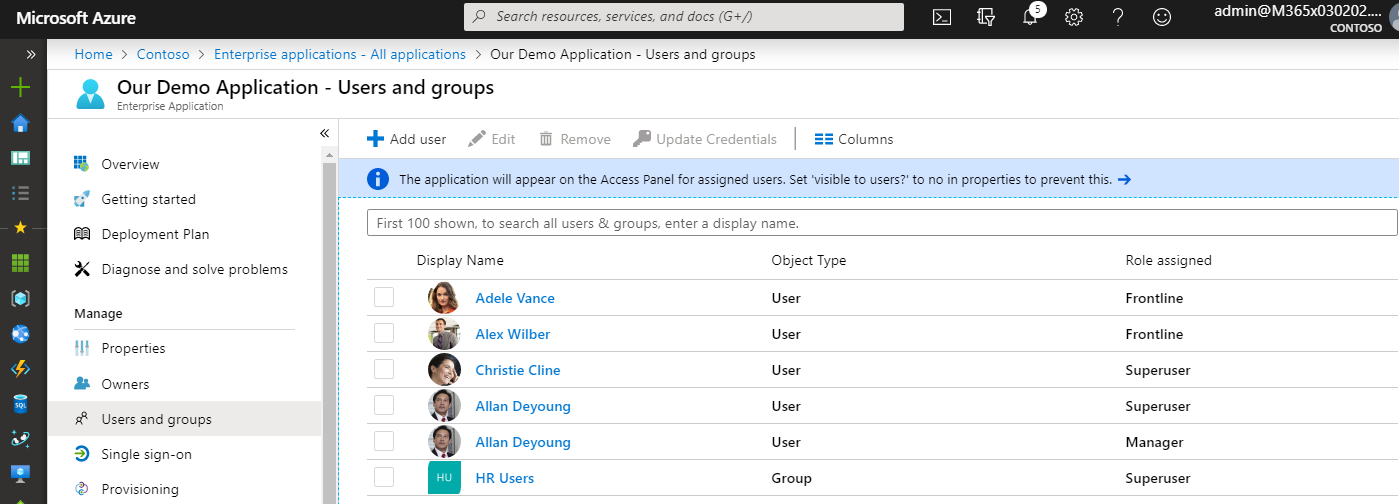
You will now find that you can select between our custom roles.
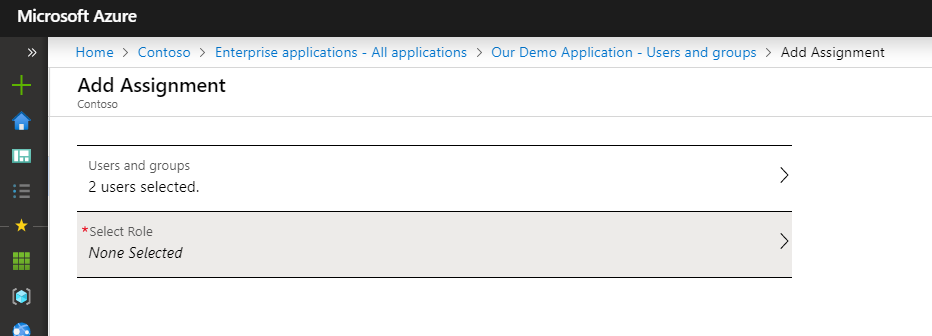
You’ll even find that a user can have multiple roles assigned, either directly as a user or assigned through being member of a group.
In a later blog post we will see how we can issue these data to our application, but as a appertizer you can copy the Object ID of the application, go to graph explorer, and query for appRoleAssignments:
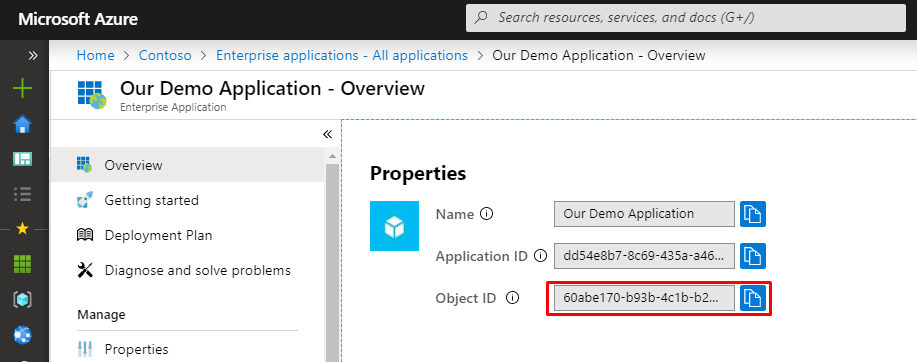
Use the url https://graph.microsoft.com/beta/servicePrincipals/60abe170-b93b-4c1b-b252-79d6667e468a/appRoleAssignments, and get results:
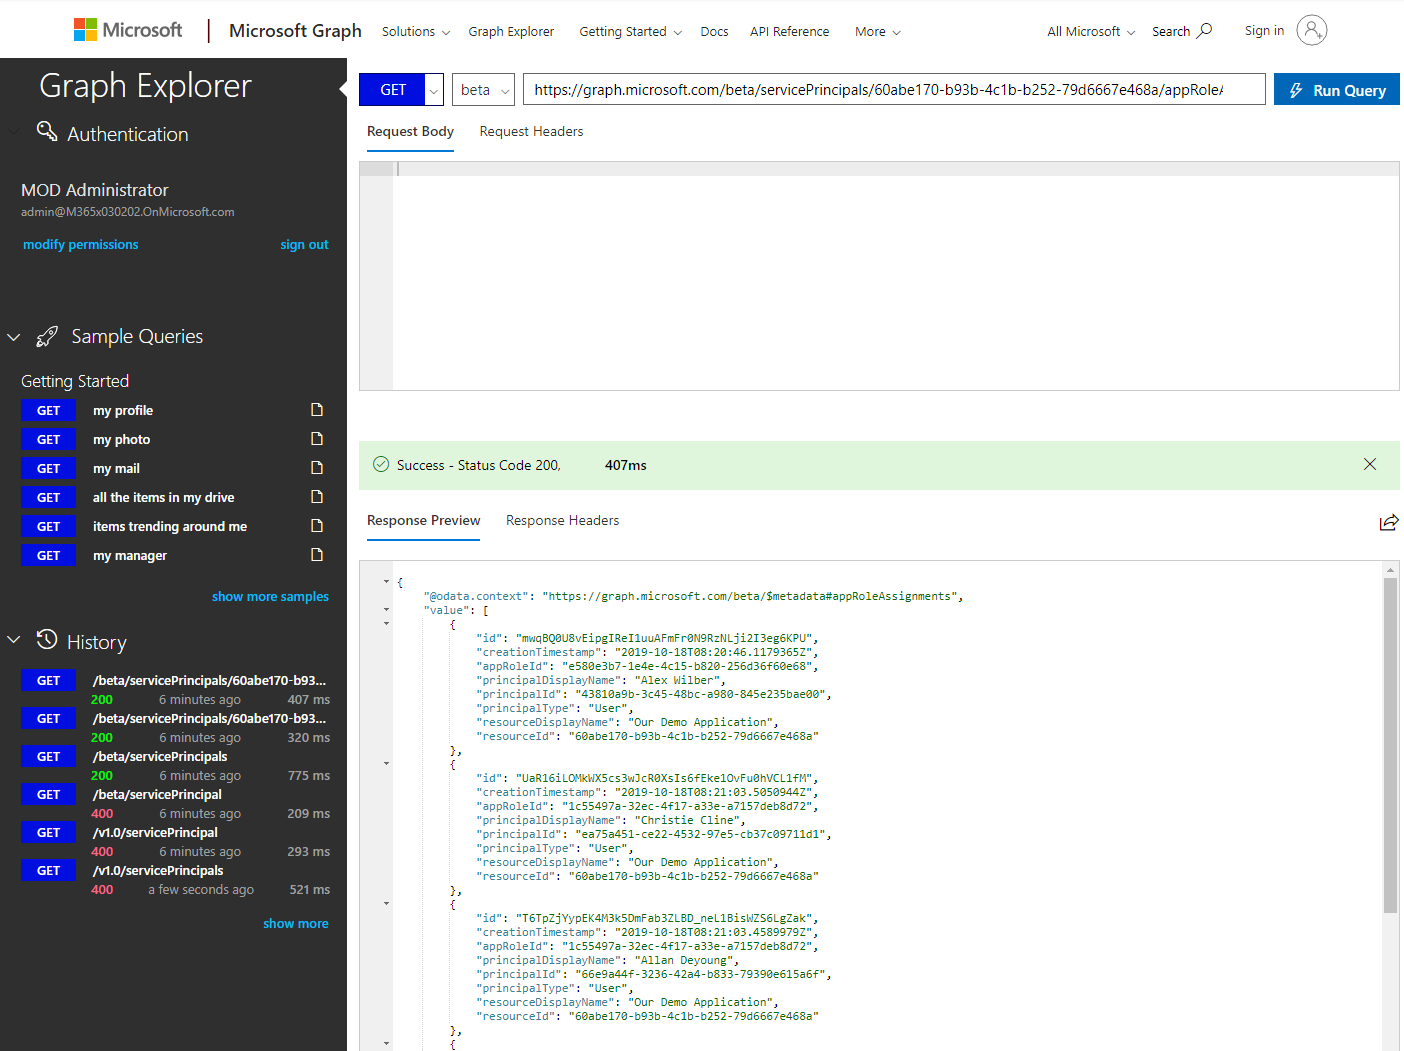
Here you’ll find that
- principalId is the objectid of the user or group assigned the app role
- resourceId is the objectid of the application itself
- appRoleId is the id of the role in the manifest

4 thoughts on “Full IGA using Azure AD – Custom app roles”