In the last post we transferred to user information and roles to the application through Azure AD outbound provisioning with SCIM. This requires the application to either have or to implement a SCIM API, which might some times be unnecessary. Also, many applications does not have an internal user database, but relies on session information when doing access control.
In this blog post I will show you how applications can get user roles through the user’s ID token, demoed with OAuth 2.0 authorization code flow.
We have already created out application, including application roles, in an earlier post, but to recap:
We have our application “Our Demo Application” created as an enterprise application in Azure AD, we have added a few custom roles as per the manifest below:

The important part here is that the roles all have “value” set. This is the value that will be transferred in the ID Token.
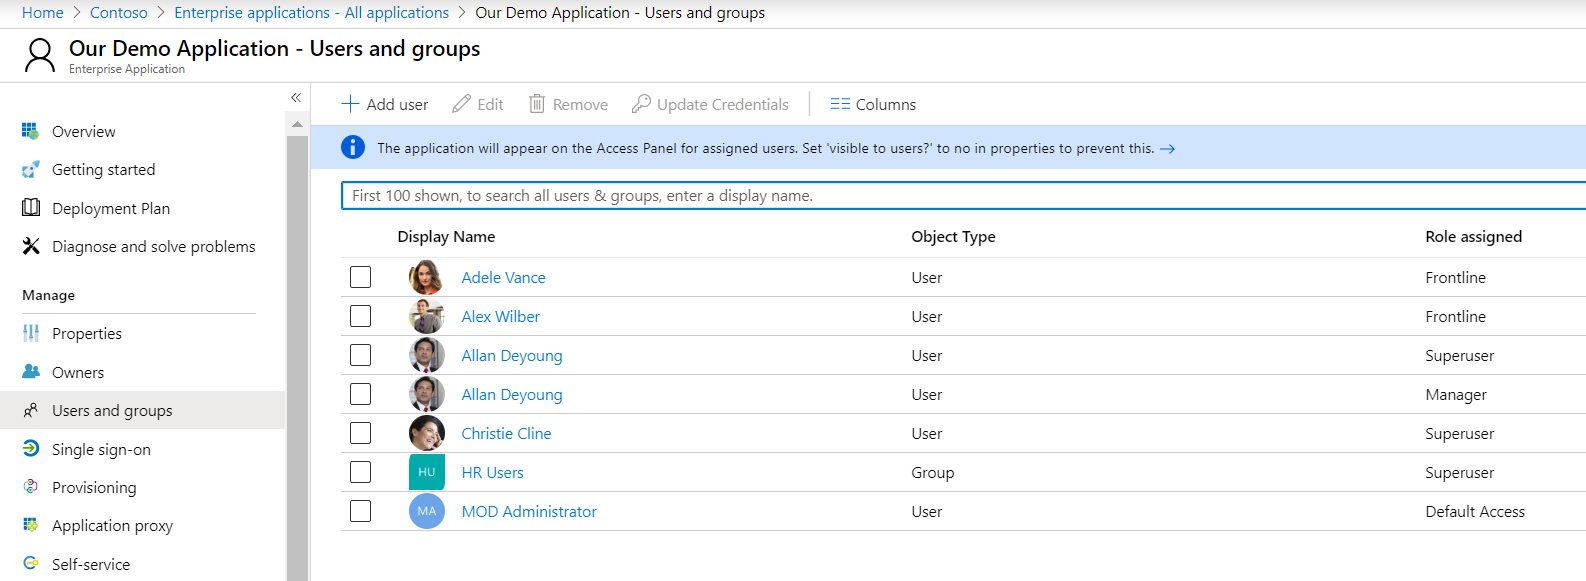
And we have users assigned both 1 or multiple roles (in later posts we will cover how to manage these application role assignments)
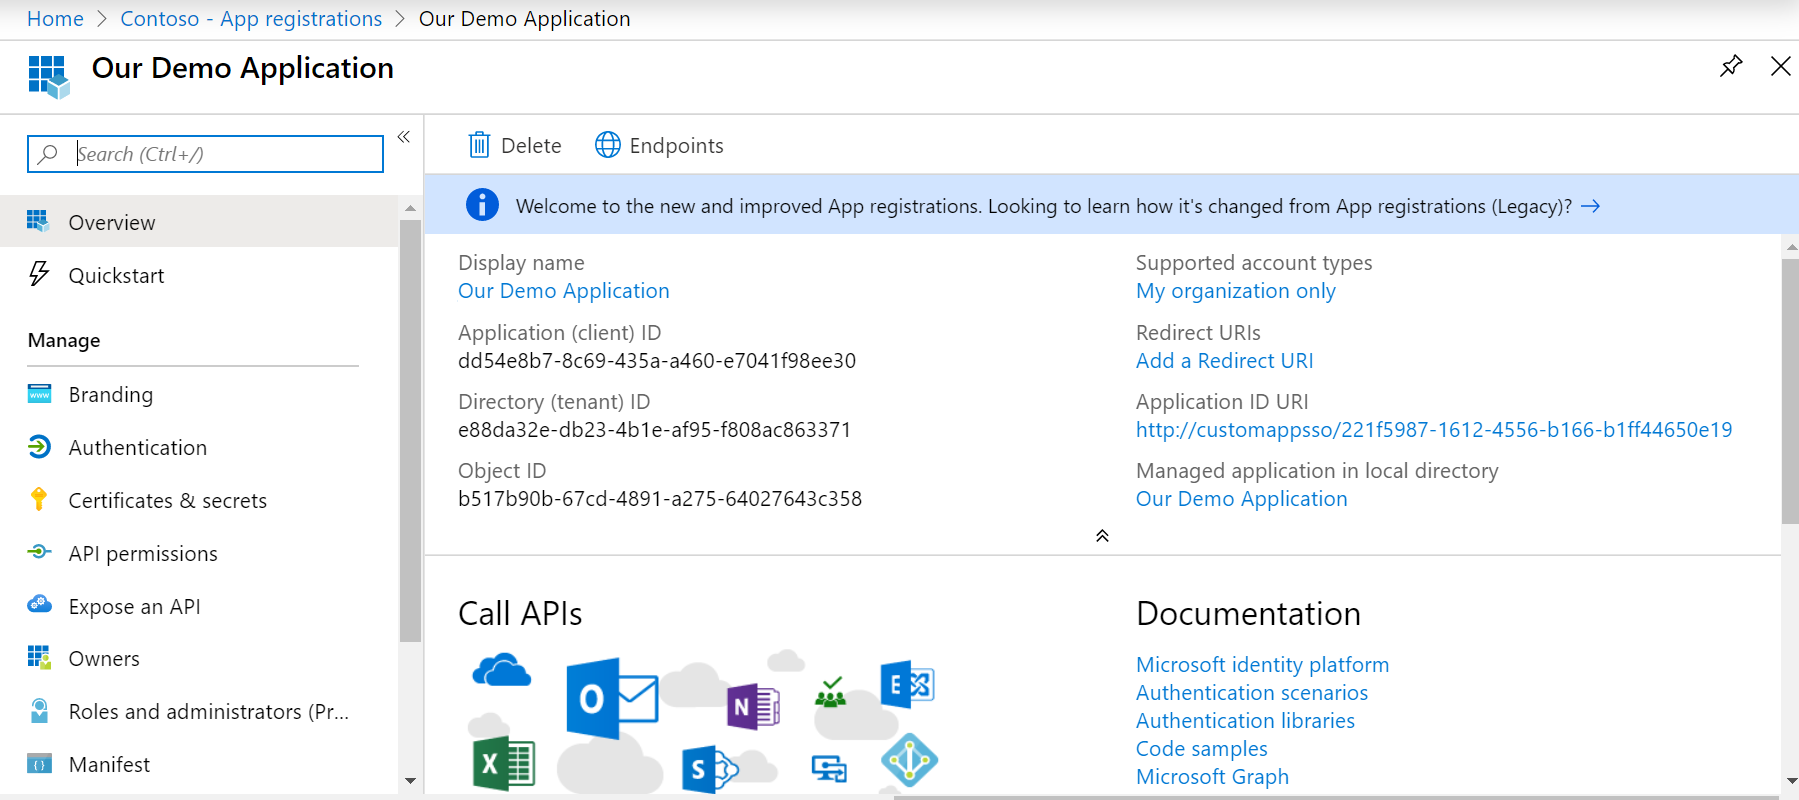
To enable the application for authorization code flow, we will need to go to “App registrations” to generate a client secret, and to grant the application some delegated permissions.
We will demo using PowerShell, and we need the client id, secret, tenant id and redirect url for this purpose. The following four variables will be defined below, and this is how it should look (with your own values of course).
$clientid = "dd54e8b7-8c69-435a-a460-e7041f98ee30"
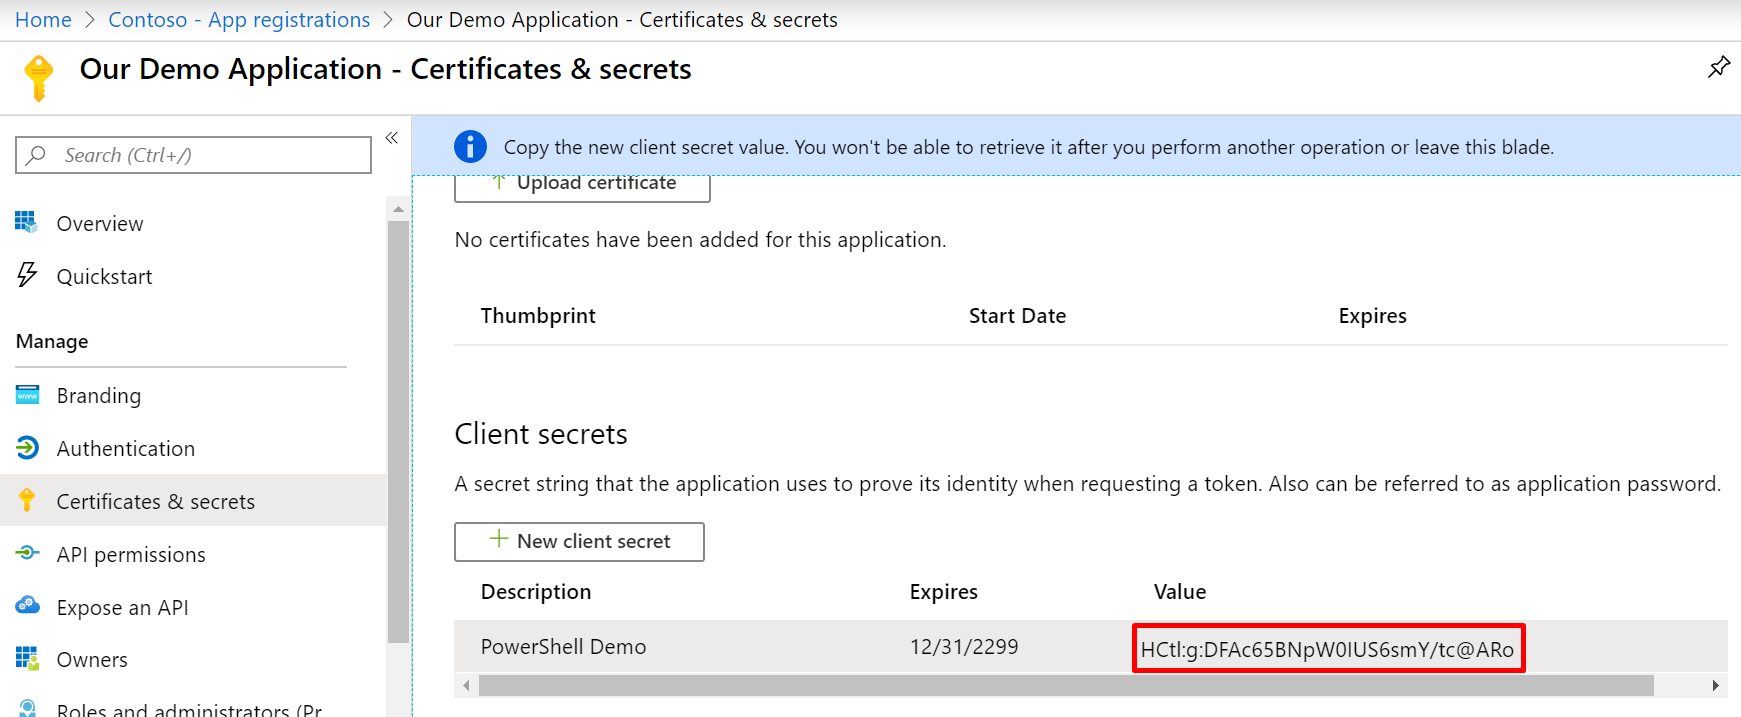
$secret = "HCtl:g:DFAc65BNpW0IUS6smY/tc@ARo"
$tenant = "e88da32e-db23-4b1e-af95-f808ac863371"
$redirectUrl = "https://localhost:4000/"
Start by copying the “Application (client) id” to the $clientid variable, and the “Directory (tenant) ID” to our $tenant variable.
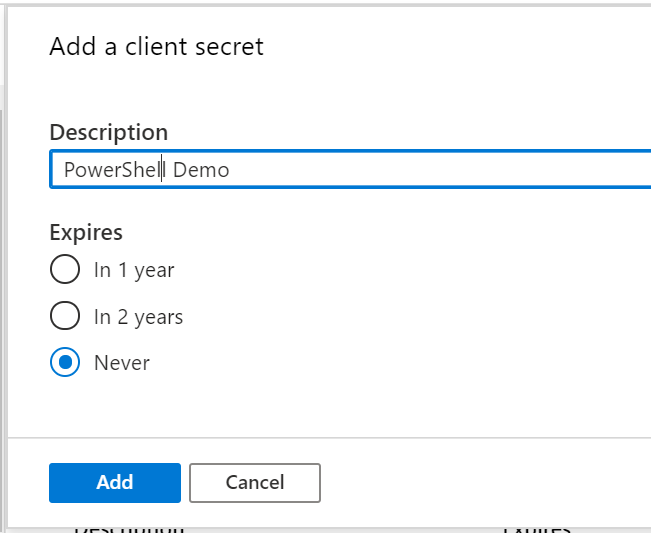
Second, we must generate a client secret. Go to “Certificates & secrets”, click “New client secret”, give it a name and copy the generated value into the $secret variable.

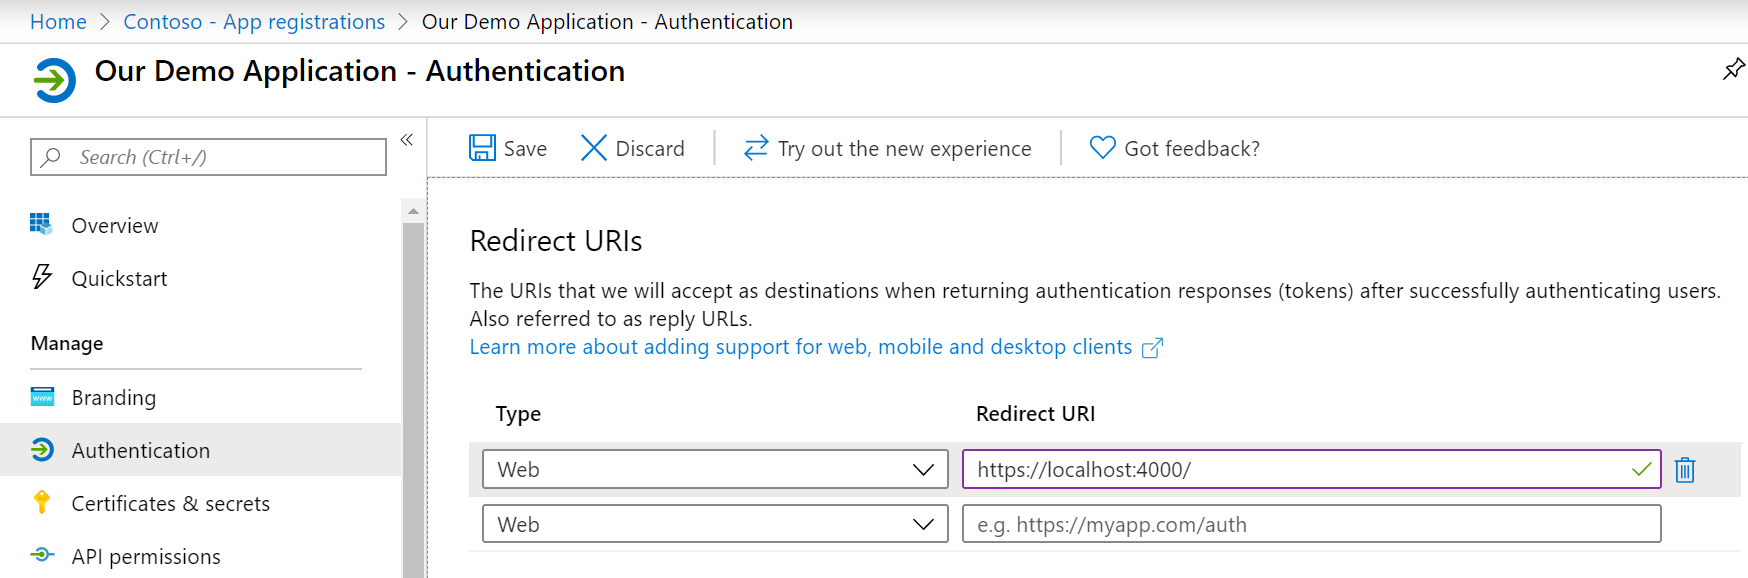
On the “Authentication” tab, add a redirect uri such as “https://localhost:4000”. Localhost is a good idea for our demo, and is common for testing purposes. Click save.
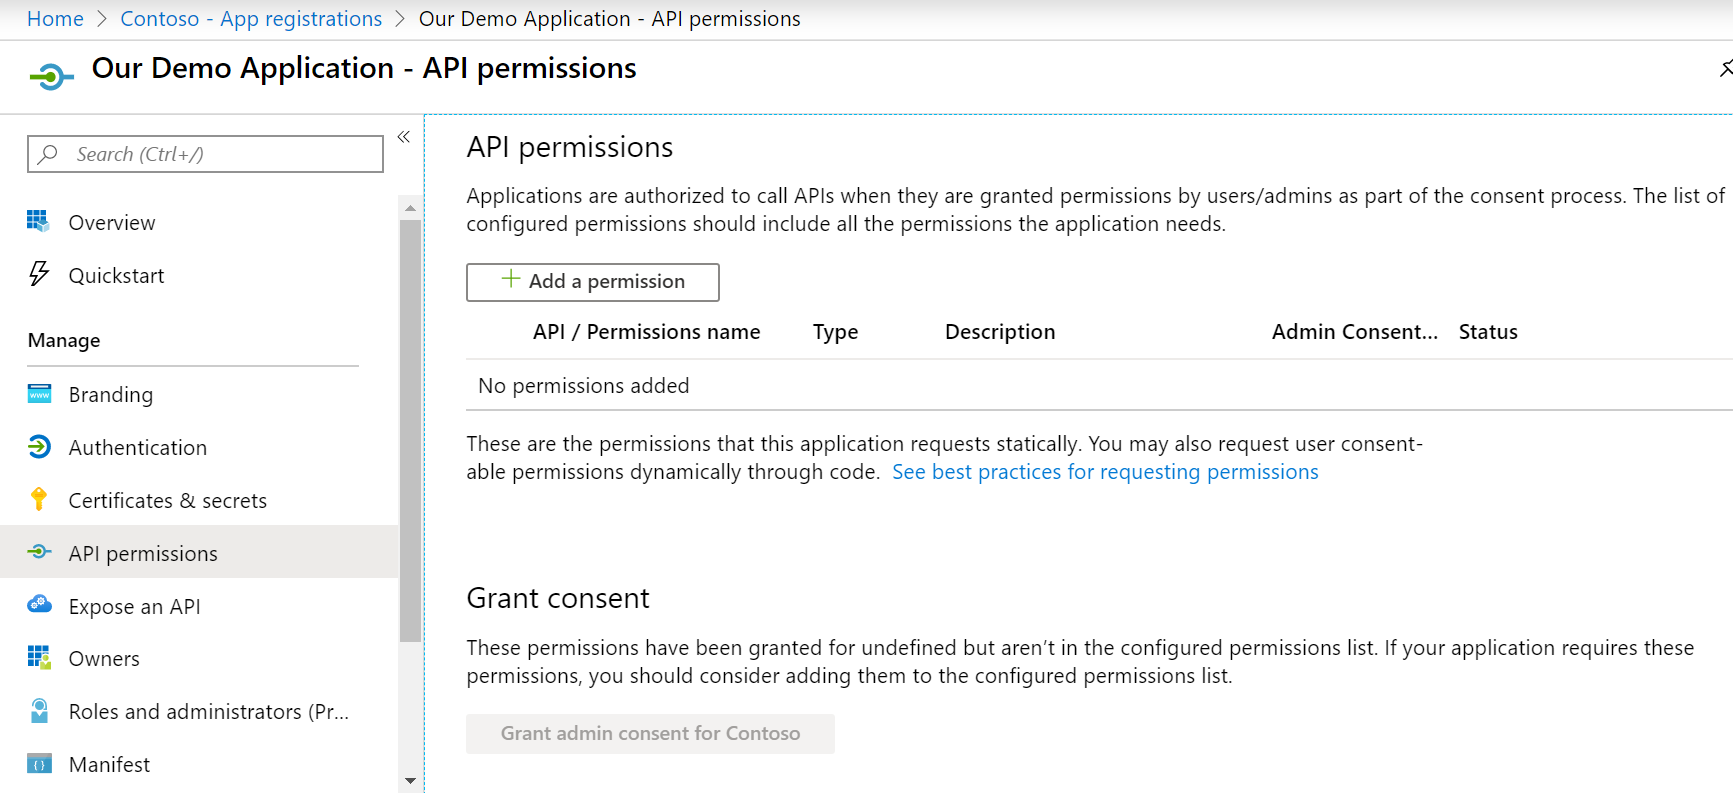
The last thing that must be done is grant permissions to the application. Even signing in is a permission that needs to be granted.
Go to “API permissions” and click the “Add a permission” button.
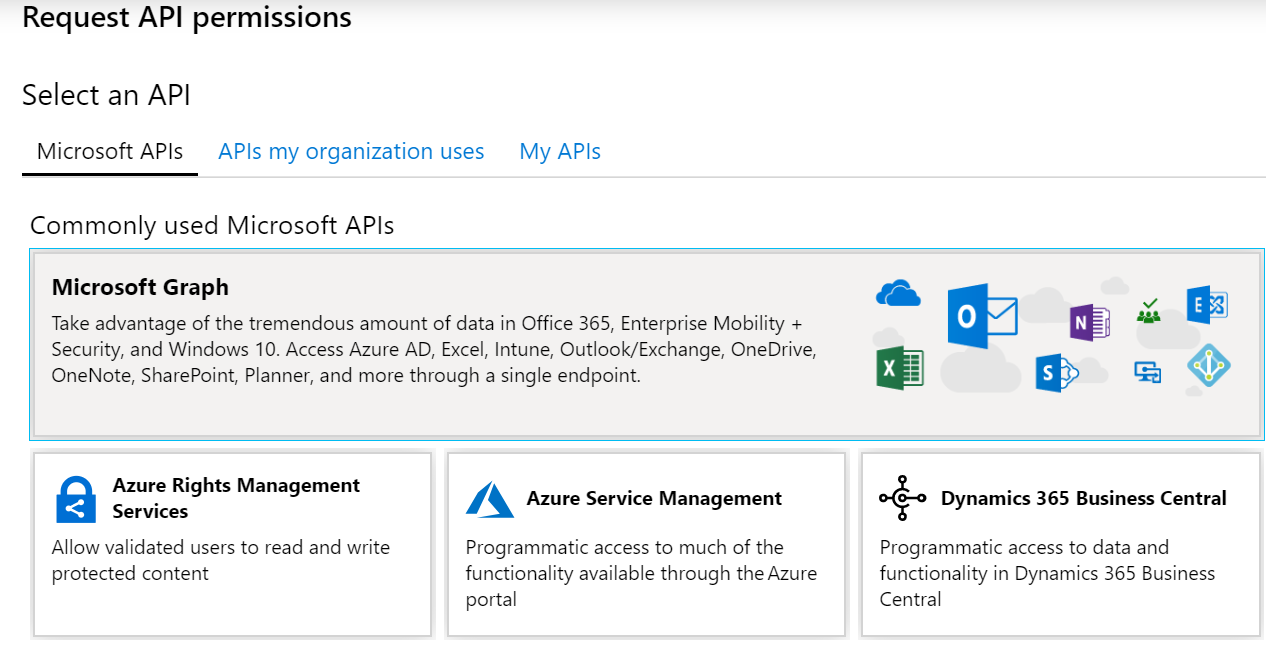
Select the Microsoft Graph as API.
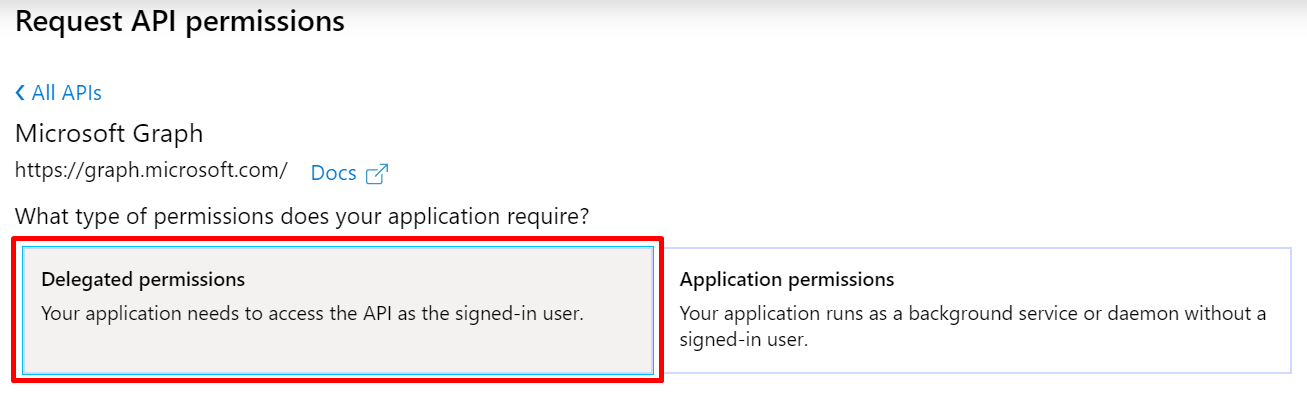
Select “Delegated permissions”, meaning that the permission is as a “proxy” permission through the signed in user, rather than directly to the application itself.
For permissions, we can select a lot of different things, even sending email as the user and stuff, but for the purpose of this demo add “email”, “openid” and “profile”.

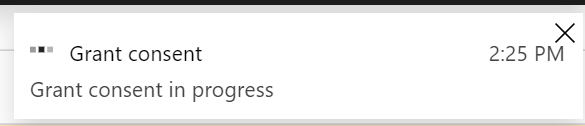
Click save, and you should see the permissions added. Now, click the “Grant admin consent” button to actually grant the permissions in your tenant.


Now everything is actually ready for you to test signing in. You should be able to run the following PowerShell, just listening to what it says. Remember to use your own defined variables (though i guess these values will work for a few months until my demo tenant expires).
$clientid = "dd54e8b7-8c69-435a-a460-e7041f98ee30"
$secret = "HCtl:g:DFAc65BNpW0IUS6smY/tc@ARo"
$tenant = "e88da32e-db23-4b1e-af95-f808ac863371"
$redirectUrl = "https://localhost:4000/"

# Simply run the following
Read-host "Click enter to put the authorize url on your clipboard" -Verbose
$authorizeUrl = "https://login.microsoftonline.com/$tenant/oauth2/authorize?client_id=$clientid&response_type=code&redirect_uri=$redirectUrl&response_mode=query"
$authorizeUrl | Set-Clipboard
Write-Verbose "Url copied, please open a browser and paste the url and sign in" -Verbose

$url = Read-Host "Paste the url you were redirected to (localhost url)"
$code = ($url -split "\?|&" | ?{$_ -like "code*"}) -replace "code=",""

Write-Verbose "Exchanging code for access token" -Verbose
$tokenUrl = "https://login.microsoftonline.com/$tenant/oauth2/token"
$tokenRequestBody = "grant_type=authorization_code&client_id=$clientid&code=$code&redirect_uri=$redirectUrl&client_secret=$secret"
$token = Invoke-RestMethod -Method Post -Body $tokenRequestBody -Uri $tokenUrl

read-host "Enter for putting id token on clipboard"
Write-Verbose "ID token on clipboard, go to jwt.ms to decode" -Verbose
$token.id_token | Set-Clipboard
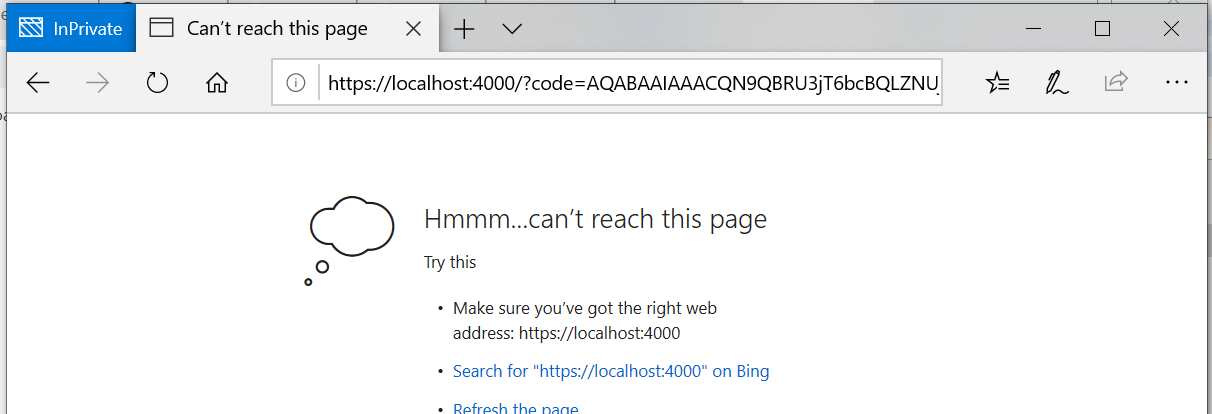
The first thing you will be asked to do is to open a browser and paste the url. The url is for the Azure AD authorize endpoint, which will trigger a signin. This can also trigger different conditional access rules, such as MFA, register for password reset etc.

After signing in, you will arrive at localhost (depending on your redirect url), with a “code” in the url. Copy the whole url and paste it in the PowerShell script. The script will extract the value of “code” from the url, and send it to the Azure AD token in order to exchange it for an access token and an ID Token.
Now, the script will put the encoded version of the ID Token on your clipboard. Go to https://jwt.ms and paste the encoded data here, in order to decode it into a human readable format.
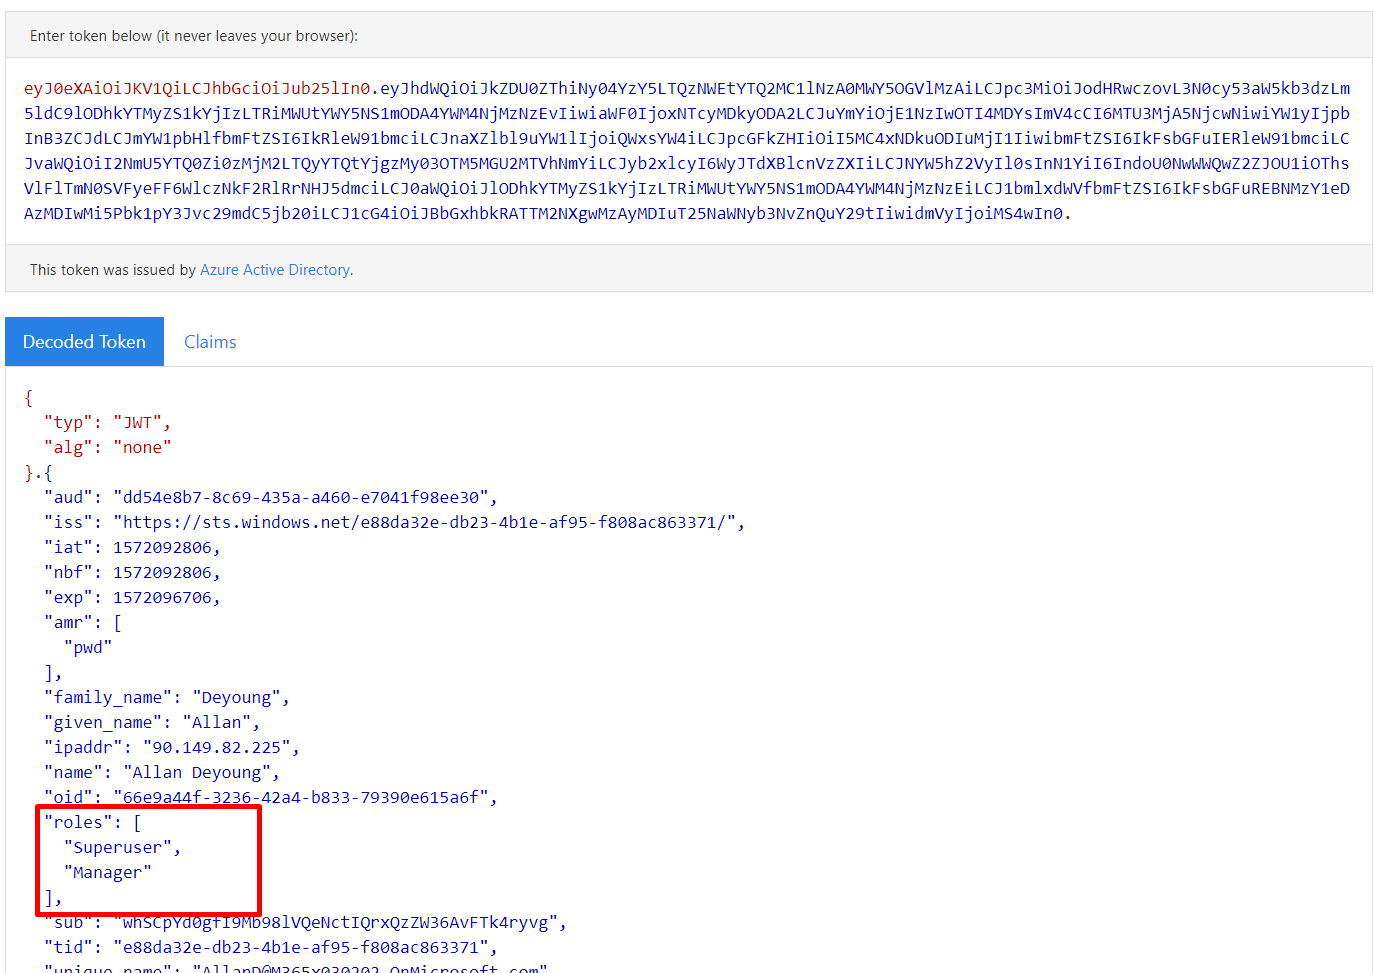
Voila, the roles of the user are available for our use!
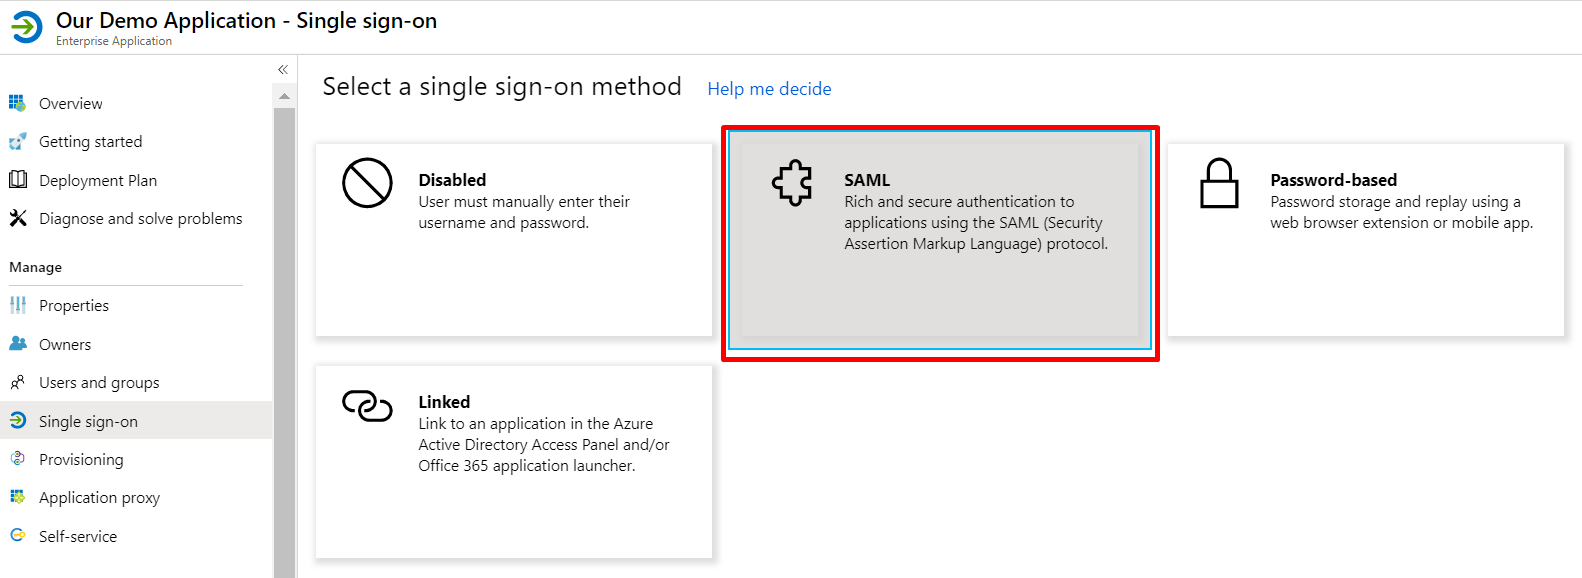
We can actually use the same application to quickly demo the same roles being transferred using SAML!
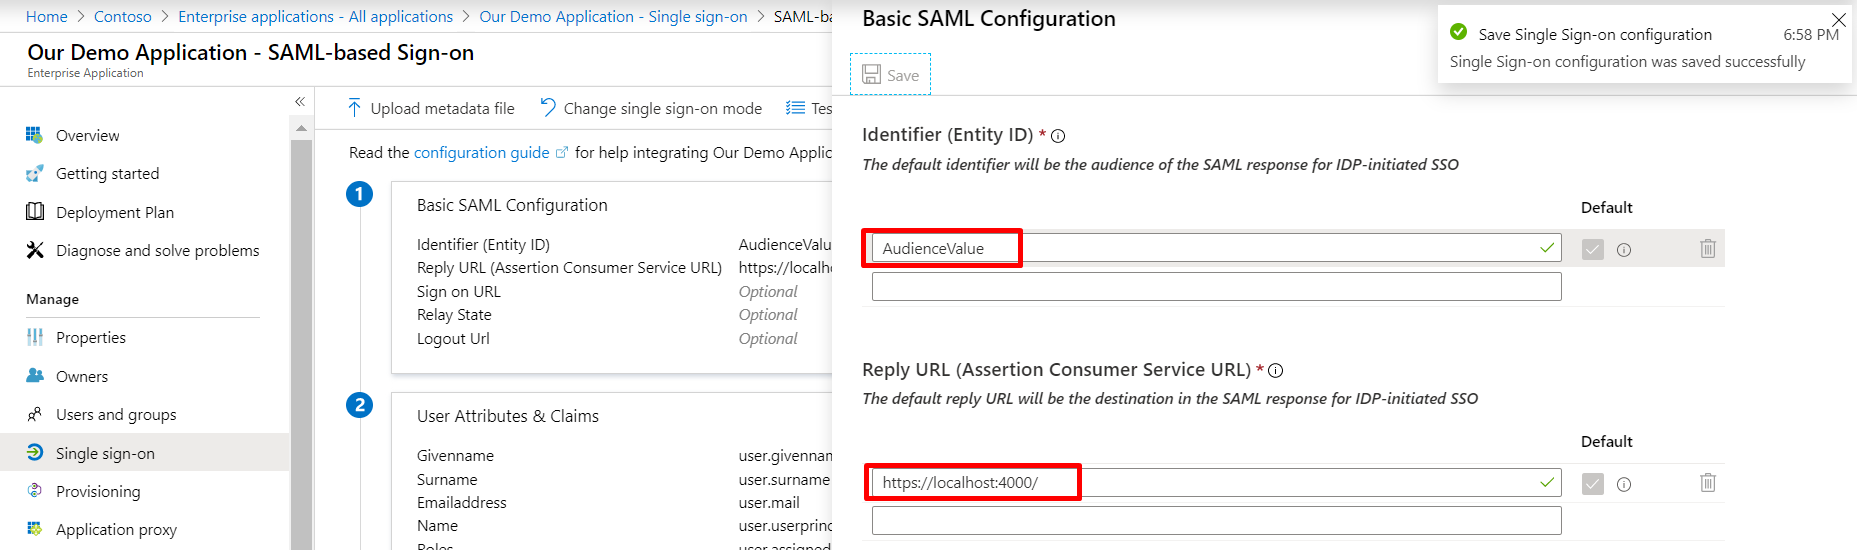
Find your application under Enterprise Applications and click “Single Sign-on” in the left menu. Select SAML:
Assign a random Entity ID. This is what identifies us as the IDP for the application, so not something we need to worry about right now – but it is a required attribute.
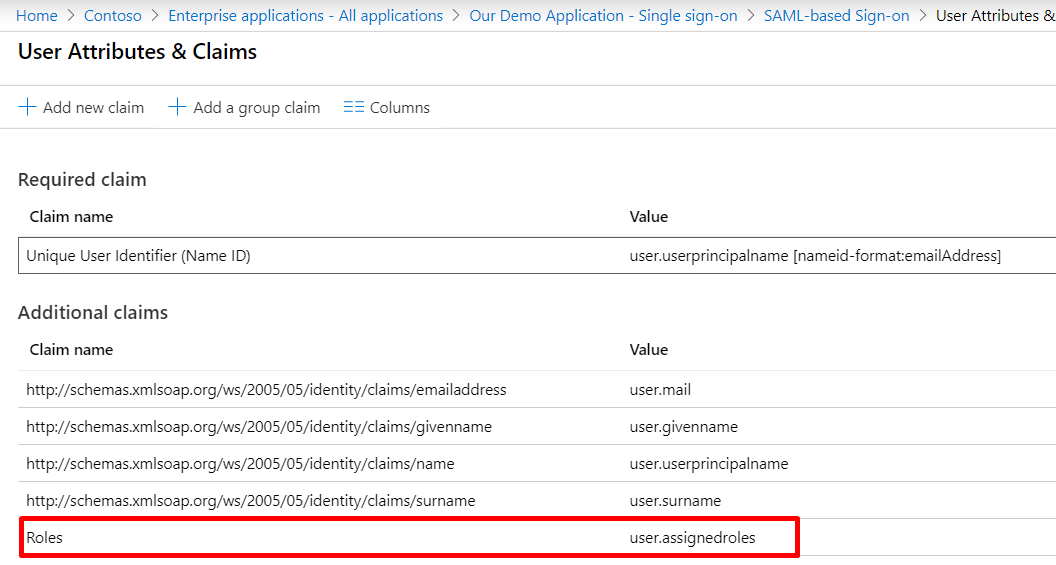
Under “User attributes & claims”, add the claim “Roles” with the value user.assignedroles, like the following:
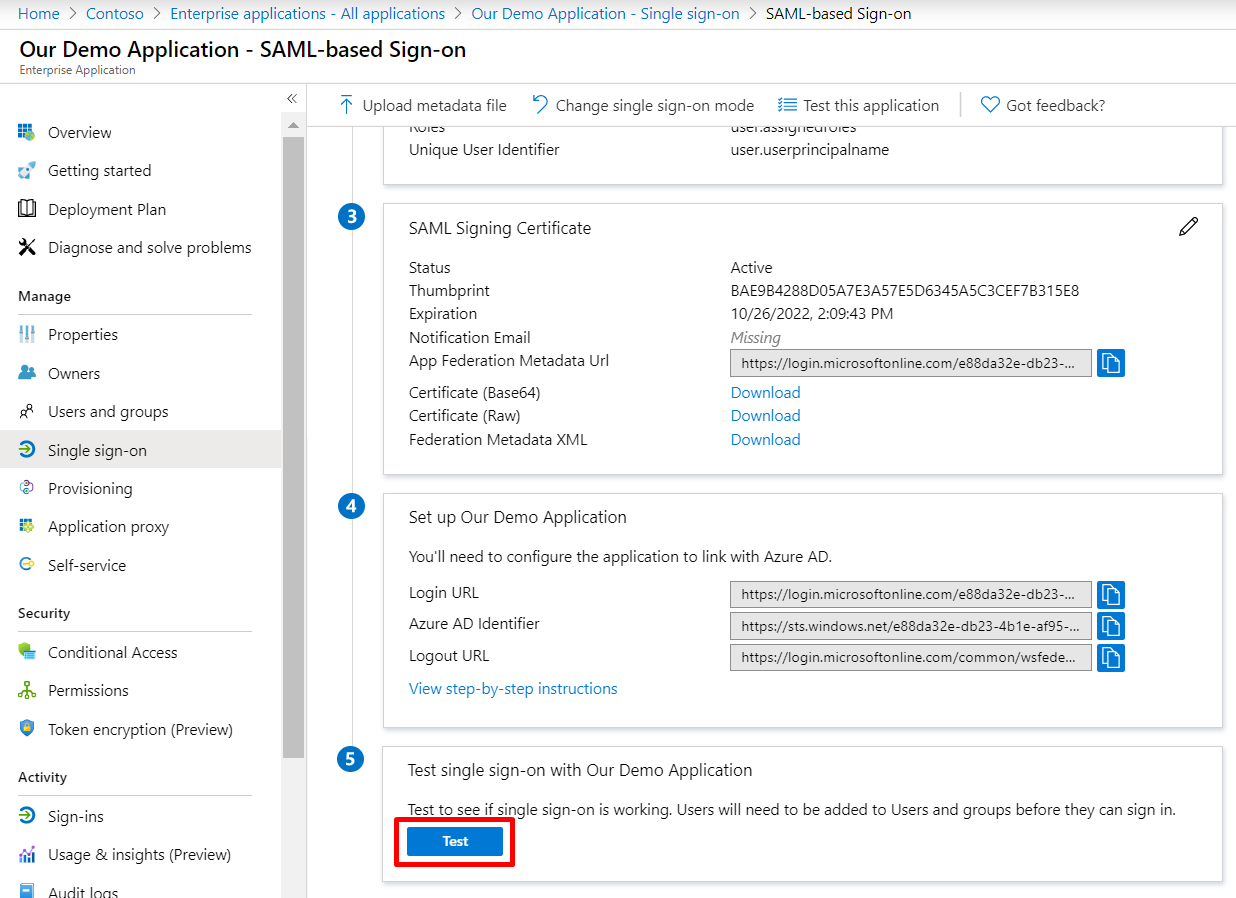
Azure AD actually has a perfect built-in test feature for SAML that we can utilize for verifying functionality.
Scroll all the way to the bottom and click “Test”:
Choose to “Sign in as someone else”, unless you are already signed in as an account that has application roles assigned.
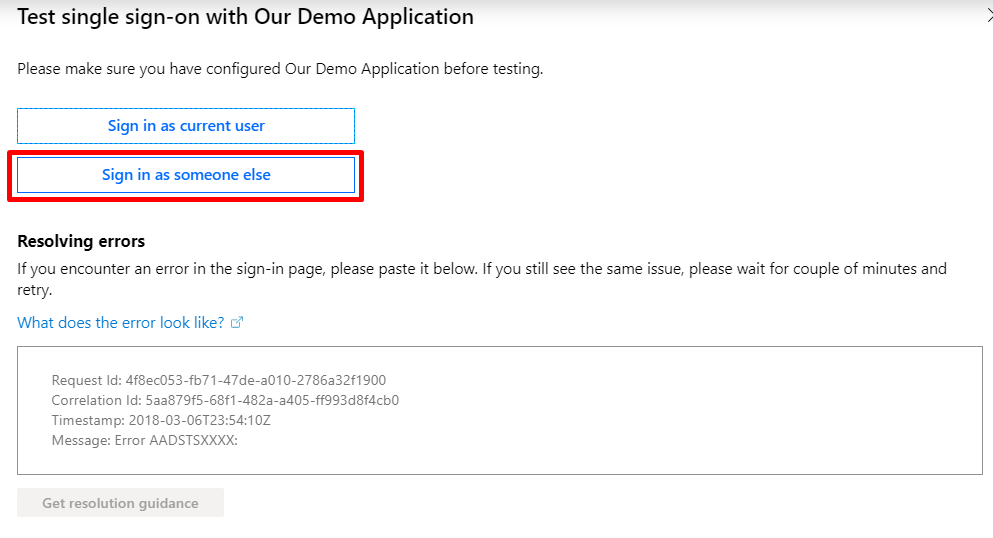
Sign in as one of the users assigned to the applications, with roles, and you should come back to the same screen with some additional features available to you:
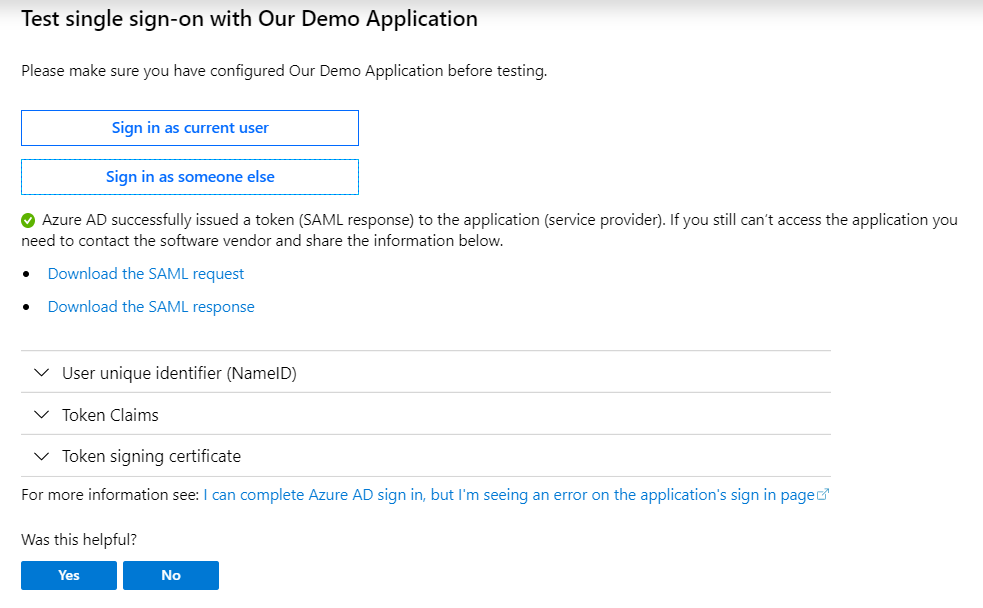
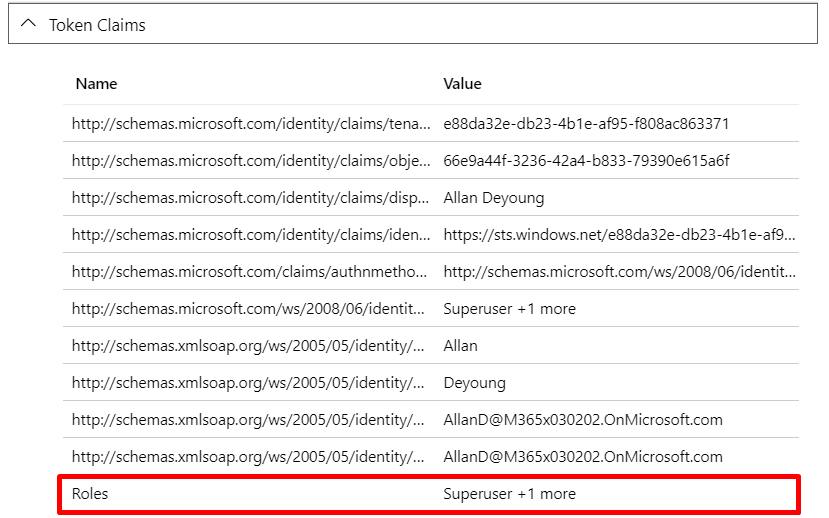
You can check the “Token Claims” section and find the roles, or download the SAML response and find the roles there as well:

So there you are, a way to provide the application roles assigned to a user to an application both through OpenID Connect / OAuth and SAML.
In the next post I will show how you can build a simple PowerShell that let’s you extract all the application roles for a certain app, allowing you to populate csv files, databases, APIs, etc with user and role information.

3 thoughts on “Full IGA using Azure AD – App roles in OAuth ID token or SAML claim”